I was watching Tabletop Sydney one day (RIP) and Craig was playing Xandire’s Truthseekers. After watching that video I was very excited to try them out. I bought Harrowdeep and put Xandire’s on the table. Then I promptly forgot 50% of their reactions. However, I never stopped playing them and got more and more comfortable with their cards and reactions.
When Gnarlwood was released I thought about pairing them with Daring Delvers (flame wisps anyone?) and also Fearsome Fortress because of their two cards which put fighters on guard scoring the easy surge. However, I failed to see what I believe is the best pairing for Nemesis, Tooth and Claw.
I have been saving this write up for three reasons: 1. I needed to get some more reps in. But recently I was able to play 14 games over the weekend (10 of those with Xandire). 2. I wanted to have someone else contribute before I wrote this article (thank you Voidtagger, check his article here). 3. I wanted to do a pre and post tournament write up. We have our end of the season Gnarlwood tournament coming up on May 7th and I wanted to put together my thoughts in detail before and after.
Why Xandire’s?
One big problem with most Stormcast bands is they require successful hits or crits to inspire. Xandire requires none of that. In addition, when they are killed you have a guaranteed (non-blockable now) reaction. Guarantees in this game are almost impossible to come by and can factor in quite strongly to card and warband play. Their inspiration is also guaranteed unless your opponent does not kill one of your fighters. And if that is happening, a different guarantee is accomplished… you winning. Finally, I like their cards. They have a few accuracy buffs, a couple of nice surges, some heals and a few great upgrades.
Why Tooth and Claw?
This is the aggro deck for the aggro meta. It is inherently strong initially. Some of the highlights are easily scored surges, excellent upgrades, and a toolkit of gambits. You can move faster, hit harder and score for doing so. The plot card is also very simple.
Why Truth and Claw (Nemesis deck of Xandire’s Truthseekers and Tooth and Claw)?
Combine Xandire’s good cardpool with Tooth and Claw’s good cardpool and you have a nice combination. Add the reactions and guarantees from Xandire and you have a great warband to use that cardpool. Finally, add Xandire’s extreme flexibility (range, damage, defense) and you are looking at a combination of cards and models that can take on all comers and have a chance to win against any warband.
As an aside, I have used Ironsouls Condemnors, Storm of Celestus, Steelheart’s Champions and Xandire’s Truth Seekers for Stormcast warbands. So I have played most, but not all Stormcast. I have to say that these guys are the most flexible and probably have the best cardpool out of any of those warbands. Though Storm of Celestus is a close second and it hurts my fragile heart to put anyone above them.
I have also tried the other decks. And while there are some successful combinations in the other Nemesis decks, I do believe Tooth and Claw is best.
Deck Build

Card Reviews
Surges
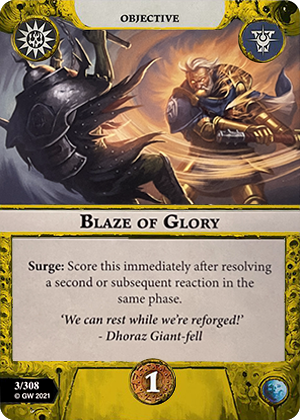
Blaze of Glory
So, I have to react twice? Fine, if a Stormcast goes down and I move the bird, I score this. However, I have other reactions in case one of the two of those things doesn’t happen in a phase. Those reactions are Indomitable Will, Gifted Ferocity, Unfaltering Stride, and Walk it Off. Or I can just move Stormrider twice and move the bird twice. This will score.
Brave the Darkness
Same scoring condition as move or die or embraced savagery really. This is going to score. Just charge and don’t forget to charge the bird.
Equal to Anything
At first glance this looks like a challenging one. But you do enough damage and unless its one of the big boys, you can take them down with a hit from Doraz and Dark Command. I think this is much easier to score than it seems. Most of the time it just means taking down a four wound fighter. Now if you really can’t score it, no worries, you can always discard it. It’s only worth 1 glory.
Embraced Savagery
See my comments on Brave the Darkness.
Paragon of Ferocity
This should happen as you will be the beat down. There will be someone in their territory that you could kill. You just have to roll correctly.
Toyed With
You have a lot of control scoring this with a 3 damage fighter, a 2 damage fighter and a 1 damage fighter. This should be easy. Plus you can then Dark Command to finish them off.

End Phase Cards
Banish the Dark
Basically it requires you kill a fighter or knock them back. I have never not scored this. Sometimes your enemy just moves away from you too. It’s actually difficult to NOT score this card.
Sigmar’s Chosen
Round 1 and 2 this should be a very easy score. If you are playing a small elite warband it can be challenging if you draw it in later rounds.
Stalwart Few
At some point in time you will score this in the game. You just have to have the card in hand.
Ferocious Rampage
This can be a tough one to score but you have range for knockbacks and Doraz’s reaction push plus call to heel to try to accomplish it by pulling the enemy off of objectives. In aggro meta, that may not be necessary even. But it’s two glory, so it should be a little hard. Late game this gets easier to score as you remove pieces from the table for your opponent to be on objectives.
Focal Point
Sometimes Xandire is dead and this just won’t score. However, if you follow some of my strategy tips in this article it will be less likely that she will die before scoring this.
Move or Die
See my comments on Brave the Darkness.
Gambits
I have tried to categorize each of the cards into the categories of movement, protection and damage buffs. The upgrades I have added the category of toolkit. Those are simply attack action upgrades if I find myself in a circumstance where I need the extra range or damage.

Movement
Reckless Haste
+2 move on Doraz coming in with 3 damage on activation 1 or 2 is frightening and few expect it. If he dies, your fighters inspire and you push someone 2.
Call to Heel
I use this far more for an enemy push than a friendly push. I find pulling people off of objectives or getting them out of range so they must waste an activation charging is pretty devastating. Sometimes I pull them just a might closer to Doraz so he can hug them. I mean really hug them. Those kind of “I am your aunt and I haven’t see you in three years” sort of hugs. Only your aunt has a hammer and she hits on hammers and does 3 damage.
Advance as One
It was pointed out to me that you cannot use this if one of your fighters is adjacent to an enemy fighter because the action cannot be completed because he would move no closer to the enemy. I will play it that way until I get clarification. This means it’s most useful at the start of the game. (Post publish edit: Voidtagger correctly pointed out you can actually advance some fighters even if all cannot complete the action!)
Attack Buffs
Blazing Arrow
Easy to crit with four dice meaning Stormrider goes to 2 damage for a turn on a shot that will most likely hit. It’s nice early and it’s nice late.
Called Strike
I would prefer an extra dice, but this is Nemesis, you can’t get what you want. So I will settle for a reroll. It could be worth sacrificing first turn so Doraz alpha strike has teeth with this. More on that in strategy.
Dark Command
It’s a staple and so good. Toyed with, dark command and a three damage attack are this decks bread and butter.

Predatory Fog
This is a trial card. I have not used it yet. It is replacing Flawless Strike which was nice and helped with my low scoring Nemesis objectives. But I want to punish other warbands who don’t bring the fight to me and hang back and shoot. It’s a bit of a meta call for me. Hexbane, Profiteers, and Celestus are all in our meta right now. Also it turns enemy fighters savage which could let me call to heel someone in the backline into attack range or off of an objective in the backline. It’s nice.
Protection
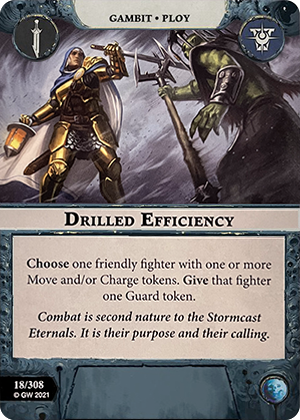
Drilled Efficiency
Guard is good when you are invading and in attack range of your entire opponents warband. It also helps with getting knocked back out of attack range. On guard with an inspire fighter on two block is delicious.
Sigmarite Wardens
See above.
Walk it Off
It’s a reaction so is helpful in that way to score Blaze of Glory. I have had it trigger twice in the games I played and both times it was absolutely devastating for my opponent because it was unexpected. A heal 2 at reaction speed is really good. I did have to hang onto it from Round 1- Round 3 though. So, It’s not hyper efficient but it’s good enough to take. Note: This triggers as a reaction to the attack and therefore will come into effect before dark command or ping damage in the power phase. This can really ruin someone’s math.
Upgrades

Toolkit
Flight of Darts
Range attacks for when we are charged out. This card is actually huge if Stormrider is down or if you only have Doraz or Xandire left and they aren’t in range (which can happen a lot). I have yet to have it explode on a crit and do something cool, but when it does it will feel really awesome.
Staggering Charge
Perfect for Stormrider if you need to get that two damage in, or need Stormrider to positionally get there. I have used this quite a bit because I use Stormrider as a late game piece. So often the upgrade is available as well as the glory. The extra accuracy is awesome.

Movement
Unfaltering Stride
Not just for Stormrider. If you are charged out, you can still move around the board by activating and going on guard. With a ranged attack like flight of darts or with Stormrider you can activate and scoot around the board while firing. I have done it before. The surfing Stormrider is cool as heck.
Mark of the Stampede
This helps augment the warbands generally slow movement and allows Stormrider to have an 9 hex attack range when savage.
Attack Buff
Brutal Transformation
The bird becomes a deadly threat with this and it’s free push. No charges needed. Just activate Stormrider and charge. Push Taros next to an enemy fighter that is already charged out. And next turn drop the upgrade and hit for 3-4 damage. It’s nuts with the bird. People are sometimes more scared of the bird than Doraz. Which is completely logical.
Feral Instincts
+1 damage to Xandire makes her do serious work. Doraz and the bird can also use it. I love it, it’s too good for this warband.
Gifted Ferocity
The warband is fairly accurate EXCEPT for Doraz (and maybe Taros, I mean he is a bird after all). And remember this is another reaction after taking a fighter out of action. So that helps with Blaze of Glory.

Keepsake
Accuracy, sweet accuracy. Best again on Doraz and if he is gone, Stormrider because there is no range restriction. Xandire will already be hitting on 3 hammers anyway.
Protection
Tempered Sigmarite
Takes advantage of those two shields or two dodges with a reroll.
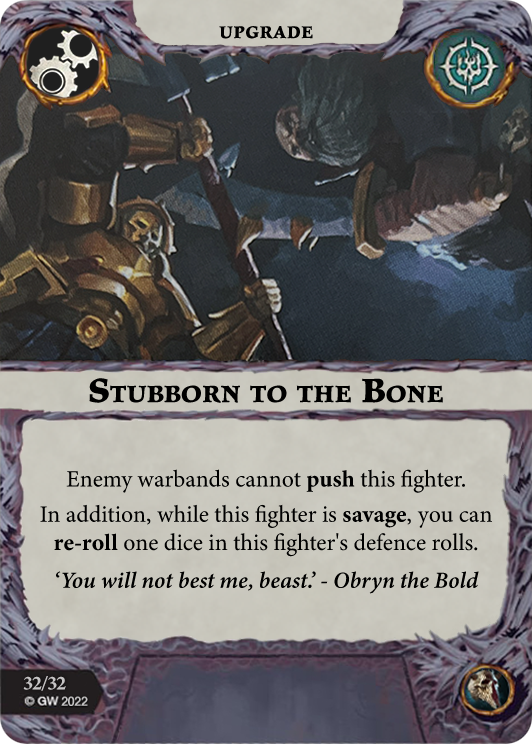
Stubborn to The Bone
See Tempered Sigmarite with the addition of no pushing.
Board Selection and General Strategy

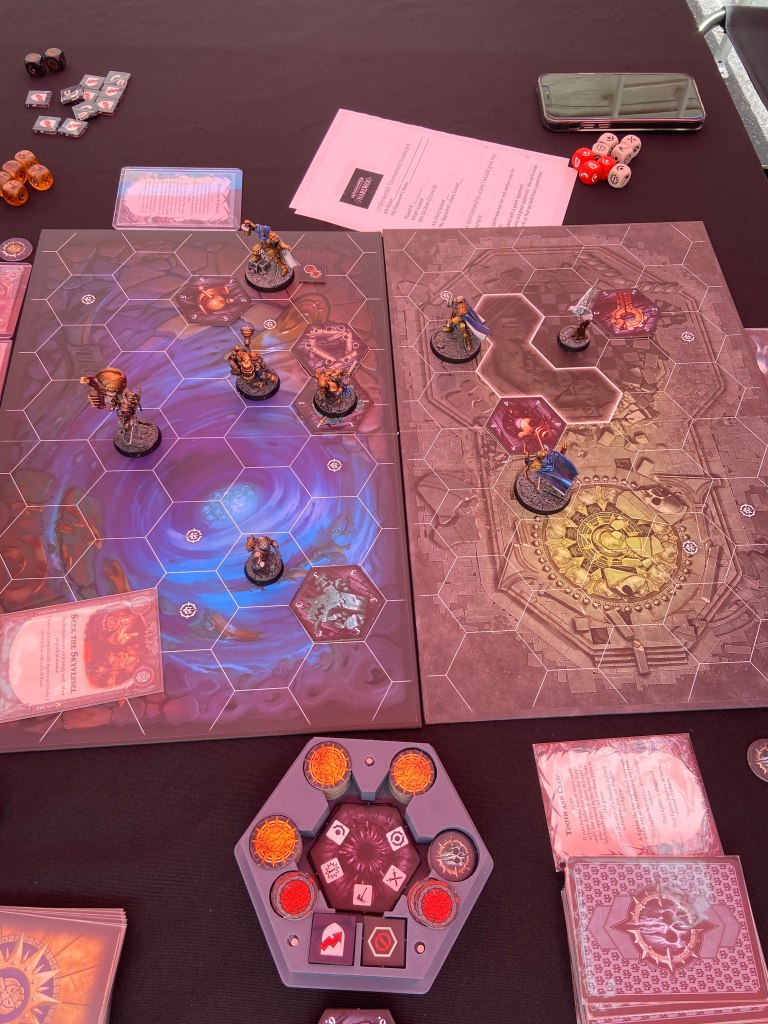
We are going with the Shyishian Stardial as our primary board and we are trapping our fighter right away. Sounds ludicrous? Allow me to explain.
First, I have never had anyone longboard me. But with Taros’ push and Stormrider’s range, I don’t see it being too terrible. We have enough movement gambits and a 2 push reaction to get things moving our way. I will let everyone know what happens if I eventually do get longboarded. If I do get longboarded, this board is meh. It’s fine but with no starting hexes on the edges it does lack a little bit.
Second, if you notice on the Shyishian Stardial there is the three blocked hex. I am going to deploy Doraz on the innermost front hex with his back to the blocked hexes, then Xandire right beside him. Then I am going to deploy Stormrider in the hex in the middle front of the board two away from the blocked hexes. The bird will be within 2 hexes behind Stormrider keeping it safe. I am counting on a hard right hook from Doraz and Xandire to take the middle of the board and Stormrider to be in range of most enemies turn 1.

From this position I charge Doraz recklessly in. I just want his 3 damage to land, take out a fighter, hopefully put him on guard or give him indominable will and eventually die. This will allow me to push another fighter two, perhaps Xandire to get her into the mix and score focal point, or an enemy fighter who I can cozy up to Xandire and take a few free swings at. It is also massively useful for removing people from Fearsome Fortress. Imagine someone charging in to finish off Doraz, he dies, and then you move their model out of the mid-board two hexes. There are not any 2 hex pushes playing fearsome fortress unless he gives them walking wall and they redeploy in hand. And the push is guaranteed, unless Doraz doesn’t die, but then you have Doraz in the middle of their lines!
However, to do this, Doraz can’t get knocked back on the first turn. I would rather have an extra success breaking a tie and deal damage to Doraz then have him pushed back and unable to deliver his 3 damage. Even if Doraz delivers his 3 damage one time, it’s worth it.
Now if my opponent gets to lay down the board and flips it on me, I am going to put Xandire and Doraz in those two front starting hexes, problem solved. Stormrider can go right in front of the blocked hexes or directly behind one of the front two if you are feeling frisky. And there are spots within two hexes at the back for Taros. This board is delightful for Xandire.
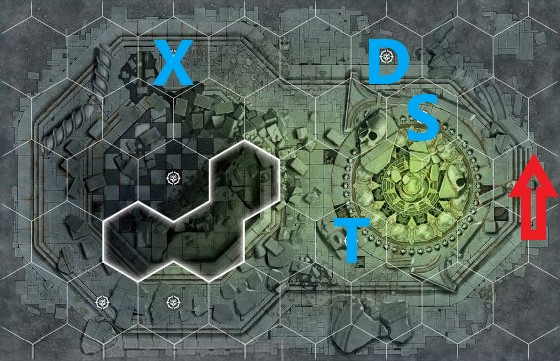
If someone limits the board sections and closes it down to 3 or 4 hexes and places the two front starting hexes by the 3 blocked hexes off to the side, then you may need to put Stormrider and Taros all the way at the back. But again, this is rare and there is no other board better than this one for every other set up.
The rest of the strategy is basically just attack. Let your cards dictate who and when and don’t commit the bird until late. Preferably until you have brutal transformation.
My Experience So Far
I have lost one game with them it was against Fearsome Fortress Profiteers. This game should have an asterisk by it for two reasons. 1. It was early on in my practicing. 2. I allowed my opponent to roll back a critical move to do a more optimal move, and that single move gave him the win by one glory.
This deck build and warband can lose, there is no doubt. Especially against a higher beat down warband. GSP will give them problems, Morgok’s will give them problems etc. Those games are still winnable but you have to be a bit more cagey.
The other weakness the deck has is a relatively low glory ceiling. You could in theory score all your cards and still lose. So be careful to deny glory for your opponent as well.
To The Tournament!

Last minute deck alterations:
Last minute I removed Predatory Fog and added Flawless Strike back in. I also took out ferocious rampage and added bearing sigmar’s light as an objective. This meant my glory threshold was the same but I had much easier opportunities to score. I contemplated Determined Brutality and even Light of Azyr, but decided that the extra glory could be better.
Match 1 vs. Thundriks
So, the last time I played Xandire vs Thundrik I lost. Ironhail kept pushing me all over the board and Lund’s Cleave attacks were painful. I set up using my standard set up so I would not get pushed back (see previous article). I missed three of my four attacks in round 1. The only one that hit was Xandire and she took out Ironhail on activation one (hurrah!). I scored some of my passive glory and onto round two where things got spicy.
I gave brutal transformation to Doraz who was adjacent to Thundrik. Doraz one shotted him. After that it went downhill for the profiteers who couldn’t put enough resources into a counterattack.
Final score was 18-9 in favor of Xandire
Match 2 vs. Lady Harrows Mournflight

I mulligan my first draw for both objectives and power cards. What I drew was actually worse. No accuracy cards in either draw, lots of movement buffs which I didn’t need because Harrows was coming to me. Worse for me, my only surge was Paragon of Ferocity. I had two shots at it with Doraz and Xandire and they both missed. I yo-yoed Xandire back out of harms way after her attempted attack with call to heel. After that, my opponent played very well and I never got the surge train going. Big loss for me, I believe the final score was 13-6. My opponent played wonderfully and my draw and attack dice were poor.
Final score 6-13 in favor of Lady Harrow’s.
Match 3 vs. Ephilim’s Pandamonium

To be honest I was not ready for this match and it was relatively obvious. Xandire got pinged down fast and he drew three of his spells and the resurrection gambit in his first power hand. Ouch. Doraz did take down Ephilim in round 2, but by then it was too little too late. This game ran out of time at the beginning of round 3 and I lost 7-11. It was actually 8-7 at the end of Round 2. So I said, we have to at least play one activation next round. We did, he won the roll off, Doraz died and that was that.
Final score 7-11 in favor of Ephilim’s.
What would I change?
I might take out some of my move tech and add another accuracy card. Internal surrender would fit the bill. I didn’t take it initially because when I inspire I go to two block, but it might actually still be worth it. Attacks not hitting were my major issue. My objectives were good except I really don’t like bearing sigmar’s light and Focal Point. I am going to see if I can change those. Walk it off was incredible. So was keepsake and gifted ferocity. I never saw Flawless Strike so that decision to take it made literally 0 difference. The other tough thing is I never saw Dark Command in any of my games and only saw Toyed With in my first game. Those are two of my strongest cards and I just didn’t see them much. I had thought about throwing in determined brutality. That actually could have come in handy since I ended up playing two high dice dodge war bands. But again, who knows if that happens again.
I did misplay something in that last game. I forgot Stormrider’s reaction shot upon getting taken out of action. In the big scheme of things it made no difference. In that last round we were up against the clock so that definitely played into my forgetfulness.
I think I can get better with Xandire, but when I reflect on my losses those have more to do with dice and card draw than poor play.
What I wouldn’t change:
This deck is great for Xandire, I would not steer away from Tooth and Claw. The board I chose was outstanding and did exactly what I wanted it too. Walk it off, indomitable will, brutal transformation were all surprisingly useful every single game. Keepsake was good too.
Summary
I didn’t win the tournament, but I don’t think it’s because Xandire’s doesn’t have the goods or my strategy was flawed. Sometimes you just miss three hammer attacks, and sometimes you don’t see the card you really would like to see. That’s just the way it goes! It was a fun tournament with a lot of great plays.
R77, an international friend, also played this deck in a tournament and his results are here. Spoiler alert, his attacks hit more than mine did! He is using a slightly modified deck from my original one after doing some planning. His deck is listed in his article. Enjoy! -Sleek
Truth and Claw 3.0
This will be my last write up for tournament experience with this build. I think I have pushed these guys as far as they can go and made adjustments to help them given the current Nemesis card options.
The most recent additions were to add back in Reckless Haste, removing one of my guard cards. Then I swapped out two objectives to bring Ferocious Rampage and Righteous Blows. Both were phenomenal in this tournament. The final deck list is here.

I also switched my board set up to using tortured coil. I did this so in case someone long boarded me, I can get in their lines quicker. The longboard hurts on Shyashin Stardial. But both boards have their purpose.
This tournament had 8 opponents who all knew how to play well.
Game #1 vs Da Kunnin Krew +Illusory Might

I tilted on this game. But I hope you will understand why. Things went very poorly for me in round 1. At the end of round 1 I had removed none of his models from the board. On the other side of the board, he had killed Doraz, Xandire was on 1 wound left and Stormrider had taken two wounds. I went into round 2 with Xandire and Stormrider adjacent to Mannok. Thankfully I won the roll to go first, Xandire hit and killed Mannok… except he had skin of their teef. Saving Mannok on one wound. This is when I tilted and almost threw in the towel. However, I recovered, played call to heel and pushed him into a lethal. That kill scored me three glory. I then proceded to crit out of every attack he threw at me that round, allowing me also to play Walk it Off on Xandire and get her up to 3 wounds again. Torka went down to Xandire next after I pushed her next to him. Then we started cleaning up the chaff. Win to Truth and Claw 17-6.
Game #2 Ephilim and Seismic Shock
Let’s be honest, I was going to need hot dice to win this one. I had to try. But alas, my dice went dead cold. I failed every defensive roll I took (some just needing single successes). At one point the dice were bordering on the ridiculous. I rolled ten total dice in two activations looking for swords. In all ten dice I rolled no crits and only one sword. By round 2 he had all the defensive buffs going and I just couldn’t make headway. My opponent played expertly and my dice went south. This can happen in any game, but this game against a high powered Ephilim deck and a good player, it made Xandire look really bad. Live by the dice, die by the dice. Big loss for Xandire’s 3-17.
Game #3 vs Starblood Stalkers and Fearsome Fortress

This was an interesting one. I was down most of the game and trying to play catch up. He scored the easy Fearsome Fortress surges like clockwork. He even scored 3 off of Conquered Domain with some well played moves. The skinks were running laps around me while I tried to kill them. Heading into the last round I was down about 6 glory. But I just kept killing skinks and I scored both Rightous Blows and Ferocious Rampage at the end of Round 3 after killing his last skink (though Otapatyl had been removed from the board by his gambit card). One of the pivotal points was a missed attack by Klak Troq who had been powered up with both Heaven Blessed Weapon and The Great Drake. Doraz hit his return attack and Dark Command finished Klakky off. Final score 15-14 in favor of Xandire.
Tournament Conclusion
With the two wins and highish glory count I ended up sealing second place. The winner was the Ephilim player. I felt good about the way my deck performed and relatively good about the way I played it. I did make some noob mistakes, deploying Doraz right in front of a lethal in my first round game. I also probably held onto some cards too long, but I did end up scoring them. I chose to go first against Ephilim and I should have gone second. But those were probably my only mistakes. The loss really had to do with the strength of Ephilim and poor dice, which happens. Interesting to note I played the same matchup against the same player a few weeks earlier. I lost by one or two glory and Ephilim critted out of Stormriders attack twice in a row avoiding death (they had 1 wound left). So, I would say Xandire’s can play and win that matchup, but at least some of the rolls have to go your way.
I hope you have enjoyed this series! I have really enjoyed diving deep into a warband like this!


Leave a comment