

This article will begin a series for beginning competitors on Counterplay – a concept about finding ways to shut down your opponents’ plan and keep them from meeting their goals. May players focus on how to achieve their own aims, score their own cards, and execute their own gameplan, and this is a great thing to do! It’s hard to win if you don’t score your cards. Whether you read the great summaries available on What the Hex, Path to Glory, or Battle Mallet or listen to any of their podcasts, they all will help you find ways to leverage whatever cards you took to score as much glory as possible. If you want to take your game to the next level, you should try to be mindful of your opponents’ possible plan and work to interrupt it when possible, and that’s what we will be looking at today.
This guide will be written with Nemesis in mind, though the principles apply in Championship if your opponent has taken many cards from the deck in questions. In Rivals, you can expect to use all of these tips as their deck will be no mystery to you and you can be confident you’ll see most of the available counterplay opportunities bear fruit across a best-of-three match.
Click here to see other articles in the Counterplay Series
Related Articles
Contender Series (For Optimizing Your Own Gameplan)
Participating in Your First Tournament
How to Run a Local Tournament
I will open the Counterplay series on Universal Rivals Decks, beginning with the Gnarlwood season, and we will see where we go from there.
Tooth and Claw

TnC has a Plot Card, which is great as an opponent because it allows you to know from the outset that this is the pairing you’ll be facing regardless of your format. The general aim of Tooth and Claw is “get into their territory and get busy fighting”, so a lot of what you can do to counterplay them is to either beat them at that game, or play effective keep-away, especially if you can do it in enemy territory rather than yours.
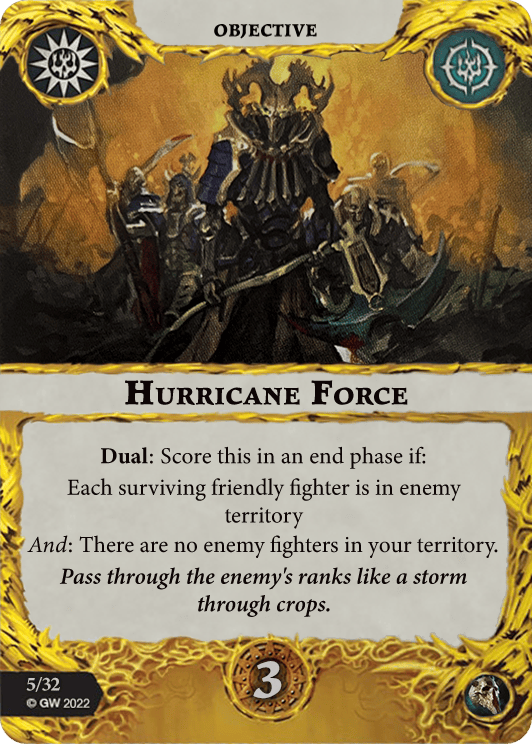
The Objective cards you can most effectively counterplay in this deck are Ferocious Rampage (hold an objective), Focal Point (kill their leader, keep them out of your territory, or stay more than 2 hexes away from them), Hurricane Force (keep them from getting every fighter in your territory or have at least on of yours in their territory), and to some extent Supreme Savagery (kill their leader or don’t let the leader take down two of your fighters).
Board Choice against a Tooth and Claw opponent is relatively wide-open, as there aren’t many cards that interact with hazards or features. Blocked hexes could possibly make their charge lanes more difficult and reduce their opportunities for attacks. Lethal hexes could potentially punish them as they come charging in at you, but beware of getting knocked into them yourself. It’s very rarely played, but Lurking Gnarloaks is a Domain that turns Cover into Lethal, so you may want to be wary of choosing too many cover-containing boards..
Board Orientation against Tooth and Claw will depend to an extent on your plan, but Longboarding can do you several favors- slowing how quickly your opponent can get into your territory and forcing more move tokens rather than charges, which could slow some objective scoring and induce them to stagger themselves for becoming Savage. Beware when doing max offset or Longboard though as you’ll want to be in their territory when possible and this will make that harder for you as well.
Objective Placement when facing TnC is relatively open for you to place according to your gameplan. The deck cares very little about objectives save for it doesn’t want the opponent to be on them in the case of Ferocious Rampage – so place them where you plan to stand so you can occupy one. So long as you don’t think the warband your opponent took cares much about objectives, you can do whatever suits your scoring best.
Fighter Placement when facing Tooth and Claw can benefit from protecting your leader, or possibly deploying far away where able. The TnC player wants to charge, and especially wants to charge your leader. If you make that hard for them, you’ll slow down their scoring. You will want to be able to get a fighter or two onto their side, so make sure you have a durable enough or fast enough fighter able to make the dash over if needed. You definitely want to stay away from their leader, so once that model is down keep a nice wide bubble away from it unless you plan to kill them quickly.
Priority Targets when facing a Tooth and Claw player generally is killing their leader. They have two cards that ask their leader to kill something or be somewhere, and you’ll shut those down if the leader is out of action. You’ll also want to kill anything that’s Savage if possible, and you’ll want to NOT kill anything in their territory or that is not Savage/hasn’t moved or charged yet unless it benefits your plan because that can slow down scoring of cards like Embraced savagery, Fully Committed, Move or Die and so on. Killing a fighter in their territory without a move or charge token is like handing them an easier path to scoring those cards, especially if they are a 5+ fighter warband who couldn’t get everybody over the line in one round anyway.
Positional Tips you can use to counterplay Tooth and Claw during the game are as discussed staying away from their leader and making sure to have a fighter on their side of the board each end phase. You can also help yourself out by trying to avoid being adjacent to any of their fighters that could attack, since they could potentially hit your with Brutal Transformation and get +2 damage, but can’t make superactions. Alternatively, if they have a fighter that has the Upgrade Feral Instincts, you may benefit by leaving a disposable fighter adjacent to that fighter. The wording states the fighter must attack if able and then must charge – so they can’t disengage your danglebro to chase down your leader if they’re able to attack without charging.
Daring Delvers

DD is another deck with a plot card, so you won’t have to wonder whether or not this is their pairing. The real question you’ll be left guessing at is whether or not the deck your opponent built cares much about Exploration Count for their scoring. In Rivals it certainly will, in Championship it probably will not, and in Nemesis it could go either way. It doesn’t hurt to try and disrupt their exploration count as long as it doesn’t slow down your own gameplan, so place tokens before they can with Plunder (can’t place any if there are no available tokens left to place!), eliminate their Explorers, and occupy features tokens in their territory to reduce their count where possible. You do know that whatever flavor of DD they went for, you’ll have to try to keep them out of your territory and off of feature hexes wherever possible.
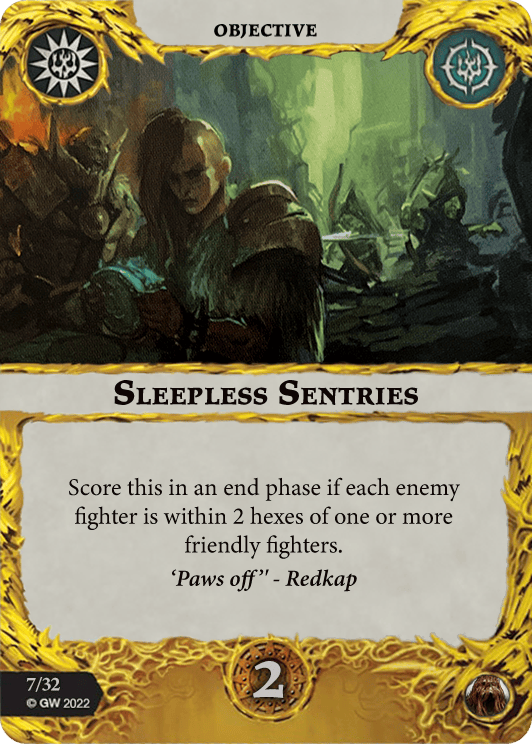
The Objective cards you can most effectively counterplay in this deck are Bold Venturer (keep their leader off of features in your territory before the end phase) and Sleepless Sentries (make sure at least one of your fighters is more than 2 hexes from any enemy).
Board Choice can be pretty important when facing Daring Delvers. You will want to avoid boards that have cover hexes when you can because multiple cards ask for fighters on their team to be in cover, and you want to make it harder for them to have those landing spots (as well as improve their defense when they do so). You’ll also want to avoid lethal hexes in all probability because those will also meet those conditions if your opponent is willing to stand in them, but more importantly – if one of your fighters dies by falling into a lethal hex, you hand them an easy two surge glory for Sudden Demise.
Board Orientation against a DD player will depend on your own goals, but again longboarding them is not a terrible plan. It makes getting into your territory more difficult. Max offset can do this as well but might constrain your objective placement a little more with additional edge hexes to contend with.
Objective Placement when facing a DD player is actually quite important. The more feature tokens on their side of the board, the better. Note that many of their conditions for cards as well as the Exploration Plot just want the token not in their territory, so no man’s land still helps them. Ideally your first token is just over the no man’s line in their territory, so that it makes a good zone of exclusion in the front part of your territory and still allows you good options to put more tokens on their side.
Fighter Placement against a DD player is less important to worry about. There are really only two things to worry about – don’t put any of your chargeable fighters next to a lethal hex to block Sudden Demise, and don’t put any of your chargeable fighters next to a cover/lethal/feature token or you can expect them to charge onto it and score Stealthy Advance. Otherwise, you can generally put your fighters wherever works best for you.
Priority Targets when facing Daring Delvers are, as is the case in many scenarios, to finish off their leader quickly. Doing so will block Bold Venturer and slow down Terra Incognita, but it will also prevent cards like Conquered Spirit and Conqueror’s Circlet from being played. You’ll want to knock off any of their fighters that occupy tokens in your territory, and if any of their fighters get an Explorer upgrade, they should be top of your list for elimination. If they have a wizard, you’ll probably want to tag them before Flame Wisps comes out or they play some gambit spells to score Sudden Demise.
Positional Tips against a daring Delvers player are as previously mentioned – you’d like to be on tokens in their territory to slow down their exploration and make some of their enemy territory interaction cards harder to use. You will want to keep your fighters either on tokens or not adjacent to them, in case they drop Grasping Rootgrave which could potentially hand out a lot of damage if you’re out of position.
Fearsome Fortress
Fearsome fortress is a deck that has a lot of potential counterplay because it has one pretty cohesive goal – stand on tokens within 1 hex of no-man’s land and do things in that region of the board. The Plot Card will also effectively annouce their intentions for you. If you are able to control that territory, especially the feature tokens, you’ll prevent them from scoring a substantial portion of their cards. Keep their fighters out of the middle and off of tokens. An alternative is avoiding the center altogether and preventing them from scoring their cards that require interaction in those spots, but you’ll be giving them the passive scores and objective hold things that have baked in so it’s probably less effective unless you know your passive play can outscore theirs.
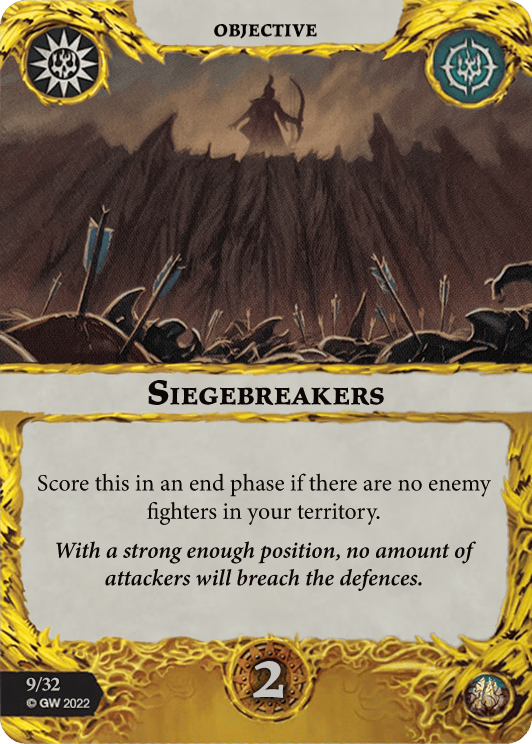
The easiest Objective cards to counterplay in the deck are Proud Castellan (keep their leader off of center tokens), Siegebreakers (get at least one fighter in their territory during an end phase), To the Walls (make sure they don’t hold ALL center features), and Underground Fortress (make sure they don’t hold the two adjacent tokens at the same time). If you manage to keep them off of Objectives 4 and/or 5 you can blunt their ability to score Stockpile as well.
Board Choice when facing an FF opponent doesn’t matter a terrible amount and you can largely choose the ones that suit your gameplan best. One angle you could potentially make use of if you’re orienting the boards is to try and place a board with hazard hexes along the edge – they can’t place tokens during setup on a hex that’s already a lethal, cover, stagger, or starting hex so if you crowd the ‘fortress zone’ with these hexes you limit their ability to castle up. Careful about using Lethal hexes though, because you might get eaten by them as well and help score Lethal Defenses.
Orientation of Boards is hugely important in the FF matchup. A signature card of theirs is Conquered Domain, and the more features within 1 of no man’s land they occupy, the more glory they’ll score. The more features they can fit in that space, the more chances they have to score many of their other cards. Narrowing that space will help you greatly – don’t square up unless it really benefits you as well since they’ll have 23 hexes in Fortress Territory. A max offset allows you to cut down to 14 total hexes, and a longboard just 12, and both orientations can make fitting more than 2 tokens (plus their Plot Card bonus one) a tough ask for the FF player.
Objective Placement is also incredibly important when facing a Fearsome Fortress deck. Their main focus will be on jamming as many feature tokens within 1 hex of no man’s land as they can, so yours should be keeping tat number down as low as possible. Place Objectives 2 hexes away from no man’s land so that they don’t help score most cards AND create an exclusion zone blocking off much of the Fortress Territory. Alternatively, you place one dead center to zone out as much of the rest of Fortress territory as possible, but mathematically this often doesn’t help you outside of the Max Offset or Longboard formations, and you probably won’t be placing first if that’s the case. Plus it will make scoring To The Walls pretty trivial for your opponent, so if they do this for you make sure to keep them off that token or at least don’t let them hold more than you do,
Fighter Placement doesn’t matter a huge amount in the FF matchup for counterplay reasons, other than you’ll want to be able to get fighters onto those tokens before they do and/or run past them into enemy territory. Deploying too far back will hurt you unless your plan is to out-passive.
Priority Targets are really anybody who occupies a feature token in the middle – they need to be taken out of action or at least pushed off the token. Any fighter who bears the Walking Wall, Siegemaster, or Bold Engineer upgrades will be somebody to focus on as well. Killing their leader never hurts but matters a little less than in some pairings.
Positional Tips for the FF pairing mostly involve, again, getting on the tokens in the middle so they can’t have them, and having at least one fighter survive in enemy territory into each End Phase to block Siegebreakers. It’s lower frequency, but try not to end a turn adjacent to a fighter on a token or you could eat a ping in Bound Spirit, and try not to finish an attack adjacent to an enemy if you’re staggered or you could get tagged back with Opportunistic Reprisal. Should you happen to get a kill outside of Fortress Territory, it’s not a bad idea to Plunder a cover hex there to prevent it from being available for them to Plunder later in the game.
Beastbound Assault

Counterplaying BBA will be a little more difficult to do at the outset of the game because it does not have a Plot Card, which means your opponent is not obligated to reveal to you that they have taken that pairing. If they have a warband jam packed with ‘Beastbound’ fighters (Beasts, Companions, or Minions) and no plot card, you might hazard a guess at this. In games 2 and 3 where you know what’s coming, you can adapt a little better. Ultimately you want to keep their keyworded fighters out of the fight and keep them out of your territory, especially off of Objectives in your territory.
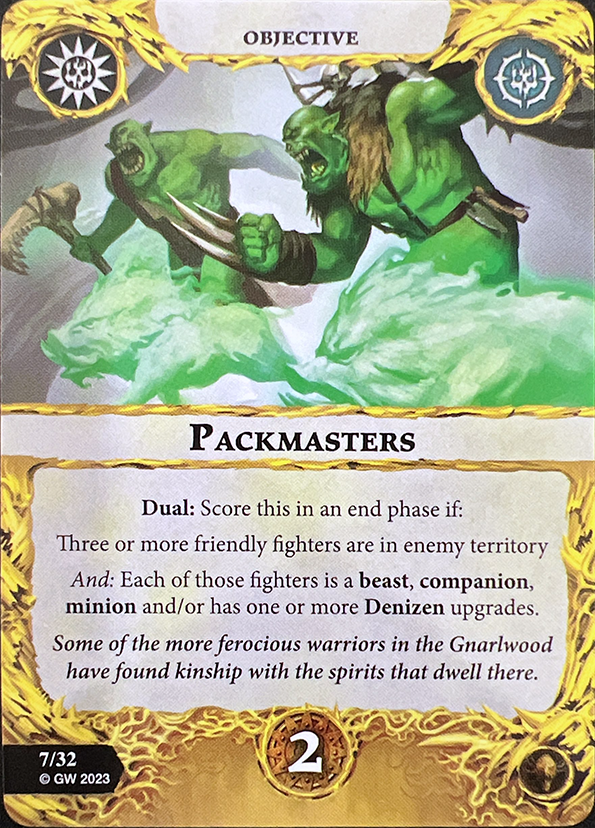
The easiest cards to counterplay in this deck are Gifted Pathfinder (keep Keyworded fighters off objectives in your territory), Packmasters (keep them to two or fewer keyworded fighters in your territory), Unbeatable Team (hold more objectives than them OR kill equal or greater than they do), and We Stand Together (keep their keyworded fighters off of objectives).
Board Choice against a BBA player isn’t super important for counterplay. The biggest thing to think about is avoiding lethal hexes near the front to make Dogged Determination a little more difficult for your opponent, but that’s not a huge payoff or a high probability so it’s less to concern yourself with. There’s really nothing else in BBA that should affect your choice of whatever board works best for you (or disrupts the warband half of your opponents’ pairing).
Orientation of Boards isn’t super important in the Beastbound matchup – you know they generally want to be in your territory, so as we have seen in every Gnarlwood deck, Longboarding or Max Offset can hurt them. Just make sure it doesn’t hurt you more.
Objective Placement when facing a Beastbound player will counterplay best if you keep objectives out of your own territory. There are a few scenarios where they want to occupy those Objectives on your side (or at least in no-man’s), so placing more on their side can help you block them a bit. The ones in your territory should be further back or harder to reach if possible, and definitely with no lethal hex in front of it for a 2-wound minion to dash through for Dogged Determination.
Fighter Placement when facing a BBA player doesn’t have a ton of counterplay consideration. They generally want to kill your fighters, so maybe keep your softer ones safe, but otherwise do what you need to do for your own gameplan. You’ll probably want to be able to kill their leader at some point so make sure you have a hard hitter or two in reach for that if you can.
Priority Targets when facing Beastbound Assault will vary as the game progresses. Early on, you want to kill whichever fighters have the ‘Beastbound’ keywords of Beast, Companion, or Minion. They can’t score easily without those fighters doing things. Any fighter, keyword or otherwise, who lands on an Objective in your territory needs to be dealt with, preferably within the next activation. Later in the game as Denizen upgrades come online, you’ll have to focus on those fighters as well, especially if a fighter has two of them or an enemy leader has 3. Generally work in reverse order against BBA – kill their little guys, then their upgraded medium/big guys to make sure you stay ahead on the kill count and slow their scoring pace.
Positional Tips – there’s honestly not much to say here. Either stand on the objective tokens in yours/no-one’s territory so they can’t have them, or at least keep them off of those objectives. Play in their half of the board when you can so they have to decide whether to run past you for scoring some cards, or stay put to fight you and score others. If you let the fight happen in your territory, they can do both.
Wrap
That’s it for the first Counterplay article! Let me know what you think about this idea and what other things you can think of to counterplay the Gnarlwood Rivals decks. I hope you enjoy spending your glory, and don’t forget that your opponent can’t spend theirs if you don’t let them score any in the first place.



 Spent Glory
Leave a comment