
This article will continue a series for beginning competitors on Counterplay – a concept about finding ways to shut down your opponents’ plan and keep them from meeting their goals. May players focus on how to achieve their own aims, score their own cards, and execute their own gameplan, and this is a great thing to do! It’s hard to win if you don’t score your cards. Whether you read the great summaries available on What the Hex, Path to Glory, or Battle Mallet or listen to any of their podcasts, they all will help you find ways to leverage whatever cards you took to score as much glory as possible. If you want to take your game to the next level, you should try to be mindful of your opponents’ possible plan and work to interrupt it when possible, and that’s what we will be looking at today.
This guide will be written with Nemesis in mind, though the principles apply in Championship if your opponent has taken many cards from the deck in questions. In Rivals, you can expect to use all of these tips as their deck will be no mystery to you and you can be confident you’ll see most of the available counterplay opportunities bear fruit across a best-of-three match.
Click here to see other articles in the Counterplay Series
Related Articles
Contender Series (For Optimizing Your Own Gameplan)
Participating in Your First Tournament
How to Run a Local Tournament
Let’s dive into the Wyrdhollow and see how best to shut it down!
Toxic Terrors

When facing Toxic Terrors, you won’t be shown a Plot Card, so you will have to make some guesses about whether you expect it. Generally, the warbands that like this want to be in enemy territory making attacks, especially with their leader, but that doesn’t narrow things down a whole lot! This deck has a general aim of applying Upgrades with the Poison keyword to fighters, and doing actions with them, as well as applying gambits with the Poison keyword to various situations. Your best counterplay will generally be to identify which fighters are equipped with Poison upgrades and finish them off, and whichever of your fighters gets tagged with a Poison gambit may need to be protected.
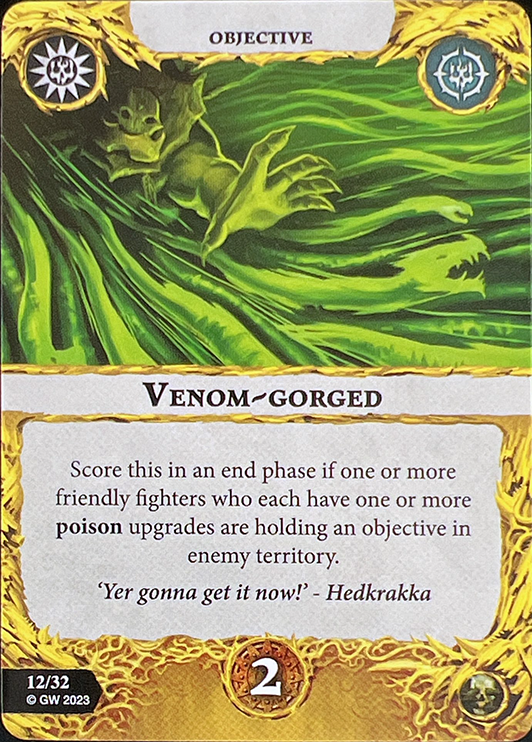
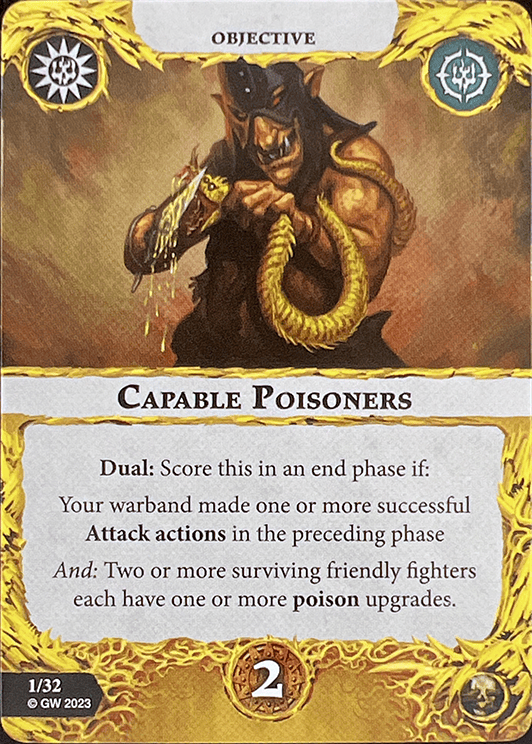
The easiest Objective cards to counterplay are Lone Claim (hold at least one objective, especially if they hold one in no-one’s or your territory), Taking Advantage (make sure you have more fighters in your territory than they do), and Venom-Gorged (don’t let a fighter with a Poison upgrade hold an objective in your territory). It’s easier said than done, but you can also counterplay Mass Poisoning (don’t let a fighter with poisons make multiple successful attacks), Capable Poisoners (make sure they don’t have two fighters with Poison Upgrades at the same time) and if you off their leader quickly enough you can also shut down Carve a Path and Superiority Confirmed.
Board Choice against a TT pairing is not super important from a counterplay perspective. There are two gambits a TT player could use against you that involve your fighters’ proximity to objectives or Hazard hexes – No Safe Ground (which you will definitely see) and Insect Swarm (which you probably will not), so you may not want many Hazards on your side of the board.
Board Orientation in the TT matchup again is relatively up to you, but with multiple cards wanting interaction/bodies in your territory, the pressure is on for the Toxic player to invade. Longboarding, and to some extent offsetting the board can help slow them down in that regard.
Objective Placement is mildly important against a TT pairing. Some of their cards can tag you if you’re within 1 of an Objective token. Some of their cards want their fighters on objective tokens with or without poisons, but generally in your territory. This means you want relatively few objectives on your side of the board, and the ones that are on your side of the board are better off further towards the back to make them harder for your opponent to reach, or less ideal for their power card play.
Fighter Placement when facing Toxic Terrors is going to hinge on where they place their leader for the most part. You need to decide to either avoid that leader, or finish them quickly, so pick a side of that fence and deploy accordingly. You could also find yourself hit with an early Ill Prepared, and a fighter who is on a starting hex now can’t attack from that spot and has a move token; try to avoid a situation where only one of your fighters starts the game in a good spot to do some important thing you have in mind. Ideally none of your fighters are within 1 of Hazard hexes or Objective tokens to open the game to slow down some power card play.
Priority Targets when fighting TT is pretty simple to work through. Their leader, if you think you can take them down, has to go. The ‘good’ news is that leader is probably headed your way! Additionally, any fighter who gets a Poison upgrade should be killed as quickly as possible, and ideally you keep them to one or fewer Poison-bearing fighters at a time, or at least by the End Phase. Then, keep that Poison-bearing fighter off of Objectives in your territory when possible.
Positional Tips when facing TT will again focus on trying to stay away from the Hazards and Objectives unless you have a reason to be there, with the additional consideration that you don’t want to have anybody standing on a starting hex until you’ve seen Ill Prepared be played – then be ready to avoid starting hexes again if they scoop it back up with Venombite Weapons. Remember to keep more of your fighters in your territory than they have in yours to prevent Taking Advantage, at least for the first round. Charge over the line too many times and too quickly, and you might be handing them a surge for 1-2 glory.
Seismic Shock

Seismic Shock is another deck with no Plot Card, so you’ll have to be guessing about whether you’re facing this deck until you’ve seen a few cards. Warbands with at least 1 wizard who are interesting in holding objectives have a habit or looking at this deck, so those are ones to keep an eye on. If their warband has no wizard, this one’s pretty much guaranteed to be off the table. Seismic Shock for the most part is interested in holding objectives, especially with a wizard, and then slinging some fireballs downrange. There are more benefits for doing the objective holding/magic stuff in enemy territory, though you’ll see those cards less often.
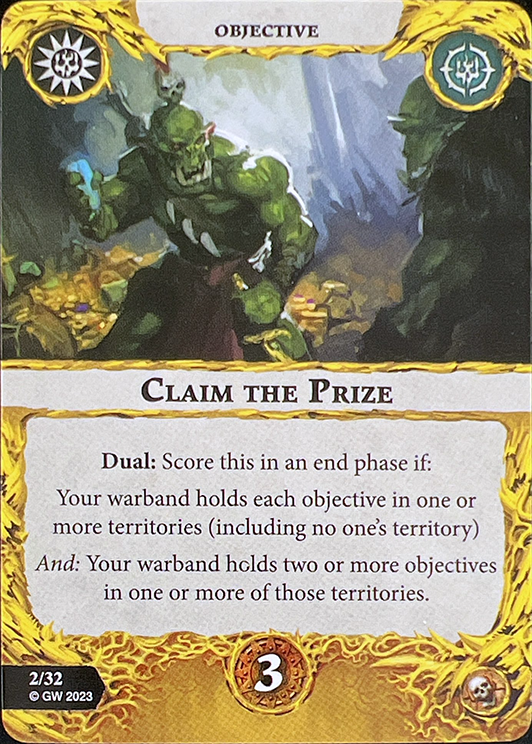
The easiest Objective cards to counterplay when fighting SS are Claim the Prize (most effectively during Objective placement, but also just make sure they don’t hold every (at least 2) objectives in a territory), Places of Power (keep at least one fighter off of objectives or hazards, or kill them down to a single fighter), Powering Up (if you have a wizard in your territory on an objective, don’t let them stay there), and Shape the Realm (stop them from holding 3, or at least keep the wizard off of Objectives). Other objectives are little more difficult to shut down but will follow the same gameplan – kill their wizard, or keep it off of Objectives, and keep the rest of their guys off objectives too.
Board Choice if you’re facing an SS pairing will benefit the most from keeping the number of Hazard hexes on your side to a minimum. There are a number of Objectives that want their fighters in them, and a number of Gambits that will hit your fighters that are in them. You may want to think about having a few blocked hexes to hide behind since there’s a chance you’ll be facing a pretty nasty spellcaster and line of sight might be the only thing that saves you.
Board Orientation against a Seismic Shock player is a bit of a tough one. Ideally there is no Longboard, because that lets them hang back and score while you struggle to engage them. However, squaring up fully means they have an easier time putting two objectives in no-one’s territory, and that could make scoring Claim the Prize easier for them if they’re more comfortable with engaging in the center. Offset limits your ability to invade and kill that wizard/knock people off tokens, but at least it limits their line of sight for spells. I would probably still square up in most cases.
Objective Placement when facing Seismic Shock is pretty important. Claim the Prize is a signature card for SS, and you can expect many if not all pairings to take it. They score 3 glory for holding all objectives in one territory, as long as there are at least 2 in that territory. If you manage to make it so their territory only has 1 objective, that’s phenomenal (but note they have some spells that will let them move tokens around the board). Failing that, try to get three or even four objectives into their territory and they’ll struggle to hold them all. The worst case scenario is a longboard where they have two objectives on their side – don’t let that happen! Outside of Claim the Prize there’s a little less to worry about, just know they’ll be trying to occupy those tokens and it will be your job to stop that, so make sure there are some in reach. Oh, and they can move them around sometimes which is a bummer.
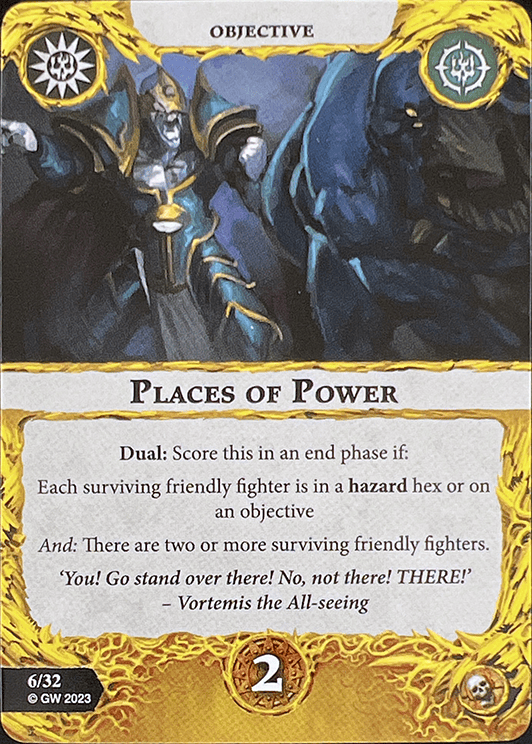
Fighter Placement in the Seismic Shock matchup depends mostly on one thing – where is their wizard? Assuming they only have one, or at least only one level-2 wizard, you want to be able to reach that fighter early. At the very least you want to be able to threaten them and take them off of the objective they’re looking at holding, so put fast people and/or big hitters in reach. Alternatively if you thing you can outscore them by being passive you could try to avoid the wizard altogether and reduce their chances to cast spells.
Priority Targets when facing a Seismic Shock player is a simple flowchart: #1 – kill their Wizard(s) or at least keep them off of objectives. #2, hit anybody holding an objective and drive them off if you can’t kill them. Coming in at #3 is anybody hanging out in a hazard hex, just in case. And for the love of Nagash, don’t let them hold every objective in a single territory come the end phase.
Positional Tips when facing a Seismic Shock pairing boils down to whether they have a wizard on the board still. If they can cast spells, they’re going to mess with people on or near Objectives and Hazard hexes, so only stand there if you have a good reason. If their wizard is dead you’re safe to stand where you please. Just like you might want to consider a board with blocked hexes to hide from their wizard turret, Plundering into blocked hexes when appropriate isn’t a bad idea either, and it keeps them from plundering into a cover they can use for more feature token/hazard shenanigans.
Voidcursed Thralls
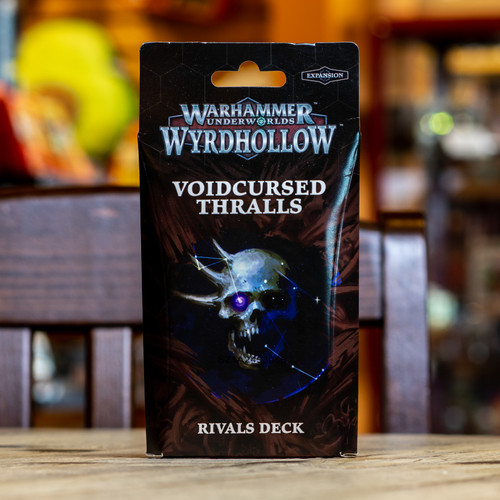
Voidcursed Thralls is a very interesting deck from a game design perspective, and the counterplay options are pretty brainy as well. Voidcurse does come with a Plot Card, so you’ll know that’s what you’re up against, but there are multiple ways a VCT player could choose to play the game. Perhaps they lean into cards that try to voidcurse everybody on the board. Perhaps they’re trying to have a horde aggro approach. Perhaps they’re trying to hold objectives and want the can’t-be-driven-back support. Which warband they’ve paired with might give you a hint about how they’re trying to take things to score, but one of the strengths of VCT is that some of it is pretty tough to counterplay.
The easiest Objective cards to counterplay when facing a Voidcurse deck are Forbidding Thralls (make sue you have at least one friendly fighter outside of your territory), Reshaped Realm (easier said than done, but keep at least one fighter from being voidcursed and if you can tell this is their plan, don’t kill anybody that isn’t voidcursed), and Threatening Presence (make sure they don’t outnumber you in two territories at once). You could possibly stop Unceasing Imperatives (if you have a cursed fighter, don’t move or charge with them) but they can score it with just their own warband in most cases.
Board Choice when facing a VCT player is relatively open – none of their cards reference hazards or features outside of the tokens. Take what suits you best, but note that you’re less likely to be able to push them into lethals or staggers or out of cover since voidcursed fighters can’t be driven back.
Board Orientation in a Voidcurse matchup is, again, a tricky one since you’ll have to guess which of the VCT flavors they’re angling for. They probably want to come into your territory and get some interaction going, as a longboard isn’t the worst idea. They will have extra pushes and moves available to them through cards though so it won’t necessarily save you, and be mindful that you will probably want to have a few fighters in the middle or their side to block Forbidding Thralls and Threatening Presence.
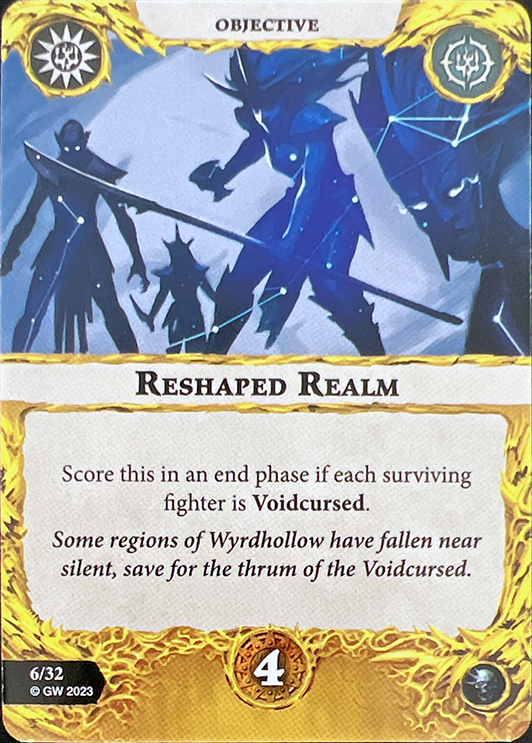
Objective Placement when facing VCT is another pickle. The deck itself only has a few cards that care about Feature tokens – Perfect Thrall (land an attack from a cursed fighter while on a token), Unwitting Guardians (cursed fighter holds a tolen in an end phase), and Refashioned Priorities (reaction move onto a token once per round). You can mostly do whatever works best for you in this step; if you manage to keep tokens out of the front of your territory and away from your fighters, they’ll have to decide whether to stand on tokens or fight you and that can split their attention. The wrinkle is that there is a heavier than usual chance they took some Objective related cards from their warband deck since they can more easily trust they won’t be driven back once the curse is rolling.
Fighter Placement again can get tough since a lot is going to hinge on which of their fighters becomes voidcursed at the start of the game. Unfortunately for you as the opponent, they don’t have to decide who is cursed until after setup is complete. You’ll have to guess which is their likeliest VC option and position yourself to kill that fighter or stay away from them, depending on which VCT flavor you think they took and how much being voidcursed hurts your warband.
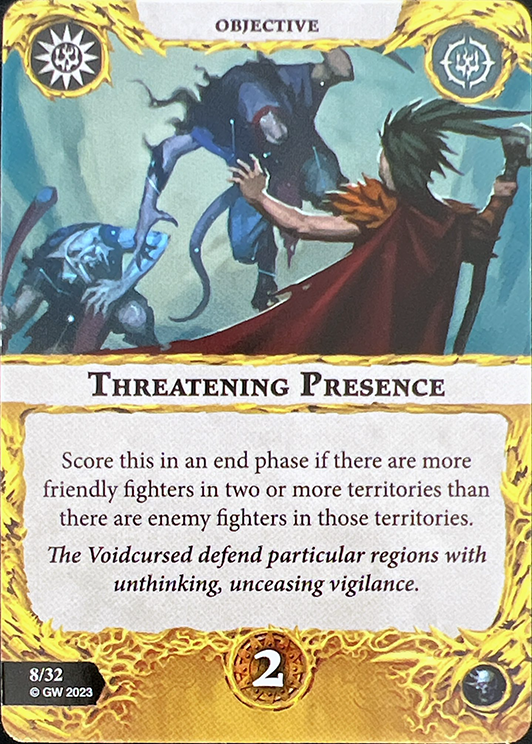
Priority Targets will generally be whichever fighters on their side are voidcursed. Almost all of the VCT Objective cards mention a voidcursed fighter does x, and number of voicursed fighters are in some position, etc. The fewer of those that exist, the better things will be for you from a counterplay perspective. If you think they’re angling for the big 4 glory payout of Reshaped Realm, don’t do them any favors by eliminating un-cursed fighters. Until you’ve seen Threatening Presence, make sure to kill or push things that outnumber you in a territory such as no man’s land when you’re able. Lastly, if a fighter has any of the Thrallmaker or ‘Refashioned” upgrades, they probably should be on your shortlist for elimination.
Positional Tips – Part of what makes Voidcursed Thralls so hard to play and play against is that there are so many positional things to keep track of. The biggest ones are related to the Refashioned Reactions and Refashioned Priorities Upgrades. Those allow a fighter to react to another move by moving either adjacent to a fighter or onto a token, so you might find yourself moving to safety only to be followed, running in at a target only for it to dash away, etc. Pay special attention to the fighters who bear these Upgrades until after they’ve made their once-per-round reaction, because nay move you make might trigger it and ruin your plan. Another critically important thing to consider is that some of your fighters probably can’t afford to be voidcursed; they will suffer on defense, will be unable to make range 3+ attacks, can’t take special actions, etc. If you have one of those fighters, do not put them on Objective tokens or into Snare hexes or they’ll get tagged by Reshaping Snare. Try not to have them adjacent to a Voidcursed fighter when they die or you might get them (and all others adjacent) cursed by Reshaping Demise. Avoid clustering too many or you’ll eat a Reshaping Burst. This all depends on whether you care about being cursed or if your opponent is attempting to curse you though. The most reliable thing to worry about is Threatening Presence, so be sure in any end phase to keep them from outnumbering you in 2+ territories at once wherever possible.
Paths of Prophecy
PoP has a simple, yet complicated goal: Hold Objectives, but only certain ones at certain times. In Rivals it’s a total crapshoot – even the prophecy player doesn’t know what they’ll need next. In Championship a lot of those cards are not part of the conversation. In Nemesis, though, you can expect to see a few ‘hold exactly these objectives’ or ‘make sure your total adds up to precisely this number’. As a general rule, if you want to stop a PoP deck from succeeding, keep them off of Objectives, kill anything small and easy to keep their body count too low to effectively hold, and make sure you’re on some tokens so they have to work to displace you. You won’t have a Plot Card to tip you off that PoP is their pairing, so you may get surprised early- if you see your opponent hustling to objective tokens and they don’t have a Plot Card, it’s probably this or Malevolent Masks.
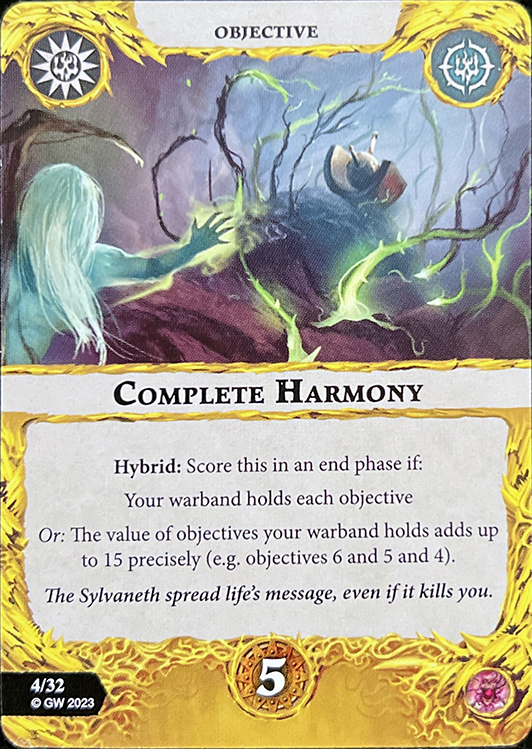
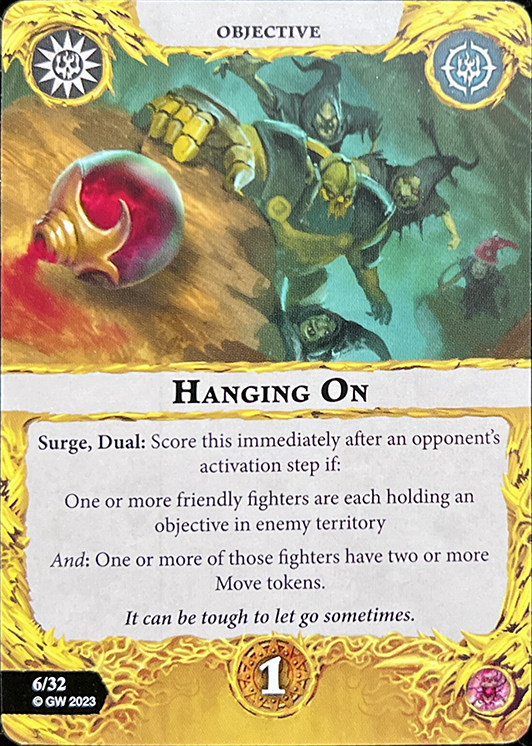
The easiest Objective cards to counterplay in Paths of Prophecy are Complete Harmony (don’t let them hold everything at once, and if they delve something to cover, make sure you run over there and flip it back), Hanging On (any fighter with 2 move tokens on an objective in your territory MUST get booted within one activation), Positive Foreboding (either make sure to hold the same or more than them, or just keep them off center tokens), and Prevention over Cure (make sure you’re holding at least one objective in the early game, or two if you’ve lost two fighters). You can reasonably slow their roll on most of the other cards by holding Objectives 4 and/or 5, or at least keeping them off of those since it makes their math harder.
Board Choice against Paths of Prophecy has relatively little impact for counterplay purposes. None of their cards mention anything beyond Objective tokens, so pick whatever features and orientation works best for you. You may want to be careful about lethal hexes, because they may make Held in a Bloody Fist a little easier to score as they run a fighter through one onto an Objective in your territory, but it’s something they’ll score eventually in most games anyway. You may benefit from choosing a ‘crowded’ board to limit their placement of tokens, especially if those are blocked hexes that make your side harder to navigate since they’ll be sniffing out your objectives when they can.
Orientation of the boards probably benefits you most in a squared up formation, simply because it means you have an easier time getting to them and knocking them off of tokens. The PoP player ideally wants to hold 3 objectives at once, and if you give them a longboard or an offset (and thus they get to place three tokens) they might be able to make it hard for you to disrupt that in round 1. That said, if you longboard them and then force them to have only 2 objectives on their side with good zoning, you can still succeed depending on your warband’s skillset.
Objective Placement when facing a PoP matchup, if you know that’s what you have, is pretty important for counterplay. You won’t know the numbers on the objectives, but you can pretty reliably assume that they want to hold at least 3 at once, possibly more. Placing tokens in a way that prevents them from having 3 on their side will force them into dangerous places and save you the hike over to their back edge. Placing tokens in such a way that you make them come toward the midboard is good. Making sure that there’s one deep in your backfield isn’t the worst idea either, since maybe that’s the one they ‘need’ – but beware if they have the mobility to get there and make you divide your own forces.
Fighter Placement during the setup phase in a Paths of Prophecy matchup is going to hinge on one thing: many successful PoP warbands will have some kind of ‘movement economy’ engine – usually a fighter that allows multiple other fighters to move or be pushed at once. Identify and eliminate the movement engine, and I prophesize that their path gets pretty narrow after that. Try to put your biggest hitter in range of that special movement model on their side and take it out early. Otherwise make sure you can get to and threaten any tokens they have early access to – in both cases you’ll probably want a pretty aggressive deployment.
Priority Targets when fighting PoP are pretty much any fighter on objectives, especially if they’re in your territory or numbers 4/5. Any fighters with the Upgrade Guided by Fate can be dangerous to you, and either The Helping Hand or Watchful Eye can help them score some of their cards a little easier, so those are nice targets for you as well if you see them on the table. And, as discussed, your most important target, if their warband has one, is that ‘movement engine’ that will help them get onto and stay on tokens. The earlier you take that model out, the slower their scoring will be.
Positional Tips against a PoP player hinge mostly on Objective Token Occupancy. Some of their cards want to make sure they hold more Objectives than you do, or that you hold fewer than they’ve taken out of action, and so forth. Being on a token or two stops that from happening, and it also creates more work for them when they want to stand on that token themselves. Be aware that this grants them pretty reliable access to +1 dice on any attack with Guided by Fate, but it’s probably still worth the risk. The last thing to be mindful of is that many of their Surge Objective cards happen after an opponent’s activation or opponent’s power step, so before you make your move be sure to scan the board state – are they holding a specific number that you think they might be trying to score? Maybe they ran off of a token to do something, or made a ‘less optimal’ attack to land on a certain numbered token. It’s a bit like whack-a-mole, but trying to bonk whatever fighter they last activated isn’t the worst move to make.
Wrap
That’s it for the second Counterplay article! Let me know what you think about this idea and what other things you can think of to counterplay the Wyrdhollow Rivals decks. I hope you enjoy spending your glory, and don’t forget that your opponent can’t spend theirs if you don’t let them score any in the first place.





Leave a Reply