This article will continue a series for beginning competitors on Counterplay – a concept about finding ways to shut down your opponents’ plan and keep them from meeting their goals. May players focus on how to achieve their own aims, score their own cards, and execute their own gameplan, and this is a great thing to do! It’s hard to win if you don’t score your cards. Whether you read the great summaries available on What the Hex, Path to Glory, or Battle Mallet or listen to any of their podcasts, they all will help you find ways to leverage whatever cards you took to score as much glory as possible. If you want to take your game to the next level, you should try to be mindful of your opponents’ possible plan and work to interrupt it when possible, and that’s what we will be looking at today.
This guide will be written with Nemesis in mind, though the principles apply in Championship if your opponent has taken many cards from the deck in questions. In Rivals, you can expect to use all of these tips as their deck will be no mystery to you and you can be confident you’ll see most of the available counterplay opportunities bear fruit across a best-of-three match.
Click here to see other articles in the Counterplay Series
Related Articles
Contender Series (For Optimizing Your Own Gameplan)
Participating in Your First Tournament
How to Run a Local Tournament
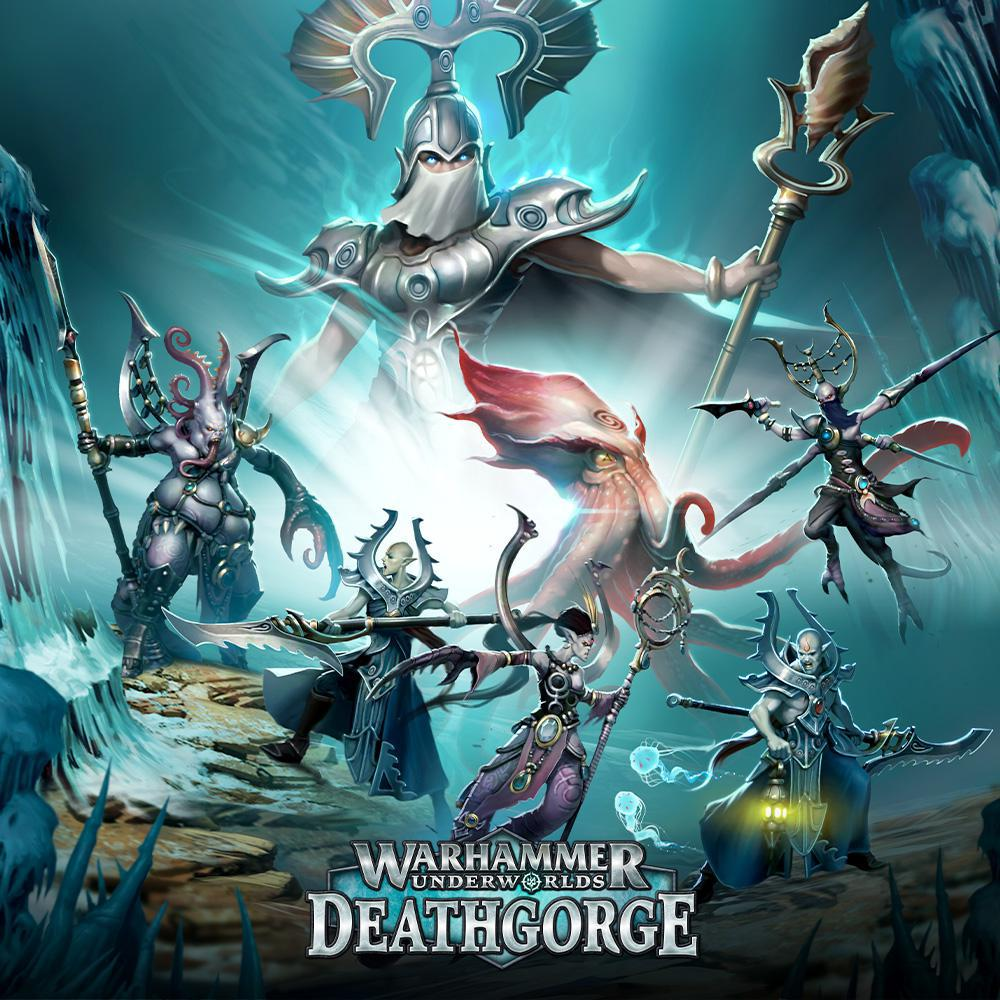
Let’s dive into the Deathgorge and see how best to shut it down!
Force of Frost

Force of Frost is a very interesting deck from a number of different angles – it is a magic deck, but warbands without wizards can still enjoy it, and those with only a level 1 wizard can still find ways to become level 2 and adopt a ‘true’ magic-focused gameplan. It is a semi-hold-objective deck, but in a balanced portion so it can support some ‘flex’ play rather than pure hold. It is a resource management deck in ‘ice counters’ and the various ways to accrue them to unlock powerful effects. There’s a lot there, and without a plot card it can be a little tough to guess that they’re using it. Even if you do, you’ll still have to guess which angle they’re taking with it. Generally the most surefire thing you can do to counterplay a FoF player is to eliminate their wizard, but this doesn’t always make the same big splash you might expect to see in a Seismic Shock pairing.
The easiest Objective cards to counterplay are Biting Wind (make sure you have at least one fighter in enemy territory), Cold of the Void (make sure somebody is adjacent in an end phase – this can even be your own fighters in the backfield if need be), Glacial Cool (keep their leader off objectives in the midboard), Ice Age (Plunder a cover hex whenever possible to keep Blocked hexes off the board), Stranglehold (either be on a token within 2 of no-man’s or stack the midboard during setup to make it hard to occupy them all).
There’s an argument for it being easy to counterplay Winter’s Hunger by eliminating any fighter with 3 ice counters, but few people will try for it and those fighters are probably better protected to begin with. Still, there is only one reason to have more than 1-2 ice counters, and it’s that card – so kill that fighter or risk giving up 2 glory.

Board choice when facing FoF is pretty wide open. The main thing to consider when making your selection is that the Frost player will have a few cards that interact with Blocked Hexes. In many instances these will be ones they place with spells or plunder when taking a fighter out of action, but if your board has blocked hexes on it you’re giving them a few extra opportunities to make some of their effects work. Unless you have a great reason to take a board with a blocked hex, don’t do it. This of course assumes you know they’re playing Force of Frost, and the lack of a plot card means you might get fooled in game 1.
Orientation of the boards in the Force of Frost matchup has really only one consideration for card scoring – if they’re running Stranglehold, they will want to hold every objective within 2 of no-one’s territory. Longboarding and offset boards mean there are likely to be fewer Objectives in this space and make it easier for them to meet this condition. These also reduce the size of No-one’s territory and make you less likely to be in it, marginally increasing the odds that they score Cold-Blooded for killing a fighter in your territory. Finally, blocked hexes are much more annoying for you in a congested midboard, so if you’re planning to invade, they’ll be able to stymie you easier in those orientations. Unless you have a good reason to do otherwise, I’d suggest using the squared-up alignment.
Objective Placement is relatively unaffected in the FoF matchup, except for the caveats above. They may be trying for Stranglehold, where they occupy every Objective token within two of no-man’s. Either make sure you can stand on one, or flood the middle with more tokens than they can reasonably hold. They may also be playing Glacial Cool, where their leader needs to hold one within 1 of no-man’s. If you place the first token within 1 but on your side, it may force their leader into your zone, which many FoF players prefer to avoid.

Fighter placement can be dictated by whatever your needs are, for the most part. The things to consider are that their wizard (if they’re taking one) is likely their most important fighter – try to deploy in a way that you can reach them early. They may be taking the Cold Blooded surge for killing an enemy in enemy territory, so try not to put anybody one-shottable up front or you risk giving up the early kill surge that way. If you did happen to take a board with a blocked hex, try not to put anybody you care about in a starting hex adjacent to that blocked hex.
Priority Targets when facing Force of Frost are firstly any wizards they have, then any fighters with Ice Counters. The Wizards will allow for multiple powerful effects from Gambits and Upgrades as well as a few Objective cards based on spell casts and spell kills. Ideally, you kill the wizards with a power card or a lethal hex so they can’t react with Final Curse, which specifies they wizard had to be eliminated by an attack action. Fighters with Ice Counters do nothing in a vacuum, but they could be trying to score Winter’s Hunger, grab a glory with Chasm Key at the end of the game, or unlock some effects from powerful upgrades. They may also spend that Ice Counter to cast Abasoth’s Avalanche, which could potentially ruin your day. Finally, if anybody starts piling onto midboard objective tokens, especially the leader within 1 of no-mans you gotta knock them off.
Positional Tips in the FoF matchup hinges the most on denying Cold of the Void. A 2 glory end phase for having no adjacent fighters, it sucks to realize in the final activation you could have run over the somebody, not driven back after an attack, etc. Try, until you have seen the card or know they don’t have it, to always have two or more fighters adjacent going into an end phase. Again, avoid adjacency to blocked hexes to prevent some power card effects from targeting your fighters. Finally, while Abasoth’s Avalanche isn’t nearly as scary now that it’s been Errata’d to require spending an Ice Counter, you should ideally not have all of your fighters in the same territory or you risk getting multi-pinged. If you want to be entirely on their side that’s a little better since they’re more likely to have to ping multiple of their fighters too, but the risk remains. Bunch up for Cold of the Void, but spread out for Avalanche. Easy-peasy, right?
Breakneck Slaughter

BNS is an easy deck from a mechanistic perspective in that it has really only one goal – get over there and punch ’em with a quickness. Post Errata the power level has been toned down a bit, but the same theme prevails – the Breakneck player wants to be getting four charges (or reach the charged-out state and keep throwing attacks) and do that in enemy territory. The impetus/momentum mechanic makes things a little interesting from a positioning standpoint but doesn’t play a huge role in how the deck functions for most pairings.
Your counterplay options are unfortunately pretty limited since their ability to increase speed will make it harder to hide, so your ability to place blocked hexes or lethal hexes to make that harder or punish them is one thing you can do, or just try to do the fighting in their territory. Part of what this deck was so prominent in the meta is because in some cases there’s not much you can do as the opponent except hope that they roll poorly. The good news is it comes with a Plot card so at least you’ll know what you’re up against early on.
The easiest Objective cards to counterplay in the deck are Eager for the Fight (especially now post-errata – keep a fighter out of your territory or isolate that fighter so there is nobody within 2 hexes), Fastest Around (don’t let every enemy into your zone and/or have one of yours in their territory), Out of Control (do not stagger their fighters with impetus until you’ve seen it discarded), and Running Rings (Don’t let one of your fighters end up adjacent to two of theirs in your territory)
Board choice when facing Breakneck is somewhat variable. You know with near certainty they’ll be running into your territory and will often have Momentum when they do so, which gives you the opportunity to throw their fighters into Lethal hexes or stagger hexes when they do so. This comes with a risk as you may be driven back into those hexes or given Momentum yourself, but it’s something to consider.

Orientation of the boards against BNS somewhat denies traditional understanding because of the speed boosts the BNS player can access. Normally, if you knew they’d be full-on invade, a longboard would be a good idea, but with multiple ways to get moving quickly it won’t work for as long as usual. Still worth doing to block more attacks and make it harder to get over the line for several of their objective cards, and if you can make them wait until round 2 to get multiple charges and attacks off, you’ve possibly delayed them enough to win. A longboard or max offset is probably the best idea unless you yourself need a wide orientation and want to invade as well.
Objective Placement has almost no bearing on the Breakneck matchup as they have no Objective cards that refer to tokens whatsoever (and possibly couldn’t stand on them anyway with Impetus). Place the tokens where you need them for your purposes unless the warband they paired with has an easily counter-able objective placement goal you need to be mindful of.
Fighter placement in the BNS matchup can be a little harder than usual, since they have a better chance of being able to reach whatever fighter they want in round 1. If you have a character who must survive early on, consider placing them in the furthest possible starting hex unless you really need them in a certain position. They’ll be in the fray soon enough. You will probably want at least one fighter close enough to be able to run over the line and block Fastest Around/cause them to have to split their forces, but beware of giving them a charge target for their backline fighters.

Priority Targets in a Breakneck Slaughter match will be whatever you perceive to be the greatest threat, with the knowledge that any fighter can suddenly reach you when you felt safe, can become more accurate or do more damage with a single power card. This means your assessment of ‘who is scariest right now’ needs to consider the worst case scenario or you might get caught looking which they move two hexes further with one more damage out of nowhere. If a fighter has the capacity for multiple attacks (scything, combo, out-of-sequence stuff) they’re a good target because it might slow down their scoring of Gale Force by even one activation, which might be the difference maker. Additionally, any fighter with the Moving Mark upgrade doesn’t get their two shields until after they have a move or charge token, so if you get the change in activation 1 of a later round, strike while they’re still a soft target.
Positional Tips in a BNS matchup follow the same theme of ‘don’t let them get to you, then maybe get on their side when it’s safe’. Until you’ve seen it discarded or know they didn’t take it, never let them have every fighter on your side without any of yours on theirs, or you’ll hand them 3 glory for Fastest Around. If they’re in your territory, try to keep more than 2 away from at least one fighter to block Eager for the Fight. When you have the opportunity to impetus their fighter, push them away from you or back into their own territory/no-man’s if possible (and never stagger them until you know Out of Control is off the table).
Malevolent Masks

MM is one of my favorite decks released to date from a thematic perspective – much of the deck revolves around 6 keyworded upgrades with the Mask keyword. A fighter can only have one mask at a time, and many of the deck’s Objectives ask the player to do something with those masked fighters – usually (but not always) hold objectives. With no plot card you might be surprised to see this come out, but any warband that wants to do a little fighting and holding, especially if they have a resurrection mechanic, is a potential pairing you should be thinking about. They may also be interested in making attacks, getting kills, and generally being aggressive. As a result, the best counterplay opportunities will arise in being able to stop the masks from coming out by slowing down their initial scoring, and then focusing on disrupting or killing the masked fighters quickly. A few gimmick cards in the deck itself can stymie your attempts to do this, but it’s pretty worth your while anyway; if a fighter puts a mask on, you put them in the ground.
The easiest Objective cards to counterplay are Completed Pact (keep pace with their kills or at least play keep away so their masks can’t outnumber you), Hooded Stranger (don’t let a mask be in your territory, especially with nobody adjacent), Solid Spread (keep at least one territory free of enemies, ideally your territory due to Hooded Stranger overlap), and possibly Totally Overpowered (either keep yourself healthy or keep them off two objectives in an end phase). Additionally, anything you can do to kill masked fighters (or break the upgrades, Rimelock them, Perfect Blade, etc) will block a lot of their scoring – 8 of the 12 Objective cards in the deck have scoring conditions tied to mask wearing.
Board choice in the MM matchup has minimal relevance as they don’t have cards related to hazard hexes, blocked, or anything of the sort. There is a niche angle where they might use the Howling Hood’s action to push one of your fighters into a hazard hex, so don’t take boards filled with those unless you think it’s worth that risk. Again, with no plot card it might be hard to guess, but the good news is there’s not much to worry about for facing Masks at this stage of the game.

Orientation of Boards can be a tough call against MM since it depends on which flavor they’re running. If they took the aggro approach, an offset or longboard can delay them getting into the fight. But if they took the pure Hold Objective angle, you just made it harder to get at them. Ultimately the only thing you can say with any safety is they probably took Hooded Stranger and so want a mask in your territory, probably took Audacious Aspect and/or Vision of Success which asks for holding in no man’s enemy if you don’t have a mask yet, and maybe took Solid Spread which needs invading into both those territories. If you know you’re facing Malevolent Masks, a Longboard might be a good idea since it also makes it harder for them to pack the tokens in a safe place defensively while also making those objective cards harder, but beware if they want to play passive and don’t mind.
Objective Placement in MM is somewhat wide open. They almost certainly want to hold, but don’t actually care a ton about where they do so, at least once the masks come online. You could try to place some in your territory as far back as you can, which would make it harder for them to get to and give you relatively fewer tokens to play whack-a-mole on (unless they took Displacing Figurine and teleport over there). They also care to an extent about odd and even, but you can’t really control that during placement. Probably just put the tokens where you need them and be prepared for the fighting to be in those locations.
Fighter Placement against Malevolent Masks depends more on your approach than theirs, and again with no plot card you may be in the dark to start. The single best thing you can do against a Masks player is deny them their ‘seed glory’ – if they don’t have glory, they can’t buy a mask, and the scoring train can’t leave the station. Should you know they are masking up, do not leave a one-shot-able fighter in early charge range or able to be dunked into a lethal hex unless you want to hand them that activation 1 kill and watch as they start piling glory up faster than you can say ‘no fair, I want a do-over’. That said, once they have that glory you need to be active on the disruption of their hold plan, so you can’t hide too far back either.

Priority Targets against Malevolent Masks are anybody with a mask. The moment it comes on, no matter which mask it is, they have to be dealt with. They can score for holding with that mask, being inspired while wearing it, killing while wearing it, being in your territory while wearing it, or even just plain wearing it if enough of their friends are too. The other priority target is whatever resurrection engine they might have. A death warband leader that allows for fighters to come back on the board is almost always a good thing to take out of action, but this is especially true when facing MM.
Positional Tips in the Malevolent Mask-up is a little easier than in some others as you have really only one thing to remember – if a msekd fighter is in your territory and you can’t get them out, at least have somebody adjacent to them. They get one glory from Hooded Stranger for being in enemy territory, and an additional for being alone when they do it. If you give them an end of round hug, the Masks player just lost a glory, or might decide to hold the card and try to score it later, clogging up their hand for a round. Against any deck it’s a decent idea to focus on tokens even if you don;t have a need to hold them yourself, but it might be even better than usual to run onto objectives to block their surges. Delve the objectives when you feel safe to do so as well since the MM scoring explicitly relates to Objective and not just feature tokens.
I hate that I’m telling you guys this. Say hello to your local mask player and give them a high five from me.
Rimelocked Relics

RR is an interesting deck that really leans into the ‘Flex’ playstyle -hold some objectives and get some kills, and do it in multiple territories. The playstyle inherently is reactive to whatever you’re trying to do, so the RR player has ways to counter-counterplay you, in a sense. Doesn’t mean you shouldn’t try! You will have the benefit of a Plot card to help guide your choices early on. Generally speaking you’ll want to keep them off of objectives and/or hold some yourself while killing some of their fighters and/or not taking damage yourself. Unless your deck rewards both things well, you’ll probably need to lean into whichever you score best with and starve them out via not letting them hold more than you while you refuse to interact in the fighting, or not letting them fight as well as you. An RR player who can’t hold 3, can’t hold in your territory, can’t hold all in a territory will struggle, and an RR who can’t survive your onslaught (or can’t reach you because you’re too defensive) will also. Another thing to keep in mind is they have five Objective cards that mention Rimelocked Upgrades, so if you have the opportunity to take a Rimelock-equipped fighter out of action you probably should – especially if that fighter is on an Objective token.
The easiest Objective cards to counterplay are Cold Front (either hold equal to or more than they do, or make sure they have as many or more wounded as you do. This might mean spreading damage rather than finishing fighters off), Icebound Defenders (keep them from holding all in a territory, either by crowding heir board with tokens or occupying one of theirs yourself), Steaming Corpses (don’t kill their fighters until the Rimelock has flipped face up), Stolen Warmth (Don’t let them have two surviving face-up Rimelocked in an end phase if possible), and Wintry Conquest (either don’t let them hold 3 or make sure they have no Rimelocked fighters able to help out)
You’ll notice a bit of conflicting advice above – wait for their stuff to thaw, but then don’t let it live while thawed – yet also they have a surge for thawing. When in doubt punch it out early (or at least keep it off of objective tokens), since you also don’t really want those things to turn face up and be used against you; some of them are quite strong. You also don’t know that they’re taking Steaming Corpses. Even if you do give up the 2 glory from it, you might save yourself much more by blocking their other Rimelocked cards and the benefits the Upgrades themselves confer.
Board Choice when facing a Rimelocked player is pretty much dealer’s choice. The deck itself doesn’t make mention of features, adjacency, or anything else, so you can pick what you need for your own goals.

Orientation of the boards in an RR pairing again is mostly up to whatever you need. There are a few cards that specify holding objectives in no-one’s or enemy territory, so you may benefit from Longboarding or offsetting to make the chokepoint a little harder for them to navigate, but you’ll also probably have to be invading them to stop their hold shenanigans or snipe that backfield Rimelocked upgrade-bearer, so do this at your own risk.
Objective Placement is of particular importance when facing RR, and you’re fortunate enough to get a plot card to tell you that it’s time to be on your A game. The most important thing to know is that the Relics player is almost certainly bringing Icebound Defenders, which specifies that they need to hold every token in a given territory, and they must hold at least 2. This could mean 1 in theirs and 1 in no-man’s, if either of those have only 1 objective. If you’re able to, finding a way to force 3 in their territory and none in no-man’s will probably be your strongest play to block this card’s ease of scoring since they’ll have to hold all three of those, or abandon that plan and try to hold both of the ones on your side. Some of their surges ask for holding in no-man’s or enemy’s (or even two of those), so this placement strategy does make life hard for the RR player. They’ll likely be savvy enough to prevent that from happening, so another thing you could try for is getting 2 in theirs and 2 in no-man’s, but that’s less ideal. Optimally there aren’t a ton of objectives on your side of the board (and those that are should be hard to reach (but Gelid Cyclone does exist)), since that blunts a lot of the ‘invading hold’ cards. Depending on their pairing and strategy they may not have taken those, though.
Fighter Placement in the Rimelocked Relics matchup can be largely based on your specific cards and goals. They will be trying to fight you, so don’t give them easy early kills, but they’ll also be trying to hold and you’ll need to be able to reach them when they do it.

Priority Targets when facing RR are as usual for the Upgrade-focused rivals decks- hit the guys with upgrades and kill them when you can. We talked a bit earlier on about the ‘do you let it thaw or not’ conversation, but whatever you decide (and probably kill them before it thaws in most situations), you do want to kill their Rimelocked Upgraded fighters before they can use them for scoring stuff. At the very least, you want to be able to keep those fighters off of objective tokens. Having a Rimelocked upgrade while not on a token renders some of them useless on the card itself (Arctyc Crown, Polar Connection) and weakens the effect of Leyfrost Conduit. It also blocks a few of their Objective cards including Wintry Conquest (for 3 glory!) Glacial Dominion, and Defrosted (which might be their only shot at scoring it that you block).
Finally, if your warband or pairing also cares greatly about upgrades (Hungering Parasite’s Bane of Heroes, Toxic Terrors Poisons, Daring Delvers Explorers, Malevolent Masks… masks) you want to eliminate the fighter with Frostbite quite quickly or find some other way to shut them down. If they hit, there’s a chance they Rimelock that upgrade, and it becomes useless to you for a time. If that time is right before you would have scored some important card, then you’re SOL.
Positional Tips when facing a Rimelocked matchup are almost entirely focused on objective tokens. If you’re on them, they can’t be. If you delve/flip them, they have to delve them back. There are relatively few other considerations unless there’s something special in their warband cards, so don’t worry about adjacency, occupying certain territories, or any of that unless it’s part of your own gameplan.
Wrap
That’s it for this Counterplay article! Let me know what you think about this idea and what other things you can think of to counterplay the Wyrdhollow Rivals decks. I hope you enjoy spending your glory, and don’t forget that your opponent can’t spend theirs if you don’t let them score any in the first place.


Leave a comment