
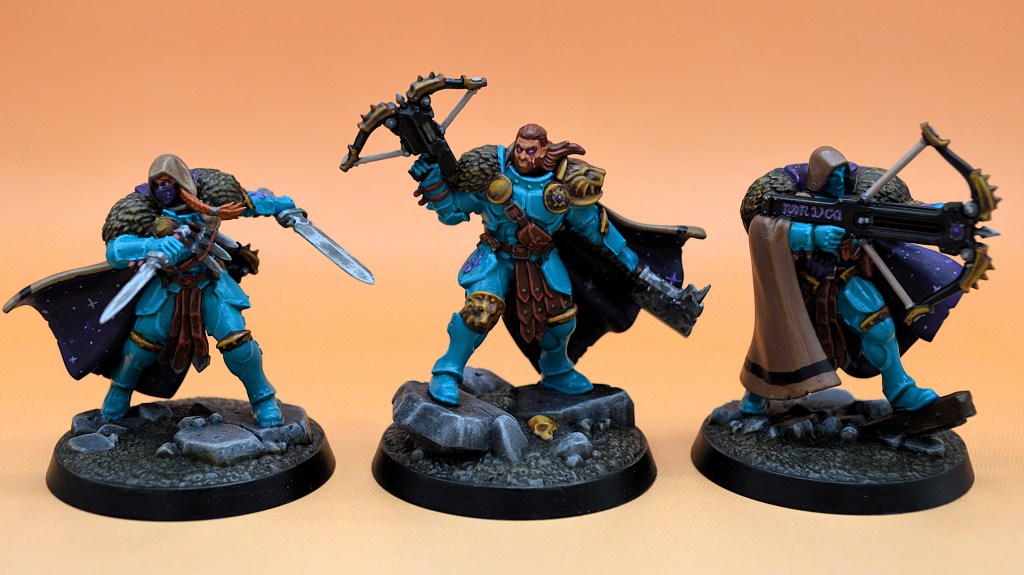
Hey team! Today I’ll talk about the deck I brought to the 2025 Tacoma Open Grand Clash. I ended up taking The Emberwatch with Blazing Assault & Wrack and Ruin and had a blast in prep for the event. I’ll post an event recap in the days to come to talk about how the deck performed in competition, but today I’ll run down the card choices I made and my practice leading up to the tournament.
Click here to check out other Deck Builds/Love Letters on Spent Glory
Why Emberwatch?

There are a dozen reasons anybody picks their warband for a competitive event – what’s fun, what you have confidence with, what you think is a strong meta pick, what can counter the top meta choices, what pairs with good/familiar decks, and so on. All of those played a part for me this time around.
For starters, I brought The Farstriders to the TacO last year, pairing with the first edition’s Rimewyrm’s Bite, which ends up being quite similar to Emberwatch with Wrack this time around. While I didn’t do as well as I had hoped, why mess with mediocrity?
I’ve also been enjoying playing them, as they have a legitimate flex-aggro toolbox that lets me adapt to different opponents and board states, getting extra range or damage when needed, repositioning fighters (and helping to inspire), as well as the incredibly clutch “Alone I Stand!” ability, where I can scoot around last second to secure positioning and score/counter objectives. I’m not the only one who likes them, as they landed in the A-Tier for ‘most enjoyable warbands’ last month. Plus, I liked how they ended up looking after I had them painted up, and they’re in Celestial Vindicators livery (read: Baja Blast, which is as close to a team mascot as the Seattle crew is going to get).

Next, I had to consider how the meta appeared to be shaping up following the Balance Update that dropped in May of this year. Elite aggro took a bit of a downgrade, especially if pairing with Countdown, so I started to look elsewhere. I had hoped to make Edge of the Knife work for fun’s sake, but wasn’t having the reliability of success I wanted. Realmstone Raiders also received no clarification, and I wanted to be certain of how my cards worked going into an event (as well as reduce my mental load), so that was out.

I expected to see a bunch of Gitz unfortunately, and there’s not a ton that can really counter that even post-update (though I did win a practice game pretty handily), but I also expected to see some Grymwatch. Who’s better at assassinating the Duke? I can shoot incredibly far, ping out a vulnerable fighter, and teleport behind him if need be. I can reasonably go toe to toe with other elites, and have some tools to counter pillage (which I expected to see en masse) without having to play it myself, which I haven’t particularly enjoyed. Is it enough to win first place? Who knows, but I’ll have play into almost everybody and will probably enjoy myself along the way.
Why Blazing Assault?

The Emberwatch are reasonably accurate, and BA both rewards and boosts that. It has a great surge suite with some pretty reliable one-glory end phases. The thing these stormcast need most is a little help in the damage department, and BA also gives the most juice in that aspect out of any available decks. It also has probably the strongest power card package of any offering.
Why Wrack and Ruin?
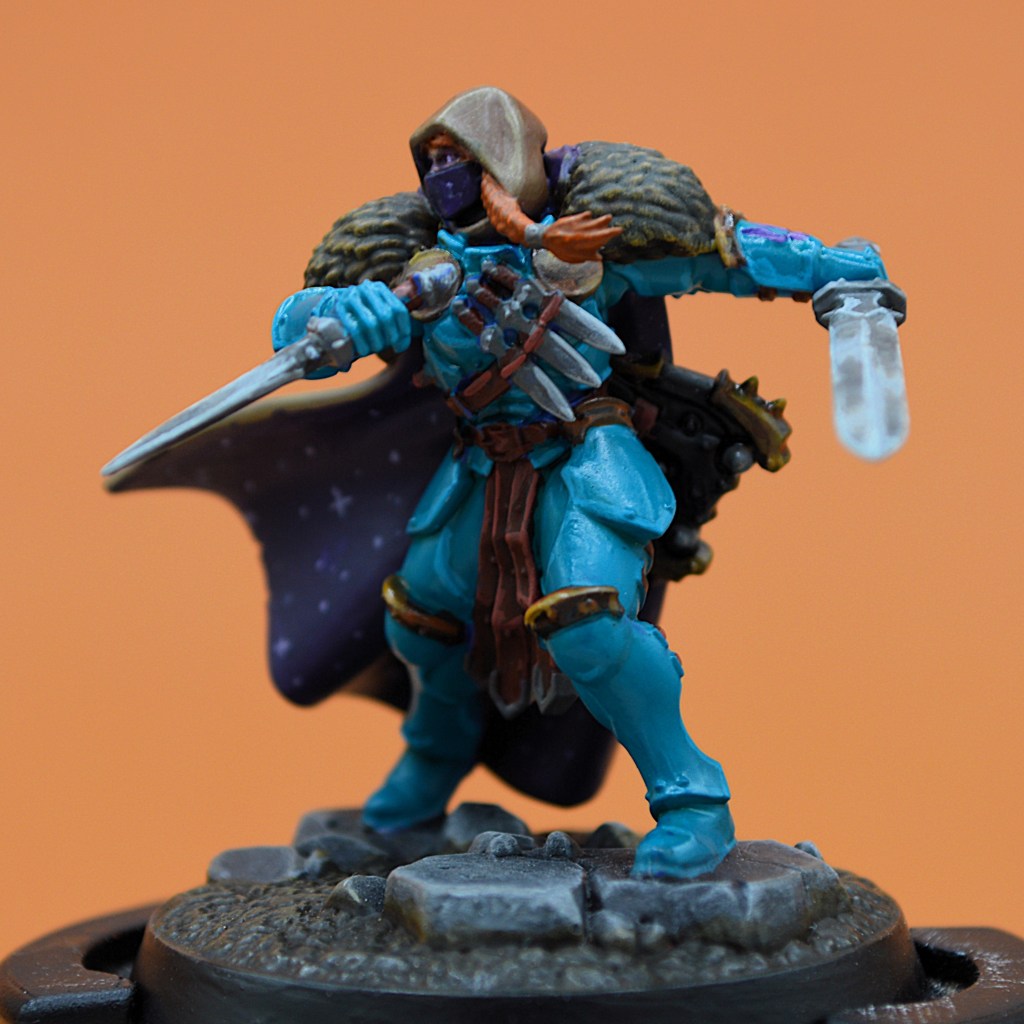
For starters, I have fallen in love with the deck after using it with Dread Pageant at LVO. Also, following the balance update, it was one of the only decks to not see any real downgrades and has no restricted card. The end phase scoring is positionally difficult for many warbands, unless of course you’re playing a low model count warband with a free end-of-round push. It may not be the world’s strongest deck, but it has fun pieces and I have a good deal of personal experience and comfort with it, so it was hard to resist! The harder part was building a deck with a decent glory ceiling while also being scoreable, because a couple of those end phases be bad.
General Strategy
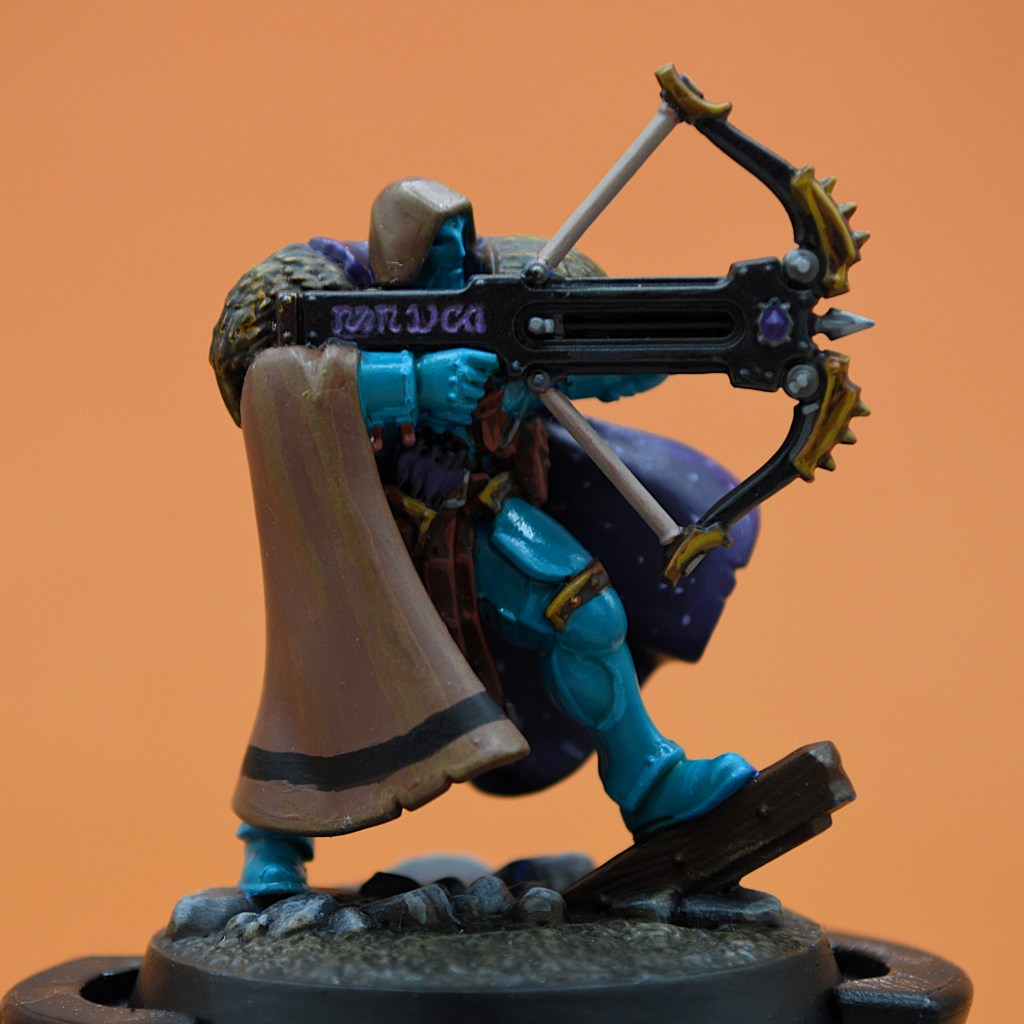
It’s been matchup dependent, as most strategies should be, but I generally take my first activation with Yurik, and opt to charge unless I’m worried about Reckless Fury scoring Unrelenting Massacre. He’s my lowest priority inspiration, and I’m not usually leaning on him to do much besides get the ball rolling (though multiple times he’s been my hero). I usually will blow Vanguard dash in the first round to position somebody in enemy territory to inspire, as getting one of the other fighters to 2 shields with better accuracy is the bee’s knees. Preferentially this fighter is Ardorn, unless I’m worried he’ll be slain and give up 3 bounty too early.
Kill at least one fighter and stand on one token to block Wreckers as well as Strip the Realm, make use of I Stand Alone! to slip on if needed, set up no fighters being adjacent/in edge hexes, and otherwise get slaying. The dream is having a tooled up Ardorn (or maybe Farasa) inspired and dishing attacks all game long.
As the flavor card for Wrack and Ruin states, “Perhaps it is better to abandon all hope and instead focus on what can be achieved: ensuring those foes still down in the dark with you meet the same grisly fate”
First, the Evidence
You fool! You’re playing a trash pairing! Nobody takes this to tournaments! The only two people who did got 13th at LVO and 28th at the Copenhagen Clash! You’d be a fool to try that again.
So one might think (and I sure did), but get a load of this:
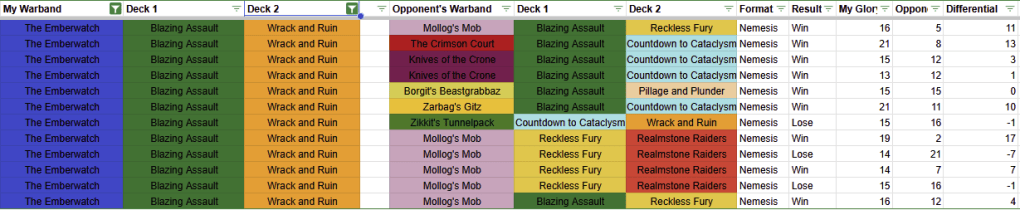
It’s not a ton of games, but cha boy went undefeated through the first 6. Unfortunately this all came in the form of Blazing mirrors, so while I can pretty confidently say ‘fite me IRL’, I’m not sure how well I’ll do against Cat/Pil or various forms of flex and hold. I’ll be leaning on my prior experience there. When I played Andrew’s Golden-Ticket-Winning Tunnelpack though, I had trauma flashbacks and definitely overextended and took stupid risks, but still managed to claw back within one glory. Sucks to lose, but I learned some lessons and had the confidence that it could hang with a strong, worlds-bound pairing/player even when I play poorly. My other losses happened when I made some ‘sure, why not’ stupid attacks to close out a game instead of running away from Mollog when I was ahead. All 3 times, any one of 2-3 ‘mistakes’ not being made means the game was mine. In a marginally different world, with a marginally better player, this deck is 12-0 headed into Tacoma.
Even so, it’s 9-3 in limited prep for the event, scoring an average glory of 16.17 glory each game with a differential of +57 over 12 games for an average of +4.75 glory. Not too shabby! Also, I hope against expectations I run into lots of Mollog at the event since that’s the only thing I got enough reps into.
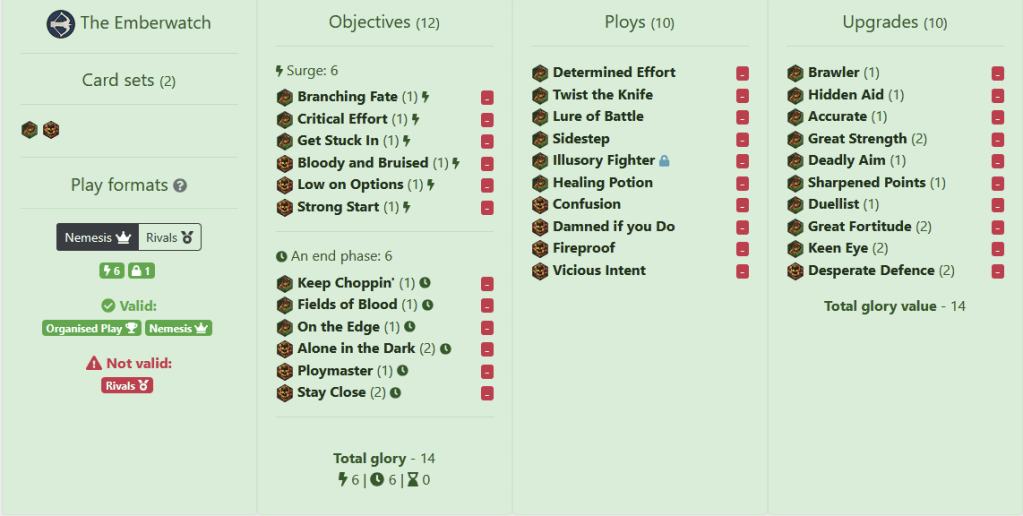
My glory ceiling is 14, which was a bit of a bummer since ‘optimum’ is usually closer to 16-17. I simply couldn’t justify taking either of the other 2-glory end phases from Wrack, and if I was being serious about an event I had to leave Annihilation on the cutting floor. I should collect more than the average amount of bounty though, so hopefully being 14 glory ceiling in cards won’t be the worst outcome. Having looked through other Grand Clash decks in prep, a good chunk of Blazing Assault pairings that podium ended with a 15 glory cap, so I might just get away with it. I eventually cut Go All Out, as it both bricked too often and reduced my efficiency. It’s nice to see surges more frequently, and have a better chance of seeing one of my 2 glory cards at the right moment!
My upgrade cost landed at 14, which is pretty close to the supposed ideal of 13. With four different 2-glory upgrades, I do occasionally find myself strapped for glory early game, but each of these are so dang good I wasn’t willing to pass them up.
Of course, very few people have brought Blazing with Wrack, and nobody has been very successful with it in a big competition. First time for everything, right? Let’s look at the cards I chose to try my luck with.
Surge Objectives

Bloody and Bruised – I will be damaging fighters and not killing them all that often since I have lower damage output, and have relatively survivable fighters, so it has scored in my practice games. It really only struggles late game when there aren’t enough bodies left, and if that’s true then I’m probably doing pretty well anyhow.
Branching Fate – with the changes to Underdog, this has become less reliable. With multiple sources of 3+ dice, +1 dice for the others, and some reroll tech, this will happen eventually. I’m going to be attacking 11-12 times a game, after all.
Critical Effort – roll a crit, and you don’t even have to hit? That’s a matter of time. Several plus dice effects in the deck up the reliability.
Get Stuck In – targeting an enemy fighter in enemy territory is really only bad to draw if it’s late game and we’ve run past each other. Nearly an auto-score, and with my reach you can’t hide.
Low on Options – lame to get early game, but close to an auto-score later on. I’ll treat it as guaranteed glory and am willing to hold it across rounds if needed
Strong Start – “A Philosopher once told me that a life well lived is one lived in peace. Probably never left his damn library” – Ardorn Flamerunner. Is it reliable? No! In most matchups I’ll be getting the first kills though, and I can burn Raptors of Sigmar if I really need to ensure it.
End Phase Objectives
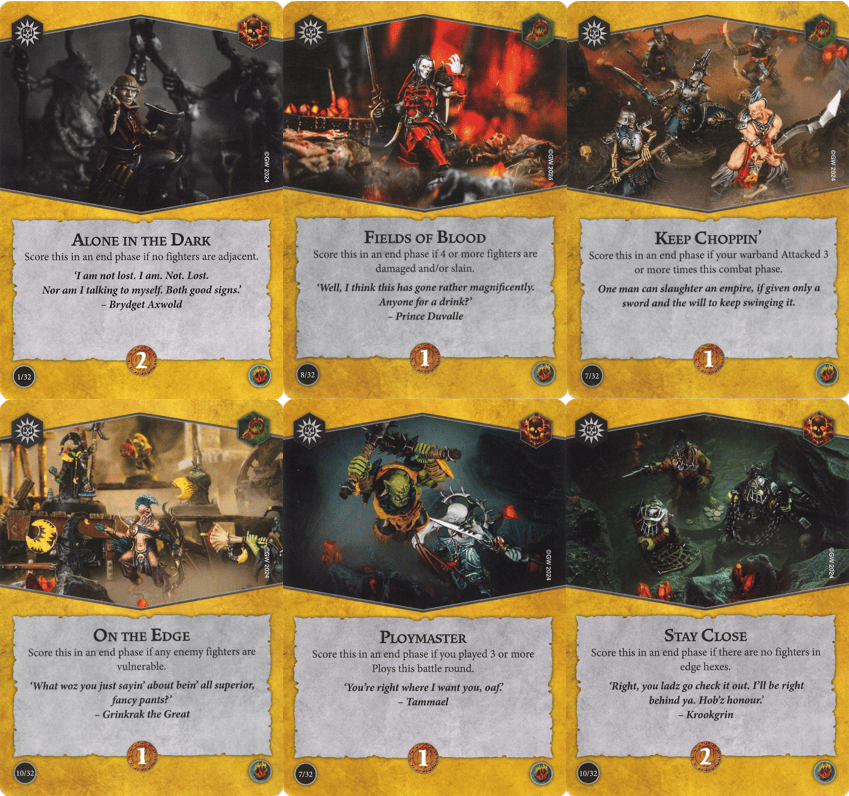
Alone in the Dark – nobody on my team NEEDS adjacency and I have a warscroll push in Alone I Stand! I can’t always score this, but it’s one people don’t think about counterplaying as often. The difficult opponent is a horde that I haven’t thinned yet.
Fields of Blood – A staple of Blazing Assault. If this isn’t scoring, things are already going bad enough I’m losing anyway in all likelihood.
Keep Choppin’ – Attack 3 times in a round? I have range 3-4 with a once per game extension of 1. There are very, very few rounds I fail to score this.
On the Edge – An enemy fighter is Vulnerable. For 1 glory. Is it great? You bet your bucket it’s not. But with my 1-2 damage base, it does sometimes naturally come up. I’ll usually still opt for a kill if it’s available to me, and this is an end phase I’m more than willing to ditch any time it doesn’t score. Against hordes with 2-health fighters, a potshot at the end of the round can nab this for me often enough.
Ploymaster – Play 3 ploys this round is also not beautiful, since I have to both have them and play them, so it only happens about 50% of the time without using a Focus action. Another ditch-able card, but I have a little more control over it.
Stay Close – Most people I have encountered don’t think about counterplaying this and will come to meet me in the middle, and worst case I can use Confusion or Lure of Battle (and/or Alone I Stand away from an edge myself).
Ploys
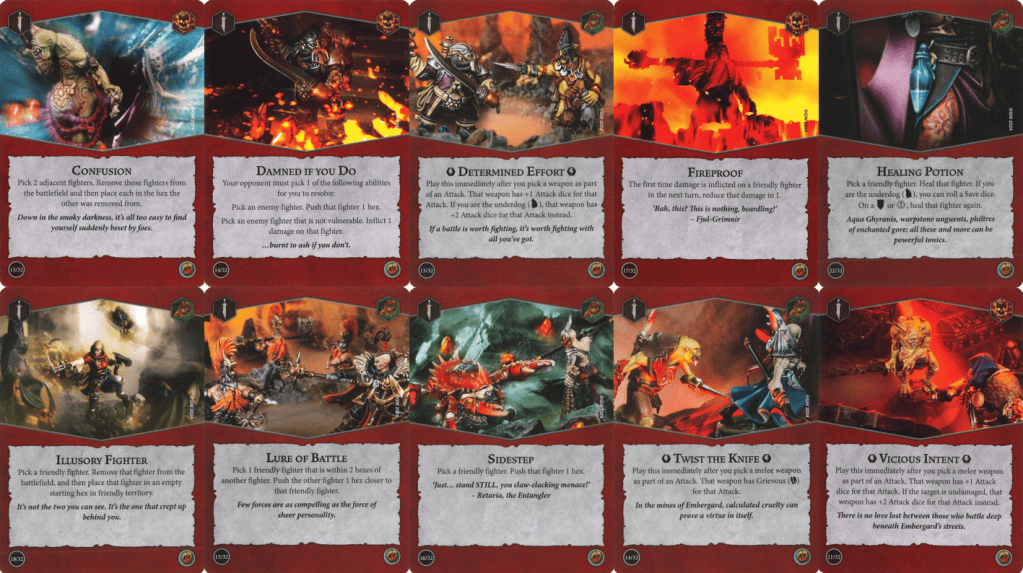
Confusion – a GOATed card in most builds, but can take some more finesse to use right. I have stolen a treasure token to counterplay enemy objectives. I have pulled somebody out of an edge hex (and then ran away myself) to score Stay Close. I have pulled enemies apart and then ran away to score Alone in the Dark. Heck, I’ve cancelled out the other guy’s Confusion just for giggles. Take this card.
Damned If You Do – a beautiful card that gives my opponent a bad choice, which adds pressure and mental load. I can bring somebody into kill range, get them off a token, out of adjacency, out of an edge hex, you name it.
Determined Effort – +1 dice. You rarely if ever are sad to see it, unless you’re really struggling to score branching fate with inspired fighters. On a bad day I’m the underdog and +2 dice is icing. More dice, more hits, more kills, more winning #TigerBlood
Fireproof – One of W&R’s best cards, this can slow down an enemy’s plan and make them wait to throw that 3 damage charge, or (possibly even better) decide just to toss a 1-2 damage attack at you and accept it will only do 1. This keeps your fighters alive and useful for you, or potentially makes them take a move/focus instead which is still helpful.
Healing Potion – You know what sucks? Ardorn in kill range. You know what doesn’t? Healing potion.
Illusory Fighter – Here’s my restricted card. I usually take it to bail out an overextended fighter after their inspire and keep them alive, but it can also allow for another unexpected attack to close out a round or help me secure my 2-glory end phases’ positioning requirements.
Lure of Battle – ‘GET OVER HERE’. Clear a token, take another melee swing, you name it. Did you know you can even pull one of your own fighters? I’ve gotten out of attack range by yoinking a vulnerable Yurik closer to his pal Ardorn with this card. It’s a good’n.
Sidestep – If nobody got me, I know Sidestep got me. Can I get an Amen?
Twist the Knife – There is no grievous in my warband, and no damage 3. This is a quick fix for that. Since Raptors of Sigmar is an extra damage afterward, Grievous can stack with it and I have more than once laid down a 2 damage + twist + raptors hit and deleted a 4 health fighter. That’s like, Nightvault-era stuff. It’s also awesome for allowing me another chance to do 3 damage in round 1, which helps get the ball rolling.
Vicious Intent – plus dice, which helps you hit, do damage, get bounty, score cards, and win. You only get an additional die against unwounded enemies, which is less ideal, but even +1 dice can often be the difference maker especially when trying to score Branching Fate or Critical Effort. The look on people’s faces when I happen to say “hey, I’m getting +2 dice here on that fighter who you thought was safe, I’ll twist the knife, and after I hit them I’ll close them out with Raptors” is pretty dope too.
Upgrades

Accurate – Rerolls mean more hits and more scoring of Branching Fate and Critical Effort.
Brawler – Can’t be Flanked or Surrounded can be a little niche, but it’s helped me against Gitz and Mollog, and since it lasts all day you’re not afraid to get into the scrum. Situational boosts for my defense and accuracy, at the cost of 1 glory.
Deadly Aim – A late add to my deck that immediately showed benefits, ensnare on every weapon is quite nice into the current dodgy meta.
Desperate Defense – potentially keeps somebody alive for just a touch longer, or changes the math on your opponent’s plans and makes them change tactics. Both options let you wring out one more activation with that critical fighter. It’s also the only Upgrade I took from WnR – BA is just that good in this department.
Duelist – Beautiful card, since I have such attack range as to be able to use it effectively at will and position how I need to score, slay, escape, stunt on ’em, whatever.
Great Fortitude – Hard to pass up for effectively any gameplan, especially one where you’re planning on getting in the mix. Put it on whoever you need take out of kill range, or the fighter with tons of upgrades to keep them ticking for one more hit. Plus, it has Sir Jedran Falseborn on it and how do you pass that up?
Great Strength – I need a shot at 3 damage. I need Great Strength. I need a fighter with this, Duelist, Accurate, Hidden Aid, and Keen Eye blazing some ruin through my enemy’s lines. Who ever worried about all the eggs being in one basket?
Hidden Aid – offensively and defensively useful, the only shame is you need to be adjacent. With Emberwatch having range 3-4 attacks and a chance to extend their melee by 1, this isn’t as great for them as it is for others, but still too good to pass up. Farasa needs it the most with her swords mojo.
Keen Eye – mo’ dice, mo’ glory. Unless you’re on the wrong side of Branching Fate, but I’m still pretty happy to see it equipped.
Sharpened Points – cleave is often handy, and it works on all attacks, even the crossbows.
Wrap
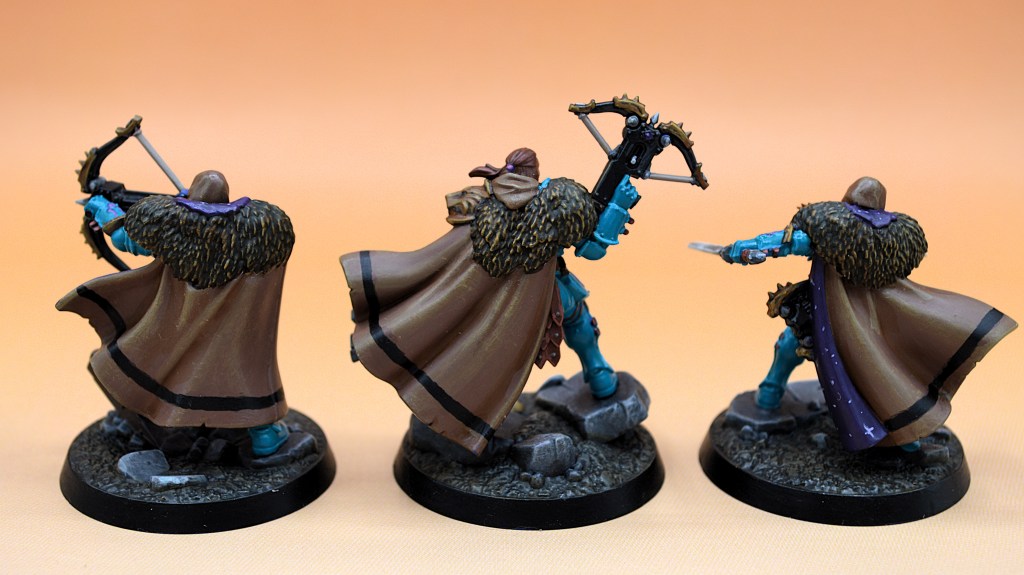
From what I’ve seen in practice, I’m going to hit, and eventually slay what I’m striking at. I can piece up big boys or isolate them from their friends, outdance other elites, and lay into hordes without too much challenge. It’s right in the pairing; I’m assaulting, and they’re getting ruined. The only question that remains is to see whether I can do it quickly enough and with enough luck and finesse to outpace the glory engines at the top of the meta (…and avoid the temptation to overextend trying to assassinate that key target too early).
By the time you read this, the Tacoma Open will be over, and in the coming days I’ll give a rundown of my matches at the Grand Clash if you’re interested to read about how the deck performed live. In the meantime, feel free to take this deck for a spin and spend some glory with a relatively unexplored pairing!




 Spent Glory
Leave a comment