
We have a very special one this week – this entry in the Love Letters Series, where readers discuss the warbands and pairings that they enjoy the most, features Imogen of the UK who has played dozens of games with the Thricefold Discord. That wealth of experience has led to significant competitive success in the Agents of Sigmar/South London scene, and we are being treated to a complete breakdown of how best to play this finesse warband as well as how best to play against it. Grab your favorite beverage and settle in for a good read – this is one you won’t want to miss.
Who are you, and where are you from? How did you get into Underworlds? Do you have a local group you play with, and if so, do they have an online presence to help people find you?
Hi, I’m Imogen from South London in the UK. I’ve thought Warhammer Underworlds looked pretty cool since around 2019, when the second season was released. At the time (and for many years after), I was pretty focused on Middle Earth Strategy Battle Game, so I didn’t really get into Underworlds until Direchasm. That was when I got my first starter box and my first warbands (Dread Pageant, my beloved!). My friends and I played a few games and really enjoyed it, but then COVID put a stop to things for a while.
A few years later, MESBG was feeling a bit stale, so I decided to properly commit to Underworlds. I taught a friend how to play, and not long after that, the new edition was announced. We kept prepping for an event we had planned at the end of the edition and I ended up winning it, running Malevolent Masks with Lady Harrow!
What drew me to Underworlds in the first place was the chance to use amazing Age of Sigmar models without having to play AoS itself, which never really clicked with me as a system.
I play with a little group in Redhill, just south of London associated with the Agents of Sigmar from Youtube! If you want to join us its best to message their Facebook page.
Warband Roundup
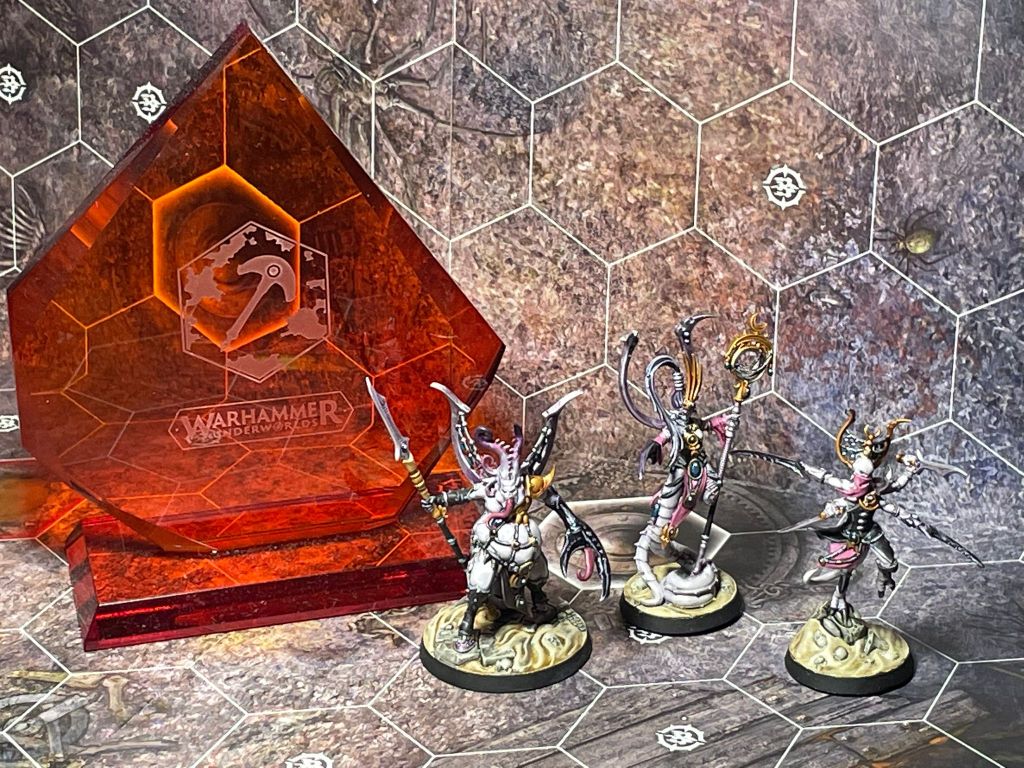
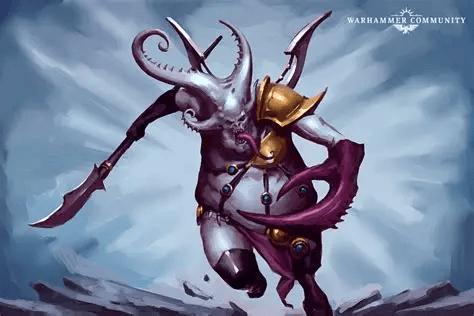
The Thricefold Discord are probably best described as an elite aggro warband that specialises in countering other aggro warbands. They thrive when opponents come to them, as they boast some of the best damage output in the game—offset by having the lowest health pool. They reward good positioning and have powerful fighter cards to boot. With their return in the upcoming Spitewood box, I expect we’ll be seeing them a lot more!
I absolutely adore these little hate-mongers (even though they were a nightmare to paint). I’m going to go through their warscroll and break down why it’s so powerful.
Inspire Condition
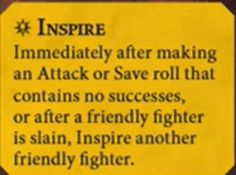
First off, they’ve got a really easy and satisfying Inspire condition. Rolled badly on an attack? Inspire. Failed a defence roll? Inspire! It’s a nice thematic bonus for when something goes wrong. I find that most of the warband is usually inspired by the end of round one, unless your opponent isn’t trying to attack you.
- Vexmor gains the least from inspiring, but if you’re planning on charging with him, he needs to be inspired to have any real chance of hitting.
- Lascivyr gains the most, extra accuracy and a dodge. You want Lascivyr inspired ASAP, for reasons I’ll get into later.
- Vashtiss gets a damage bump on her melee, an extra range on her ranged attack, and a dodge. Not bad, though her two attack dice remain a bit of a limitation.
Evasive
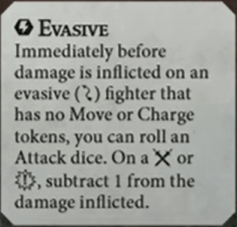
The original version of Evasive was busted, 50% damage reduction if the opponent dealt more than 1 damage. It’s been double nerfed since, and now it’s not something to rely on: rarely active and only triggers about a third of the time. In a recent event I won, I rolled for it about eight times and never hit the reduction once. It’s not essential for winning games, but if you can keep it active longer, it’s a nice bonus.
Indolent
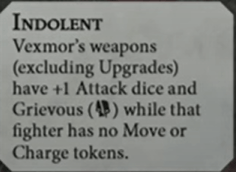
Many players immediately assume Vexmor is terrifying, and they’re right. This rule heavily influences how your opponent plays. A fully turned on Vexmor (which isn’t hard to achieve) can absolutely wreck enemy fighters, especially in the mid-game. There are some strange synergies with this too, which I’ll get into later.
It used to affect equipment, imagine Desperate Rage or Hurled Weapon coming in with an extra dice and grievous. Gross.
Wicked Slice

This ability is worded a little awkwardly but is incredibly powerful. Basically, whenever Lascivyr makes an attack, she pings 1 damage to an enemy within 2 hexes who isn’t vulnerable.
This rule is bonkers. The attack doesn’t have to hit. There’s no dice roll. You just need to be within two hexes of someone, which is very achievable considering Lascivyr’s movement of 5. The only restriction is that it can’t finish fighters off, though there’s one exception I’ll explain later.
It makes it really easy to score cards like Hounds of War, Wreckers, and Fields of Blood. It’s great versus hordes (ping to make them vulnerable, then finish off with cards) and versus elites (stacking ping damage on a single fighter). Try to get this activated as much as possible.
Eldritch Enmity
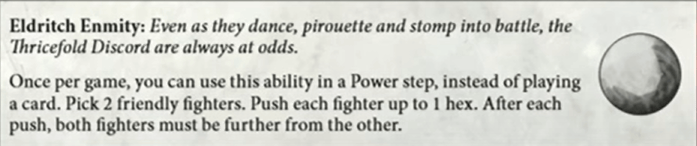
Did you know this lot don’t like each other? Eldritch Enmity gives you a built-in push, and built-in pushes are very good for this team, especially Vexmor. It can be awkward to use, since you must push away from each other, but you don’t have to push both fighters.
You need to be thinking about this constantly if you’ve not used it yet, as the positioning can be really fiddly. I often use it to get fighters out of trouble or punish an opponent who’s stepped too close to Vexmor.
Feuding
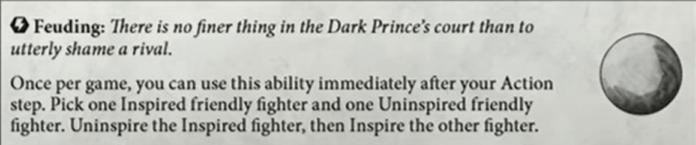
This is a fun little bonus that I don’t often use, but it lets you swap which fighter is inspired. I usually use it when one inspired fighter has charged and I want to inspire the next one I’m activating.
It’s also helpful if a particular fighter is “stuck” and not inspiring. For example, if your opponent keeps targeting one model, you might find the rest of your warband gets inspired, but not them. Feuding gives you a way to correct that, if you can read what your opponent is doing.
Vile Temptations
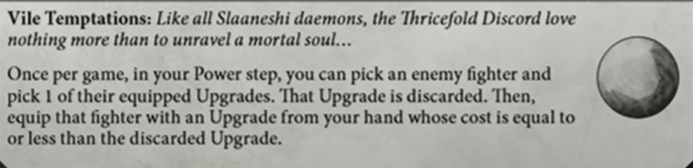
Now this is an incredibly fun and unique rule, with loads of potential. Its main use is stripping off a Great Fortitude from a vulnerable fighter to kill them. Remember earlier when I said Lascivyr can ping someone to vulnerable with Wicked Slice? Well, you can then use Vile Temptations to remove Great Fortitude, and if you give them something *really* useful like Tough while doing it, congrats, you’ve just used Wicked Slice to kill someone!
It has plenty of other uses too. Want to get rid of scary equipment or defensive tech? Use Vile Temptations. Discarding an upgrade isn’t usually a huge deal for you, but you must think about how and when you’ll use this while equipping your own fighters during your turns.
And that’s the warscroll! Six useful abilities that will likely come up in every game and give you a clear direction when building your deck. Great stuff!
The Fighters
Vexmor (The Best One)
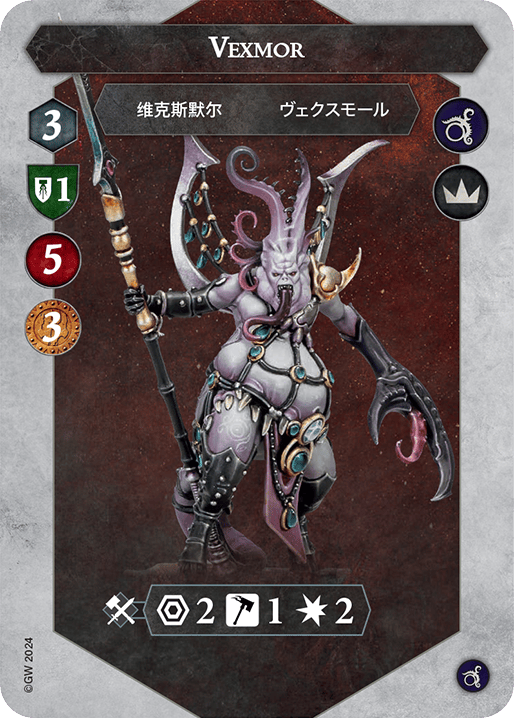
Vexmor is the leader of this delightful little nightmare of a warband, and he hits like a freight train. He’s quite slow, but he makes up for it somewhat with his 2-range melee attack. His uninspired profile is fine if you’ve got Indolent online, pretty unexciting otherwise. He’s always stuck on 1 shield, which isn’t exactly robust (a bit of a theme for this warband).
When inspired, he gains an extra attack die, which combined with Indolent, makes him seriously lethal. He becomes a fantastic board control piece, capable of reliably deleting threats if positioned well.
Vashtiss (The Whiffer)
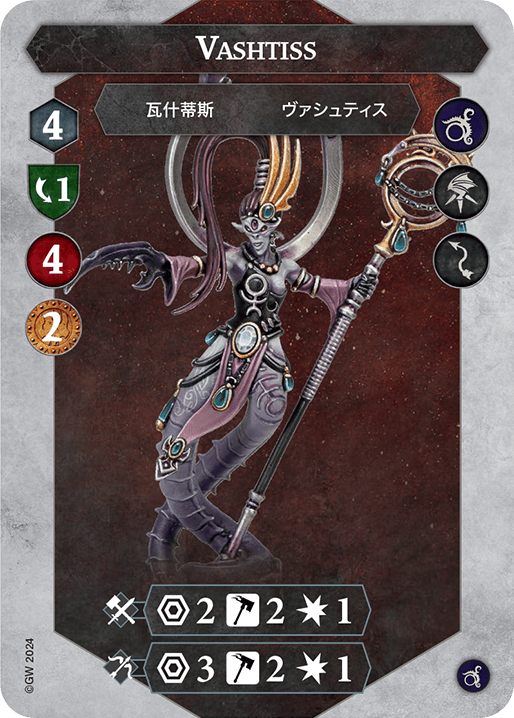
Ah, Vashtiss. The weakest of the trio, but she’s got some flexibility that makes up for it. For starters, she can fly, which is surprisingly useful given her move of 4. She can melee from Range 2 and hits on hammers, so she’s fairly accurate (in theory).
She’s also the only one with a ranged attack, which is especially helpful against horde warbands in the late game after Lascivyr has softened them up.
Inspired, she doesn’t gain extra attack dice, but she gets +1 damage on her melee, an extra dodge, and her ranged attack becomes Range 4—great for sniping. If you’re going first in Round 1, it’s often Vashtiss leading the charge with a cheeky ranged attack to start the ball rolling.
With the right upgrades, she can become a kind of mini Vexmor with a bit more reach.
Lascivyr (Actually the Best One)
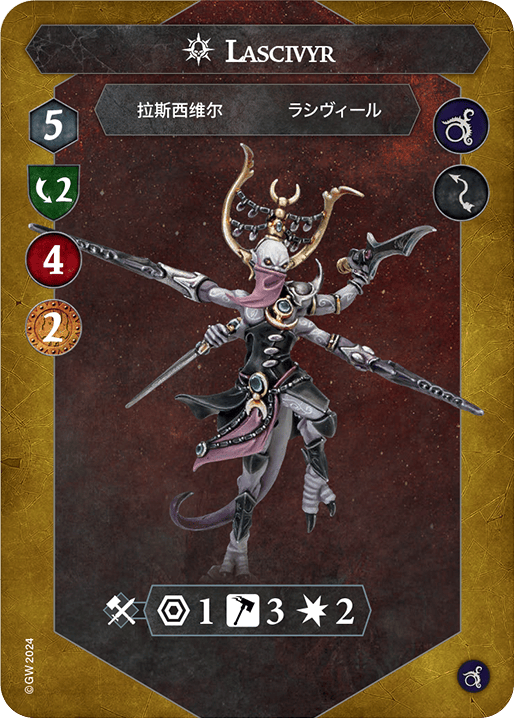
Lascivyr’s uninspired profile is decent, 3 sword dice and 1 dodge backed by Evasive. Nothing wild, but good enough.
When inspired she switches to hammers and hits as reliably as Stormcast fighters. She also bumps up to 2 dodge, which with her Move 5, makes her incredibly slippery and hard to pin down.
Move 5 gives her absurd reach, I often refer to her as “Lascivyr the Bladed Bullet”. She can dive deep to take out key targets like Crackmarrow, Zondara, or The Warden. She’s secretly just as strong as Vexmor, just a little more subtle about it.
Warband/Deck Pairing: A Love Story
What’s the warband/deck pairing you love, and how did you two sweethearts meet?
At the start of this edition, I bounced between various warbands and decks, but none of them ever really clicked. They all performed poorly against my regular opponent’s Emberwatch, who they played religiously.
Near the end of the previous edition, I’d picked up Wintermaw because I love Slaanesh models from a narrative perspective—so I decided to give Thricefold Discord a go. Immediately, I fell in love. Suddenly, not every game was a stressful scramble to protect key fighters. Now, I could brawl.
At the time, Righteous Fury had just been toned down, so the logical pairing for an aggressive elite warband became Blazing Assault and Countdown to Cataclysm, as the warscroll screams to have good push tech for Vexmor.
Over the past few months, the pairing has been refined into a truly terrifying Annihilation engine, at on point in my testing I had an 11-game streak of scoring the objective card.
What makes the deck so fun to play in your experience?
The synergy is just incredibly satisfying. At this point, it runs like a well-oiled machine. It’s rightly feared in my local playgroup and has Annihilated many opponents before the end of Round 2 (though sometimes I do play with my food and let them live until Round 3 just to score a few more objectives).
It makes you feel powerful. You present a classic aggro conundrum to opponents:
“If I charge you, you’ll kill me—but if I don’t, I can’t score anything.”
There is, of course, no right answer.
What I especially love is that this warband rewards good positioning. You can’t just blindly charge and hope for the best (well, not unless you’re desperate). You have to carefully consider where each fighter goes. For a non-feature token based warband, that level of positional play is enjoyable and I feel somewhat unique.
Link to the deck on UnderworldsDB and then describe your theory behind it
There’s actually a fun bit of evolution behind this deck that I think’s worth sharing.
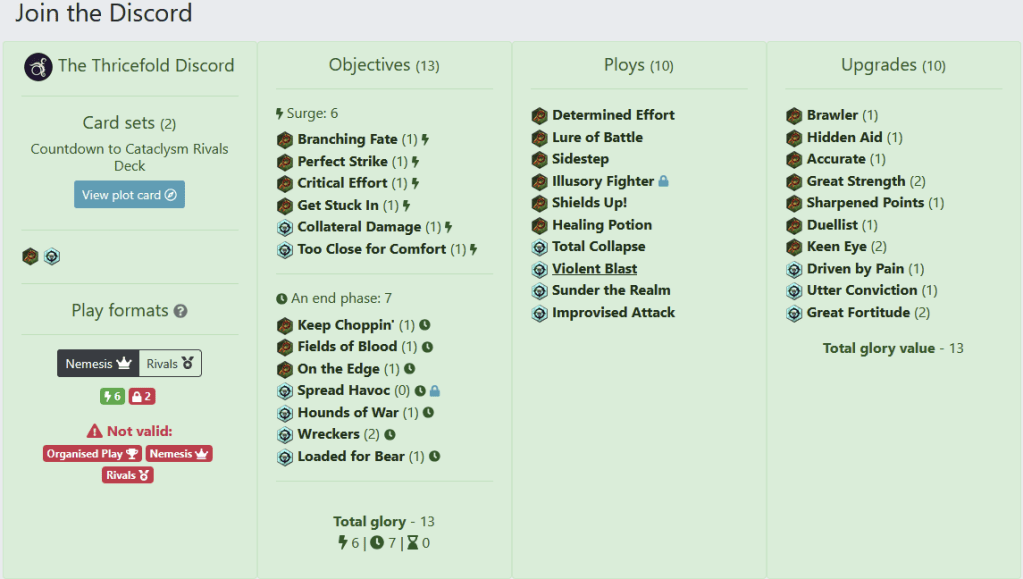
Back in April, I came 2nd at the Agents of Sigmar event, only losing to the eventual winner. I even managed to kill all their fighters (Gristlewel twice). At the time, I wasn’t running Annihilation and my deck was a little unfocused. Despite not consistently wiping opponents in my practice games, I annihilated 4 out of 5 opponents on the day. I’m confident I would’ve scored it against my fifth-round opponent (Zarbag) too, if I’d actually been playing for it.
That performance was the turning point. It was clear my deck had reached a place where Annihilation was not only achievable but reliable. So, I leaned into it.
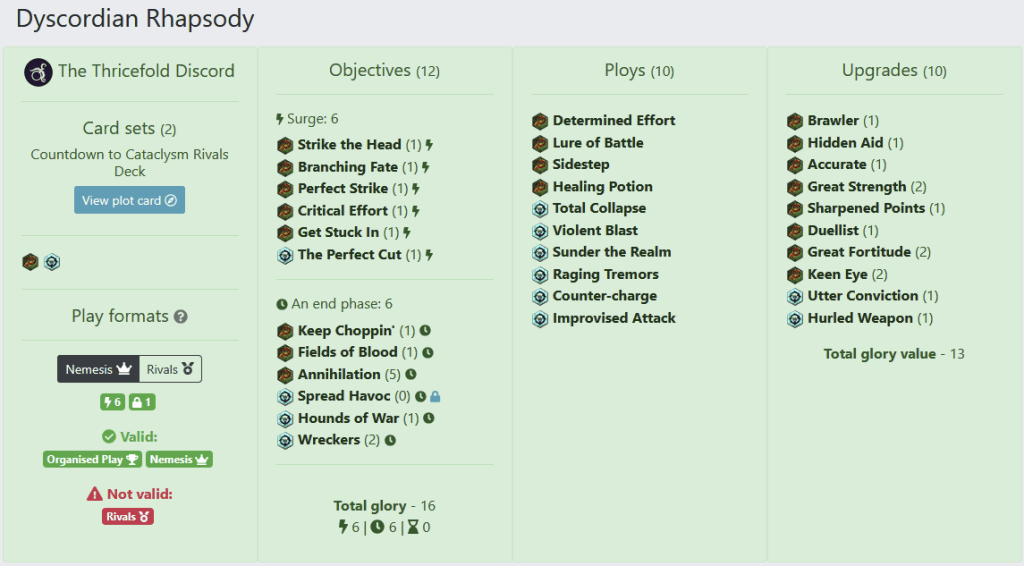
From there, I refined the build further—shaving off cards focused on defence and instead doubling down on damage output. The result was a lean, aggressive second version of the deck that went on to win a subsequent Agents of Sigmar event. Illusionary Fighter had just been restricted, so I swapped it out on a whim for Raging Tremors, which has been fine so far.
Now that the core strategy is locked in, I want to go over a few cards in the deck that might seem “odd” at first glance, and also talk about some common picks I’ve chosen not to run. Hopefully, my reasoning makes sense!
The Surge Package
Strike the Head
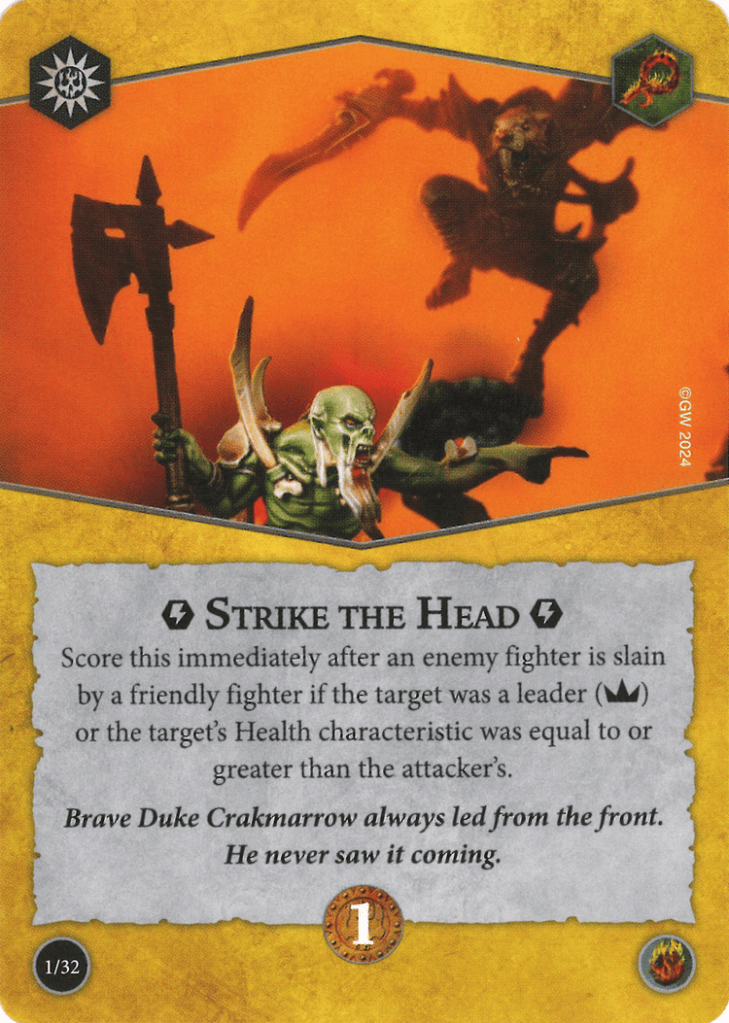
This one doesn’t see a lot of play, but it’s a bit of personal tech that’s been consistently solid for me. The Thricefold are in a unique position—an elite warband, but two of their fighters have only 4 health. That opens this card up more than you’d think.
Against other elite warbands, you’re likely to score it anyway. But even outside that matchup, over half of the warbands currently in rotation have at least one non-leader fighter with 4+ wounds. Even fighters upgraded with Great Fortitude count, so if someone bumps from 3 to 4, you’re still golden. It’s reliable enough that I don’t worry when I draw it—but don’t be afraid to toss it if needed. It’s good, not sacred.
Surges I Tested and Cut
Too Close for Comfort
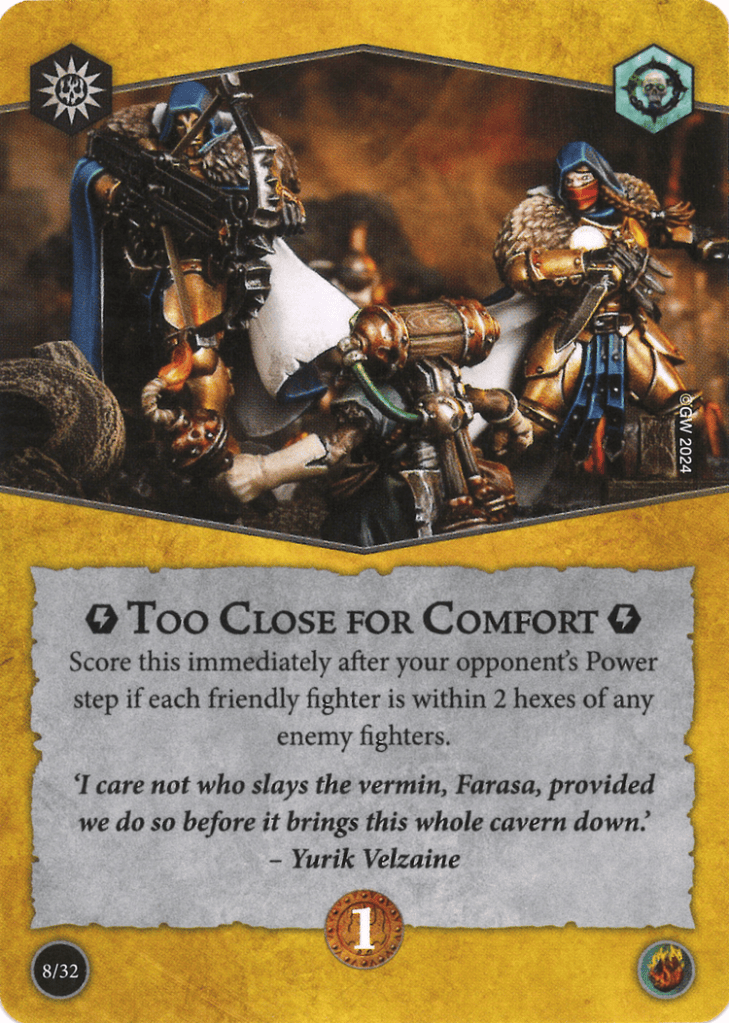
I’ve said before—positioning is everything with Thricefold. This card asks for very specific placements to meet its condition, but the fact that it scores after the opponent’s action step makes it feel far too reactive.
If you draw it near the end of a round (and especially if you’re going second), you might not even have the opportunity to score it. There’s too much reliance on your opponent’s behaviour, which I actively try to avoid in surge selection.
Collateral Damage
With the current underdog changes, you’re rarely the underdog with this warband. So scoring it relies on one of your fighters dying, something I’m definitely trying to avoid. It gives away control, and that’s a deal-breaker for me.
The End Phase Package
Annihilation
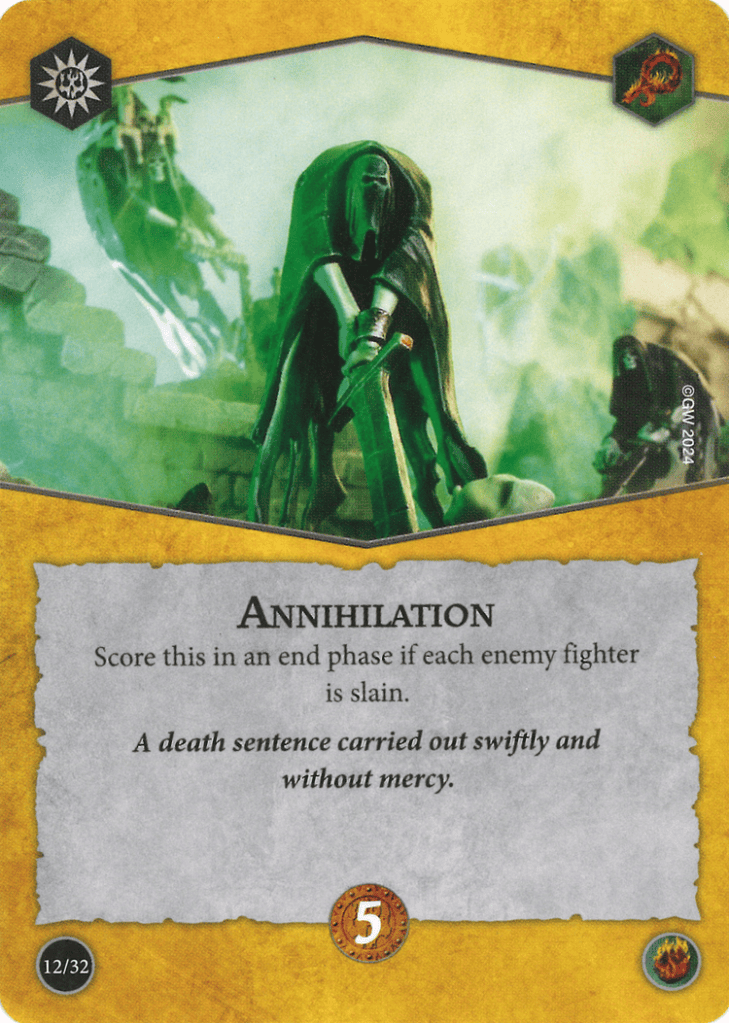
Not a typical inclusion in most Thricefold decks I’ve seen, but an essential one in mine. It’s the only real way an aggro warband like this can catch up with the near-effortless glory engine of something like Pillage and Plunder.
And since UK tournaments are best-of-one, most people don’t play around it. Between this warband’s high speed, extended reach, and damage output, there’s nowhere safe to hide, so Annihilation is often more reliable than people give it credit for, with this warband at least.
Cards I’ve Cut Along the Way
Loaded for Bear
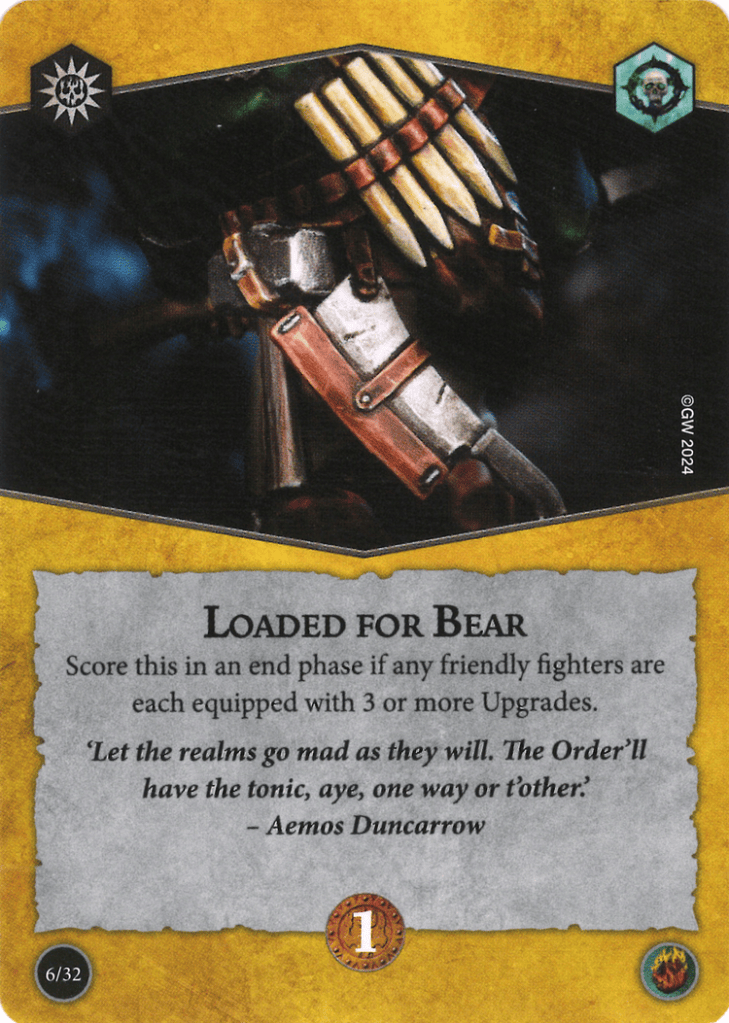
On the surface, it’s simple enough. But I found that constantly planning around it restricted my plays and made me hesitant to equip upgrades optimally. Add in the fact that Vile Temptations wants you to discard upgrades to use its ability, and it just became too clunky. Okay card, but wrong fit for this deck.
Set Explosives
Tried this early on, but Thricefold needs precise positioning to function, and with only three fighters, they’re not great at holding objectives. Draw this late in a bloody game and it can be literally unscorable. It lost me more games than it won—cut.
On the Edge
I thought this had potential with Lascivyr, who often leaves fighters vulnerable without finishing them. But in practice, it was too situational. You don’t want to be planning to leave someone on 1 wound—you want them dead. Just didn’t fit the deck’s pace or approach.
Movement Tech
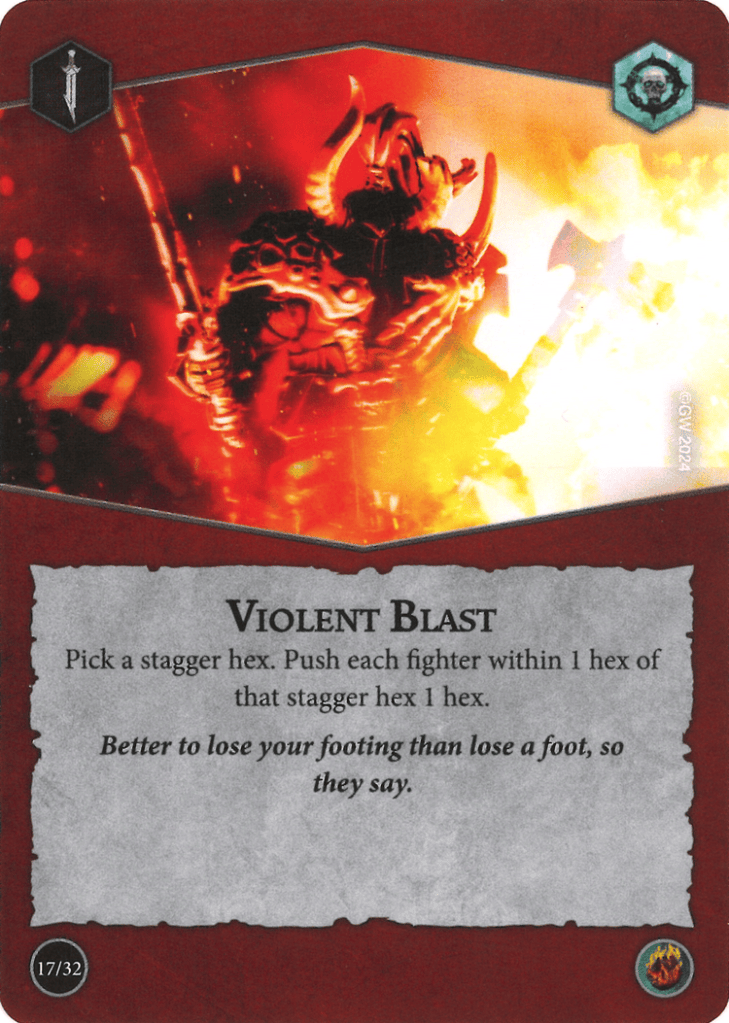
Keeping your fighters free from Move and Charge tokens for as long as possible is just upside for this warband, so I’ve leaned into movement tech quite heavily. They already have a built-in push on their warscroll, and I’ve supported it with a well-curated selection from both Blazing Assault and Countdown to Cataclysm.
You won’t see Illusory Fighter here, it’s restricted, and Spread Havoc is simply better in the current build.
Several of the movement cards have useful secondary effects, like pushing opponents off objectives or dragging them closer to the fight. I deliberately place objectives near stagger hexes where possible, especially because I’m playing Violent Blast and I like have the option open to mess with them.
Kill Cards
This section is all about enhancing lethality. Most of the equipment from Blazing Assault is so effective that I’m running basically the same core eight that most players are. These are backed up by strong power cards that support aggressive play.
To complement that, I’m also running ping damage from Countdown to Cataclysm. In some match-ups, I find myself leaving enemy fighters vulnerable due to Lascivyr’s inability to ping them. These cards help me do more damage and synergise well with the warband.
Special mention to Improvised Attack: it’s even better than usual in this warband. If you pick Lascivyr as the attacker, you get an extra ping from Wicked Slice. If you use it on an unmoved Vexmor, he gains an extra attack die thanks to Indolent. And if you draw it early and whiff the attack, no worries, you still Inspire someone. Incredibly synergistic, and an easy include.
Only the Best Defence
Finally, a sprinkle of the strongest defensive tech to round things out. I don’t go overboard here but having a couple of powerful, flexible tools helps keep key fighters alive just long enough to do their job.
As with any finely tuned deck, some cards just don’t make the final list—not because they’re inherently bad, but because they don’t suit this warband’s unique rhythm and needs. Here are a few more I experimented with before cutting them.
Driven by Pain
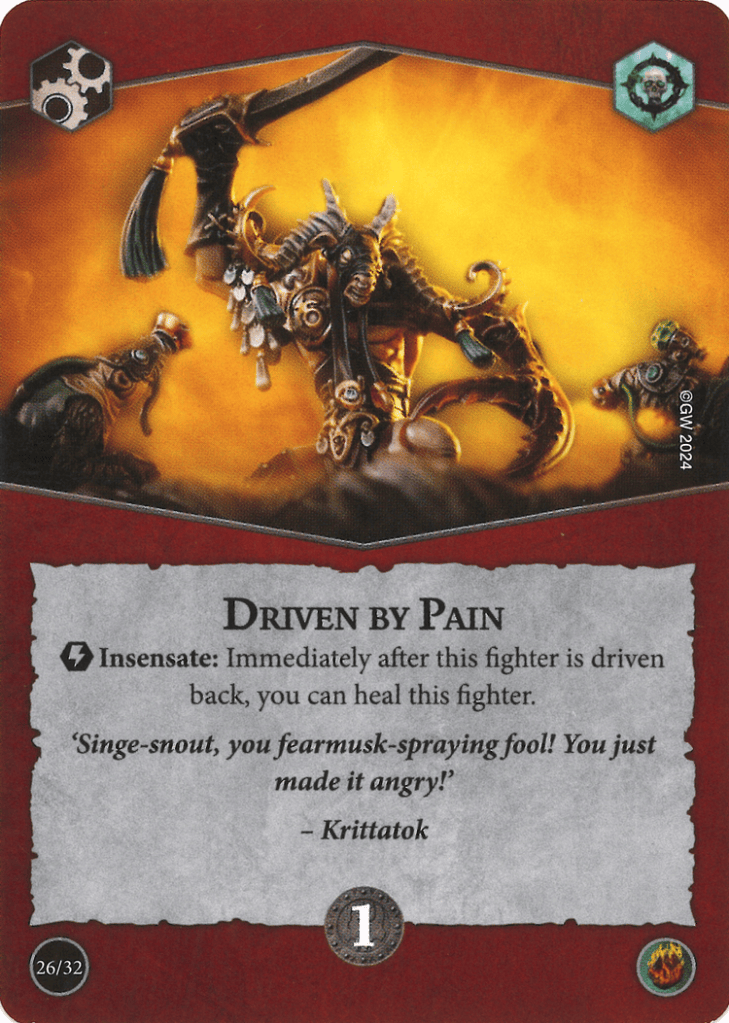
In practice, Thricefold Discord rarely care about being pushed. Their good attack ranges mean they’re often in range anyway, so opponents tend not to bother pushing them as it often benefits them to keep you next to them. You’re also rarely contesting or sitting on objectives long enough for pushes to matter.
As a result, this ended up feeling like a wasted slot.
Twist the Knife
Normally a strong aggro tool, but Grievous can be a little awkward in this particular warband. Vexmor already has it built-in, and Lascivyr’s Wicked Slice provides a kind of pseudo-Grievous effect anyway. The overlap often meant the extra damage wasn’t doing much, and sometimes you just didn’t need it.
Commanding Stride
You could play Commanding Stride—it’s not a bad option. For me, though, it came down to a choice between this and Counter-charge. I prefer Counter-charge slightly more because of its flexibility: you can use it even after Vexmor is dead, which gives you more value across a game. The ability to surprise your opponent with an unexpected push and set up an attack is just a bit more impactful than the controlled move Stride offers. Honestly though its users preference, I’m currently pondering if its more useful to me than Raging Tremors.
Shields Up
This one’s solid defensively, especially on the lower-health fighters with 2 dodge when inspired. But that’s not the game plan. Shields Up doesn’t help you kill your opponent—and that’s ultimately what this deck is built to do. In such an aggressive and damage-focused setup, if a card doesn’t help me delete enemy fighters or maintain board control, so I cut it.
How have you found success and/or fun with the deck?
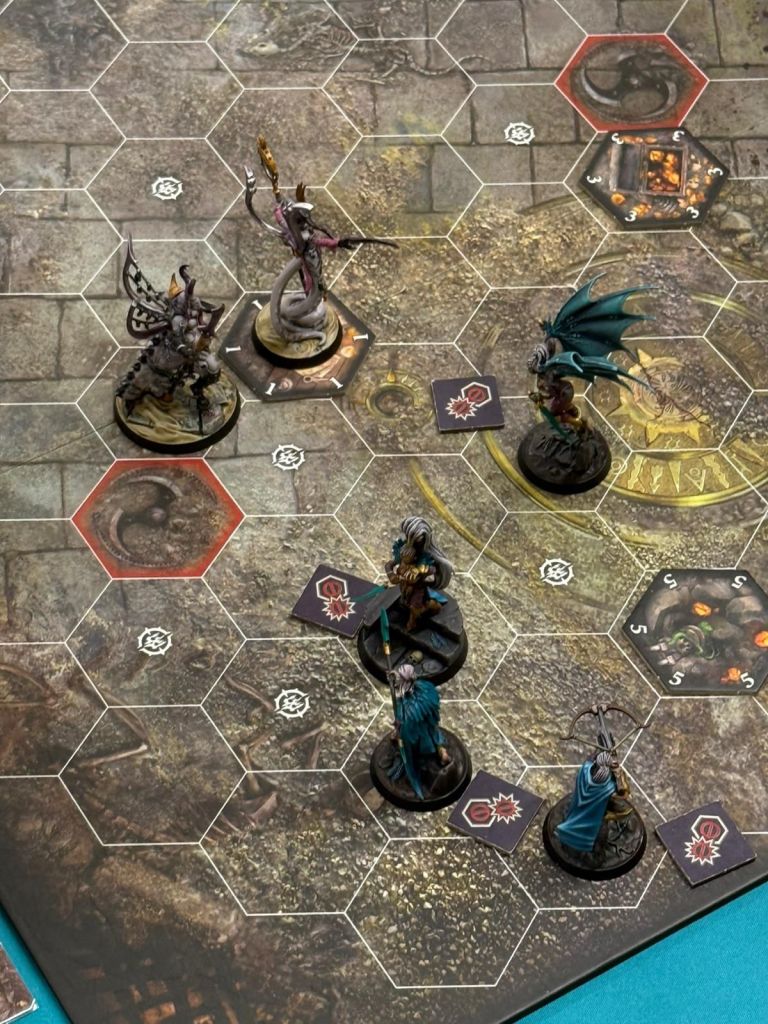
The fun of this warband and deck comes from how much it rewards tight, attentive gameplay, especially when it comes to positioning. You can’t just throw punches and hope for the best; you have to think carefully about movement, and I find that really satisfying. On top of that, they feel powerful. There’s something very enjoyable about taking great big chunks out of your opponent. My local scene (myself included) has done a fair bit of moaning about Annihilation as a card, but I’ve actually found it quite fun leaning into it and trying to squeeze every bit of potential out of it here.
What advice do you have for other players who might want to try your warband on for size?
You play a bit more reactionary than most aggro warbands, and that’s a good thing. Don’t be afraid to take it slow in the early game—sometimes a measured setup leads to truly brutal attacks in round 2 or 3. And yes, sometimes Vexmor does need to charge. That’s okay.
Also: don’t rely on Evasive. It’s a nice bonus, sure, but is not the end of the world if you don’t have it up.

What threats do you find most challenging to face? Are there any warbands or strategies that others can use to beat this warband or pairing?
The trickiest matchups for this deck are against opponents who aren’t trying to kill you—so hold or delving builds can be a real pain. This warband often relies on taking early defensive rolls (and failing them) to inspire. If your opponent isn’t engaging with you, you can end up hitting round 2 without inspiring, which isn’t ideal.
While my win rate with this warband is honestly pretty wild, all of my losses have been to non-aggro builds. That said, I do have wins against them too. These are exactly the matchups where Annihilation is needed for. It gives you a way to claw back against warbands that rack up easy passive glory, and ideally, leapfrog them.
For example, in the event where I came second earlier this year, my only loss was to a Pillage and Plunder / Countdown Grymwatch deck. It was a tight game, ending 21–19 to them. But if I was playing Annihilation I would have jumped them and won that game. That was the original thinking behind including it, and so far, it’s held up!
A little tip. Always make them go first in round one. They love going second—don’t give them the choice.

Wrap
Thanks again to Imogen for providing this overview, and putting the Master in the Mastery warband archetype. Let me know if you bring a variant of this deck out for a spin! I’m excited to see how it performs in more people’s hands.
While there are a few Love Letters in the works, there is always room for more. I’d love to hear your thoughts about an older or lesser or weird warband/pairing, what drove you to fall in love with it, and how you’ve piloted it to success – and especially piloting it to fun. If you have a warband you’d love to wax poetic about and serenade the wider community, let me know! I’m always accepting new submissions at SpentGlory@gmail.com. Until next time, grab the warband you love, a couple friends, and Spend some Glory!





Leave a Reply