
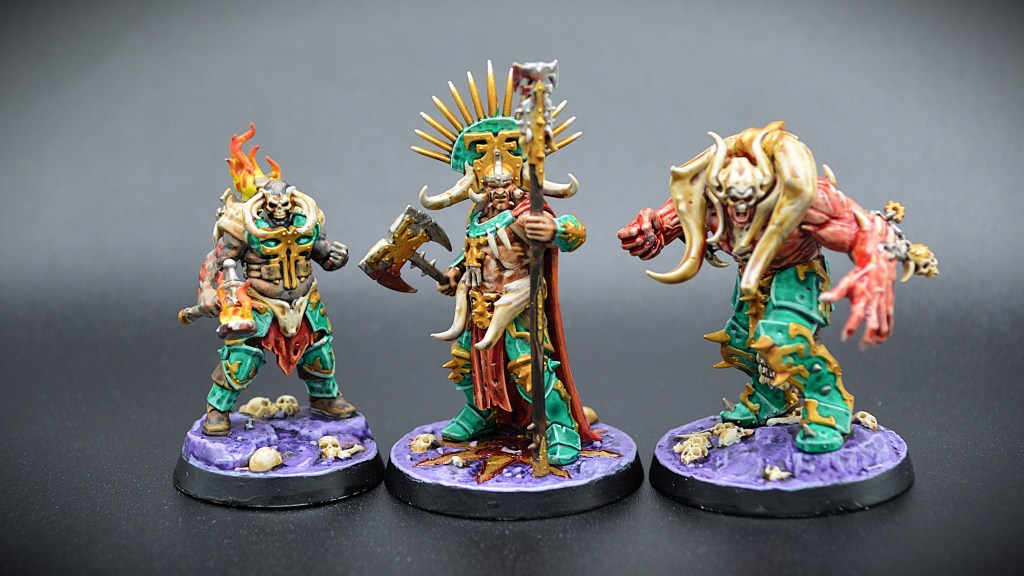
This time around in our warband reviews, we turn to second edition’s original big bad, the Gorechosen of Dromm. Incredibly over-tuned right out of the gate, they took the 2024 World Championships by storm, only just missing first place despite composing over half the field. Since then, they have been hit with a few rounds of heavy nerfs and have changed how they work. While they remain quite strong, things are different and much more reasonable now, but no full-scale review has touched them since their updates.
Let’s look now at how this unique 3-fighter Elite Strike team functions in the Spitewood, how they work in the under-utilized Control playstyle, and how you can still win with them. Despite their substantially reduced power level, they can still compete at the highest levels: I took third place with them at the Tacoma Open 2026 and was a single activation away from first despite not taking bringing BA/RF.
Underworlds Underground would love for you to listen to our Faction Focus: Khorne where we cover this warband’s background and mechanics in significant detail!
Click here to see a Master List of all warbands in the game
Gorechosen of Dromm: The Lore
Underworlds Undergrounds also covers some background and lore in out Hot or Not Vibe Check series. The Gorechosen are a part of this episode covering the Despoilers and Daemons box from 2024

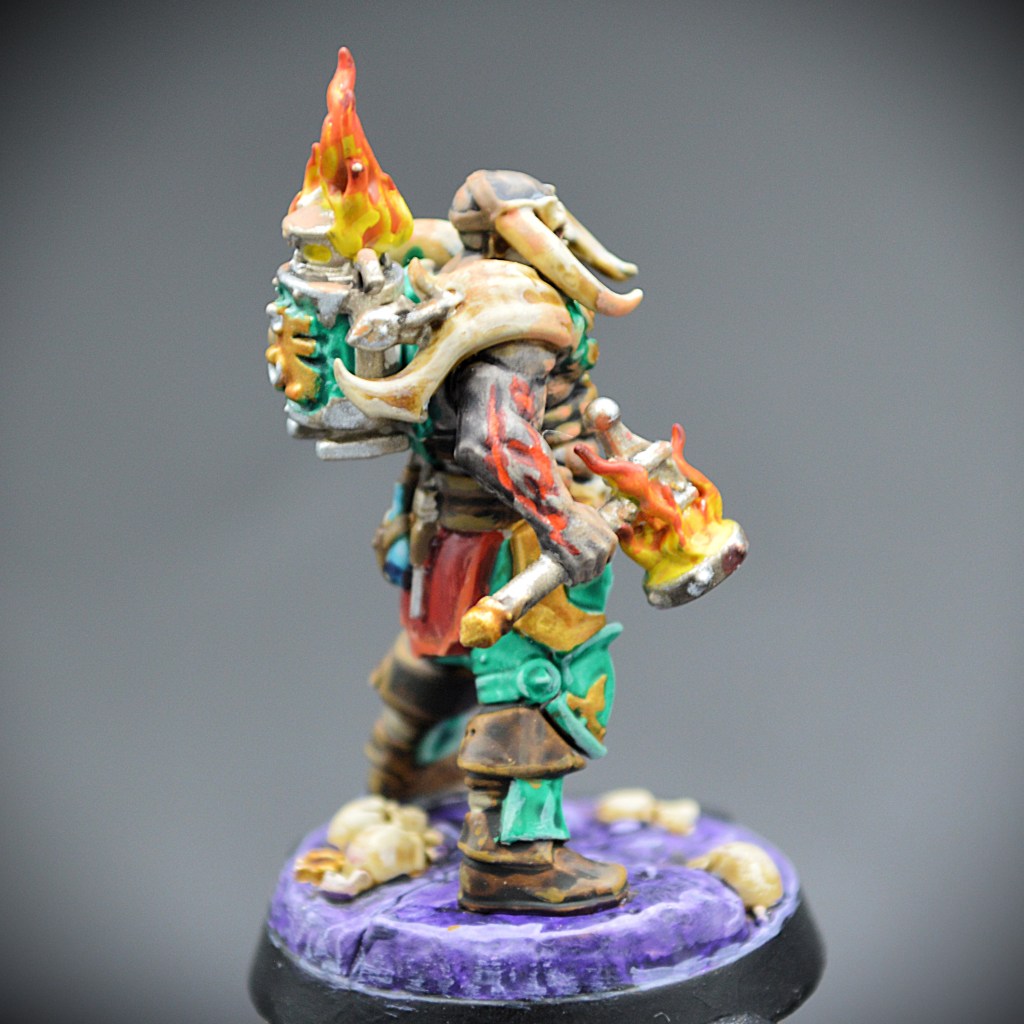
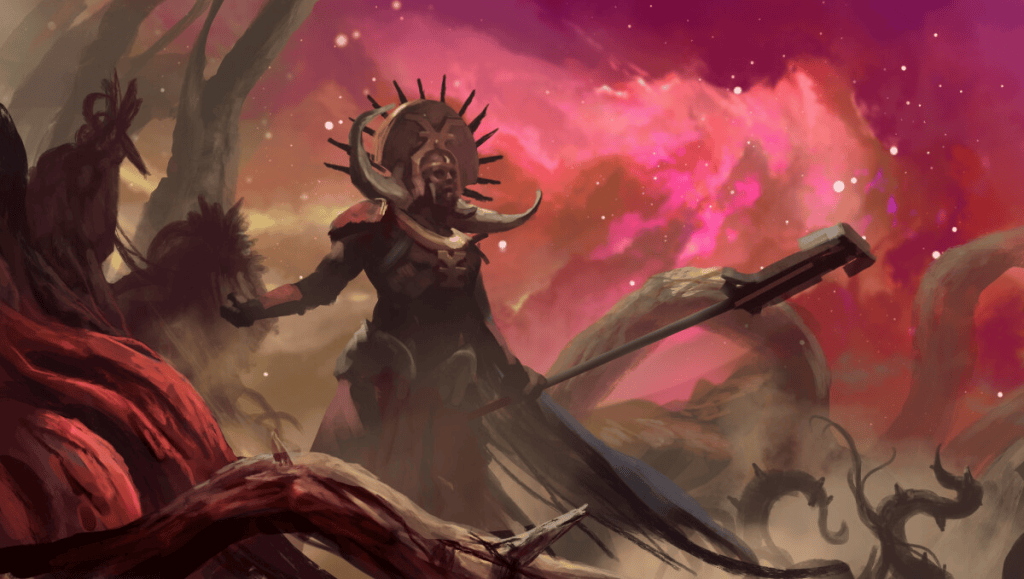
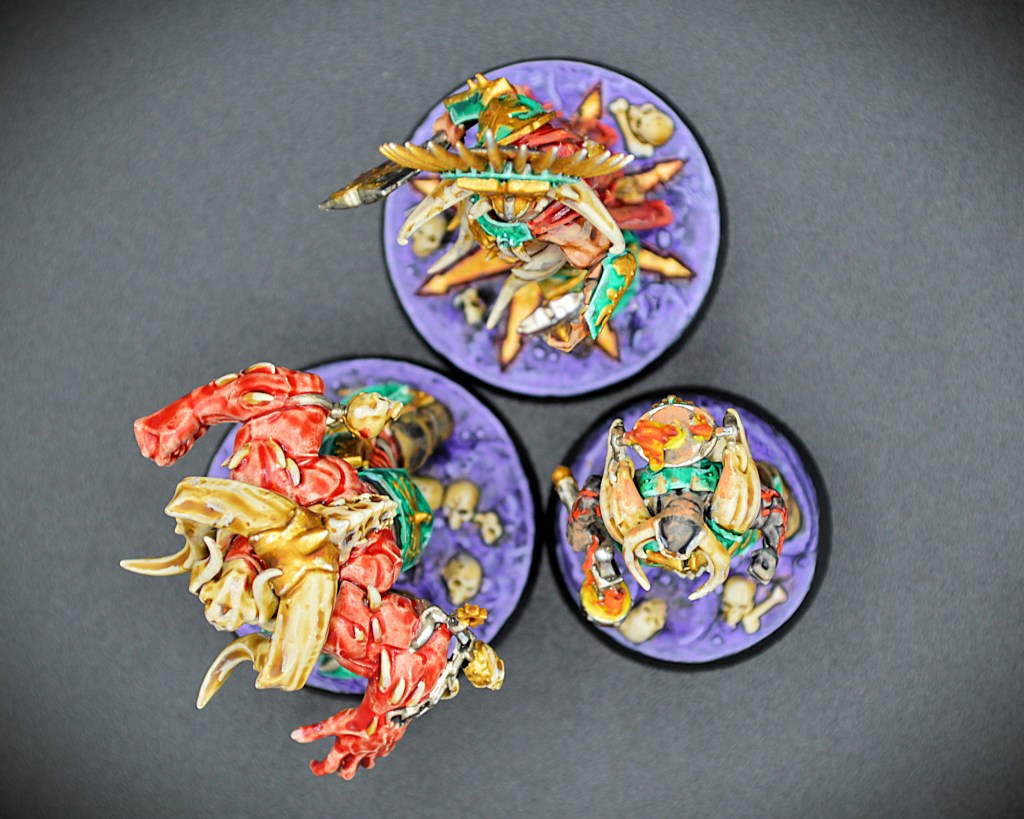
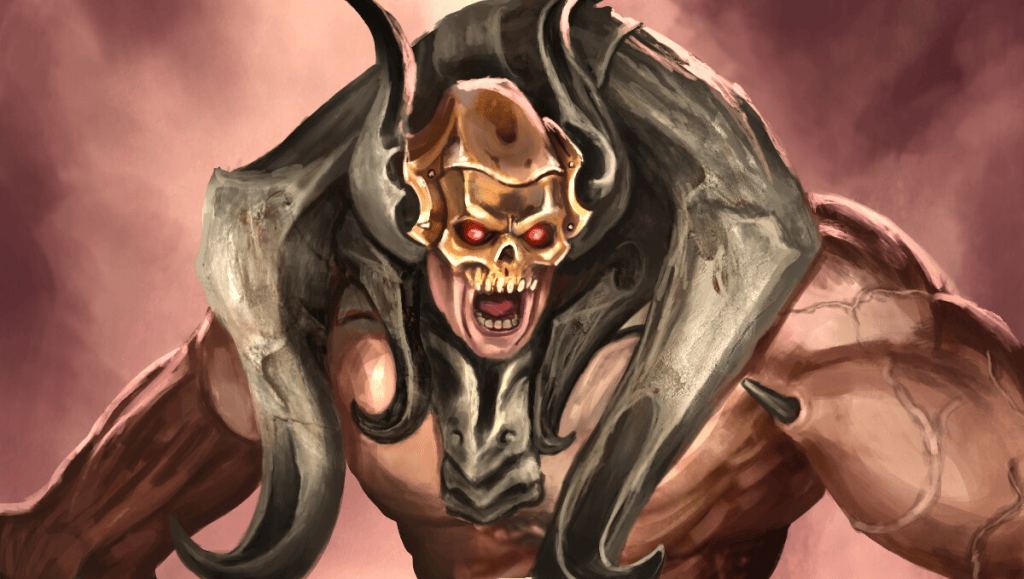
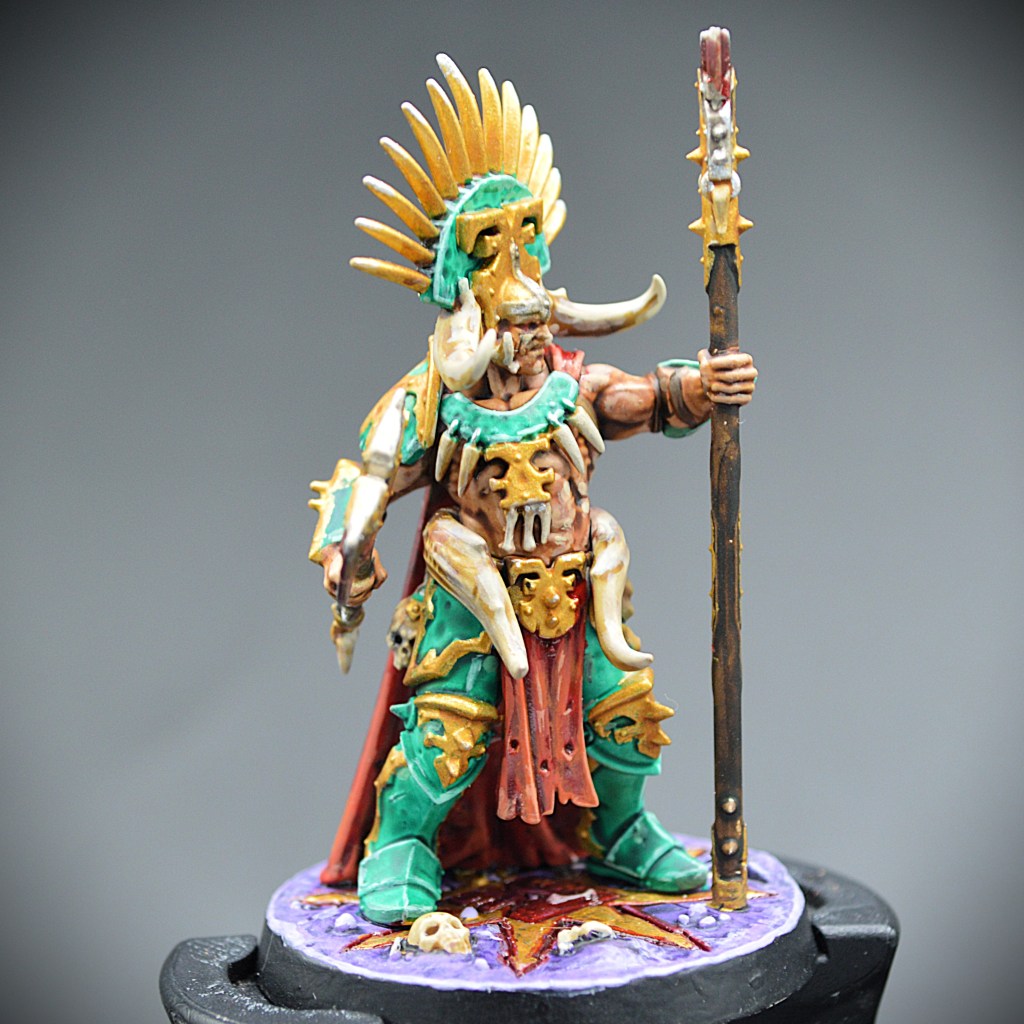
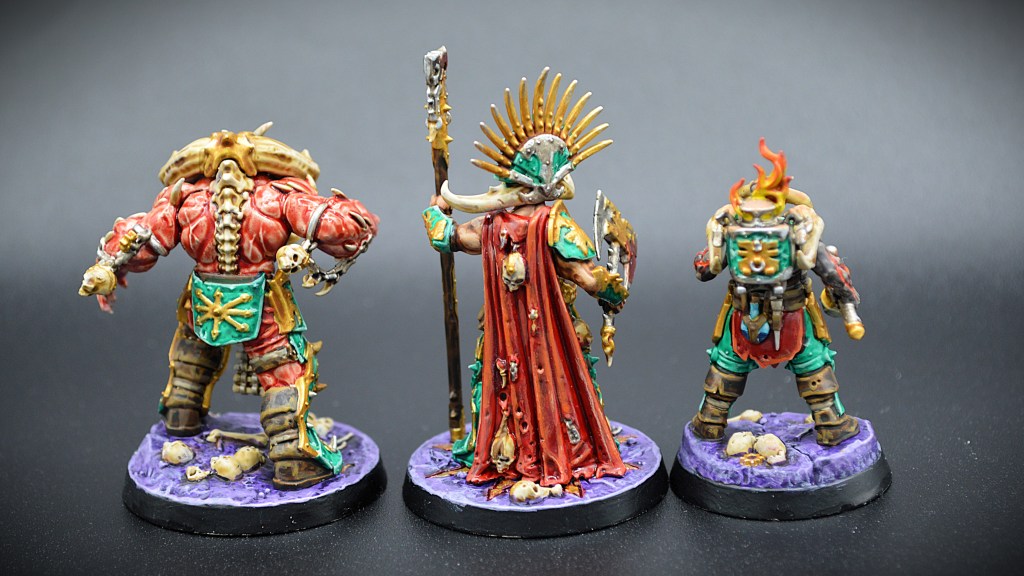
Dromm is a slaughterpriest of the Khorne, the Blood God and Lord of Skulls. Known as the Wounder of Worlds, Dromm originally debuted in the Nethermaze season in first edition where he set out to make the very realms bleed to exalt in his patron’s dark majesty. Along with him are Skullgrinder Herax, a warrior-blacksmith with a raging furnace forge upon his back who radiates hatred, and the Gorehulk, a twisted abomination of muscle who is slowly revolving into a mighty Khorgorath and now unable to enunciate much more than frothy roars as he thunders through the Underworlds seeking skulls and blood in equal measure. Dromm is a preacher with compelling oratory and chaotic gifts and works to stoke the rage in both his followers as well as his foes so that they might join glorious battle together and shed blood to his God’s amusement and satisfaction.
Gorechosen of Dromm: The Warscroll
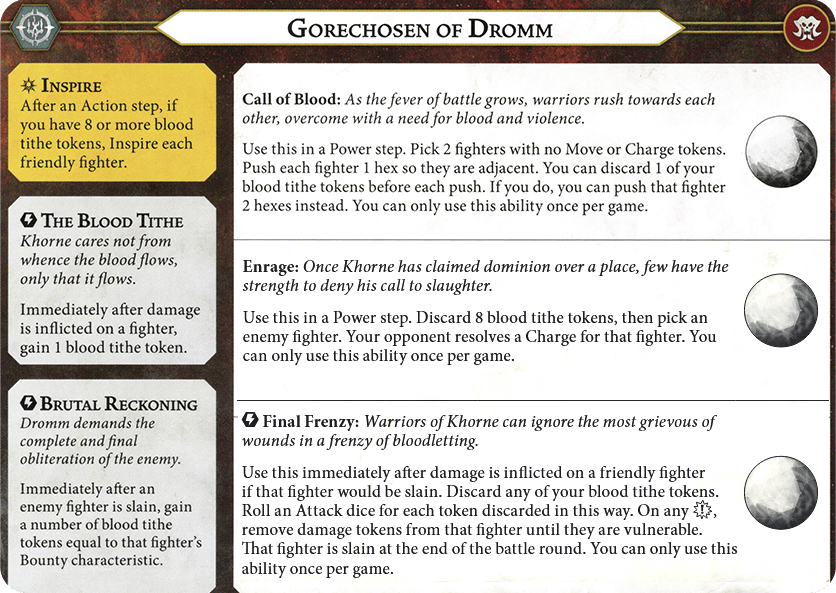
There are many things that have changed from the originally printed warscroll – if you have the one that came along with them in the Grand Alliance chaos box from Embergard, it is no longer valid (nor is Gorehulk’s Fighter Card). Please use this one for reference.
Inspire
You inspire your entire warband after an action step in which you have 8 total blood tithe or more. We will cover how to get Blood Tithe below, but note that you need to have 8 after an action step. If you acquire your 8th in a power step, you’re not inspired until after the next activation (and thus will not be inspired for that action). If you get to 8 in a power step and then spend below 8 in the same power step, you will not inspire until you break 8 again.
You’re pretty unlikely to inspire until round 2 or later unless things are particularly gory, but you still want to be working toward it early since their inspired stats are very, very good.
The Blood Tithe
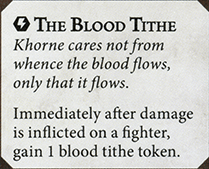
The first of two ways to increase your Blood Tithe is the ability appropriately named The Blood Tithe. Evey time an instance of damage is inflicted on any fighter friend or foe, you gain one. It does not matter which fighter takes damage or how they take it, nor when – for as the saying goes: Khorne Cares Not from Whence the Blood Flows, Only That It Does.
You can get Blood Tithe when you hit something or when something hits you. You can also get it in the power step when abilities or cards are played to put ping damage on somebody. Note that you get one per instance of damage dealt, not per point of damage: if you hit somebody for 2 or 3 damage, you don’t gain 2 or 3 Blood Tithe but instead pick up only 1. If a power card or warscroll ability happens to ping multiple fighters though, you get one Blood Tithe for each fighter damaged.
Brutal Reckoning
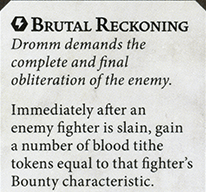
This is the second way in which you acquire Blood Tithe. Whenever an enemy fighter is slain (regardless of how), you gain a number of Blood Tithe equal to their bounty characteristic. This is in addition to the damage done, so if you slay a 2-bounty fighter with an attack you’ll get a total of 3: 1 for the damage and 2 for their bounty. You do not gain Blood Tithe in this way for your own fighters being slain (though you’ll still get one when they’re damaged prior to their removal). This incentivizes slaying things, especially those with higher bounty characteristics, as Khorne loves when you challenge worthy foes and lay them low. Punching a zero-bounty fighter’s ticket is hardly glorious.
Call of Blood
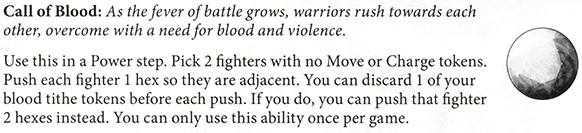
This ability is incredibly powerful in the right situations and has immense flexibility but does require some finesse to get the most benefit out of. You choose two fighters (any two, they don’t have to be yours) that have no move or charge tokens, then push them each one hex so they are adjacent to one another. If you want, you can spend extra Blood Tithe to push them further, up to 1 for each model.
There are generally two ways I use this with three more in rare cases.
- Scoot your fighters closer to each other at the start of a round to make a charge possible that would otherwise not have been able to reach a good target. Your fighters are slow and people generally stay away from you, so being able to get one or two fighters into range in a power step can be game changing.
- Take two of their fighters who are in important spots (usually a treasure token or two) and yank them off their positions. This is beautiful for disrupting Hold players especially if you can block Starblood inspiration with it. Regrettably, you can’t pull this trick on Thundrik unless you have a fighter adjacent to them already.
- When playing against a Deadly Synergy opponent, take one of their fighters and one of your fighters and scoot them together in a way that breaks their United status while also giving you a flank when you come to punish them.
- Early in a round, drag your fighter and theirs closer together so you can get a standing attack without having to charge, allowing you to charge later. This is best when Gorehulk is your last man standing, as he now only has range 1 attacks and you want to get more use out of him.
- The rarest of options, you’re already adjacent to somebody on a token and you want to bump them off while you step on in a pseudo-Confusion.
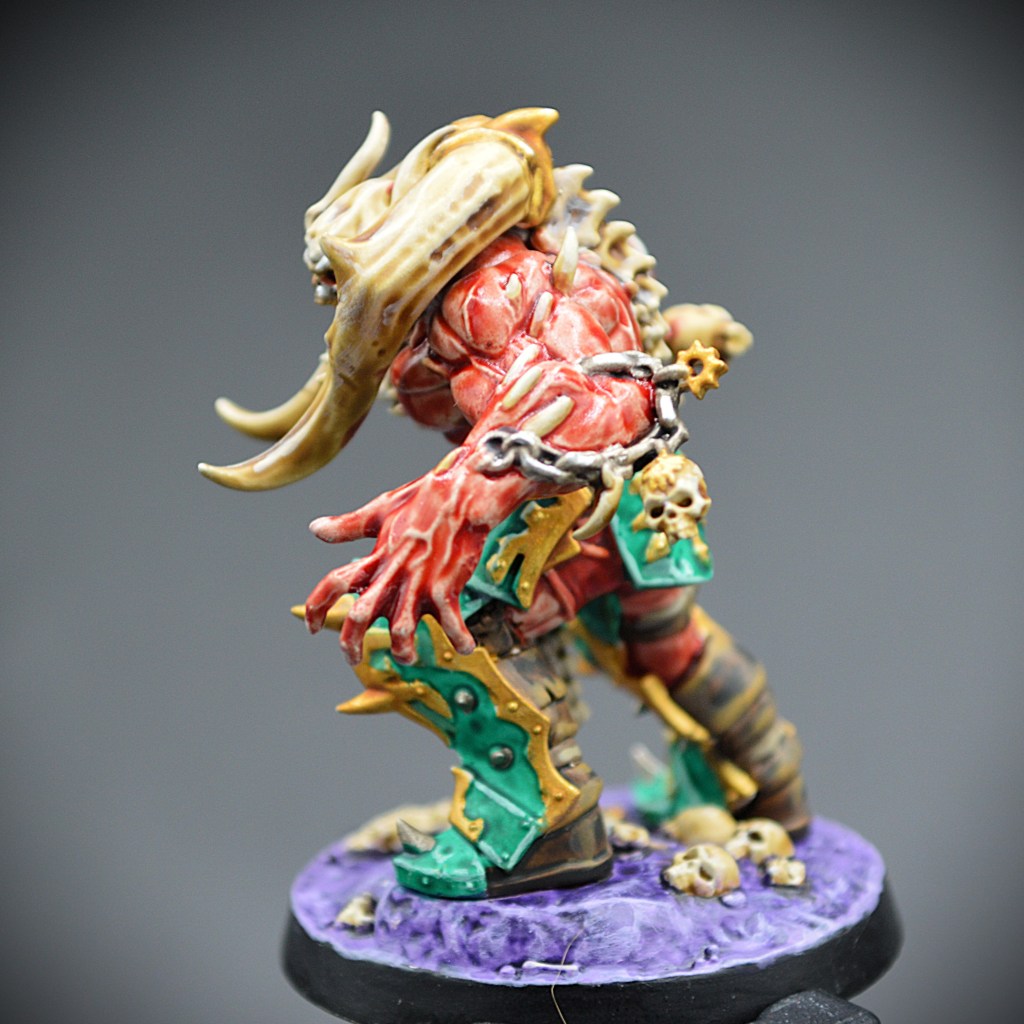
Most commonly I find I use Call of Blood early to get into charge range, either by dragging targets forward or your own guys forward, ideally without having to spend Blood Tithe. Too many games early in my experience I waited until ‘the right time’ and then never used it. If I opened with it, I generally had more success. Make sure you deploy in a way that allows you to push guys together without spending any since you won’t make much at the start of the game and don’t want to slow down your inspiration.
Remember both fighters you choose need to have no move or charge tokens, so this ability becomes inaccessible the longer into a round you wait to use it. I do love the thematic branding of the ability though, as fighters are compelled to get closer to one another as Dromm stokes the call to slaughter.
Enrage
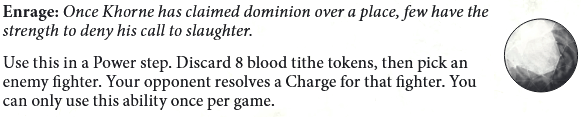
This bad boy is the hot sauce, despite being the first of two dramatic reworks in their earlier rules update. Originally, you could spend a tiny amount of Tithe and make anybody charge (usually Gorehulk in round 1 for a second charge which was disgusting and blatant BS). Now it’s much more limited but still quite good in the right situations.
In a power step, you choose an enemy fighter, spend a whopping 8 Blood Tithe, and force that fighter to charge. You have to have 8 to spare, so you can’t realistically do it until late in the game. Then, you give your opponent a free out of sequence attack against you. That sounds really bad, right? WRONG!
The important thing to note here is that you get to select the fighter. Your opponent chooses where they charge to, what they attack, and what attack profile they use, but you can pick any of their fighters and make them charge. Whether they have a move token, charge token, guard token, or nothing, you force it. Sometimes they are on a really important spot they need to keep and you can make them leave it, bricking some Objective scoring as you cannot charge back onto the spot you were already holding by running in a circle. Say goodbye to that treasure token, bucko! Other times you’re playing Reckless Fury or Raging Slayers and they have a single fighter who hasn’t charged. Pick them, make them charge, and score cards like Unrelenting Massacre, Arena Mortis, and more. You can make an opponent in your territory charge back out of it. You can make an enemy in an edge hex charge out of it. You can make an enemy in a waystone hex charge out of it. You can strip a guard token with it. You can make a vulnerable fighter in a safe spot run right back into danger. You can do so many dang things.
Yes, you risk taking damage or even losing a fighter, but the ramifications for scoring cards for both you and your opponent are potentially massive. I have used this to net myself 5 glory while reducing my opponent’s glory by 5, which you may recognize as a TEN GLORY SWING with a single ability. This won’t happen every time, but Jiminy Christmas it can be a difference maker.
Final Frenzy
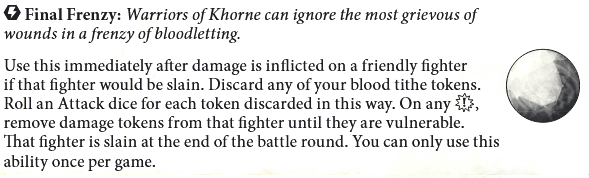
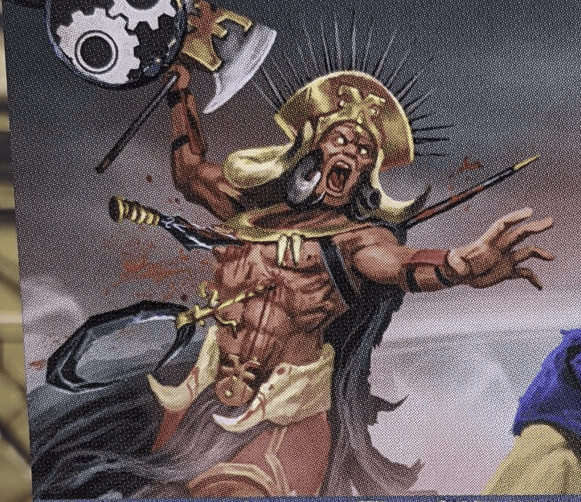
The second major change in rules updates hit this ability pretty hard. The new wording says that when one of your fighters takes enough damage that they would die, you spend any number of Blood Tithe that you want and roll a number of dice equal to that expenditure. If you get any crits, that fighter does NOT die (yet) and remains on the board with 1 health left. They can still die later that round if they’re damaged again, and they will be slain at the end of the round regardless. Note that this is AFTER objective scoring, so the fighter still is on the board for any objectives you need to score and can get you a glory from an Aqua Ghyranis. Your opponent will also not collect their bounty until after they would have to spend for Upgrades in the end phase, so you might prevent them from putting out something expensive and important by delaying their reward.
If you spend 4 dice you have a 51% chance of success. 6 dice is 66%, and 8 is 76%. Anything 13 dice and over breaks 90% odds. Remember that you did get a Blood Tithe when they took the damage that would slay them, so you have one more to play with! Depending on it you have used Enrage yet and feel like you want to later, you may want to spend few enough to leave yourself with 8 remaining to burn on that later. Otherwise, go HAM.
I find this quite useful for making sure Dromm gets to take one last (or maybe 2 more) attacks or getting Gorehulk to be able to charge if he dies before you got to use him. I try my hardest not to use this before I am inspired – you’re often better off with one inspired guy than two uninspired ones in terms of accuracy and damage output for this warband. Note they can still drive you back if you survive (unless you got a Stand Fast or were on Guard) and you didn’t die so you don’t clear your charge or move tokens; this can potentially keep your guy alive but unable to hit anything back, so be thinking about that before you pull the trigger.
The denial/control potential on this is huge too. Your fighter will be slain by the ability at the end of the round, and NOT by the attack that would have killed them. Many effects in this game will ask your opponent to slay an enemy fighter with a melee attack, with a united fighter, with a tempered fighter, Hrothgorn inspires if he kills something personally in melee, and so on. That’s not what killed them, so they won’t get those unless they spend yet another activation trying to finish your guy off! Laugh while you block Hemmed In and get to have Dromm smack another thing before he waves goodbye.
One final touch of advice: since this is a surge ability it happens right when they would be slain. If you happened to just hit 8 Blood Tithe with that damage and you spend any with this ability, it will be gone before the end of the action step and you will not have 8 at the end of the action step and therefore will not inspire. Think very hard about whether erasing inspiration is worth it to take a 76% chance to keep the fighter alive. I personally let the guy die and inspire his friends in almost all cases.
Gorechosen of Dromm: Fighter Cards
Dromm, Wounder of Worlds
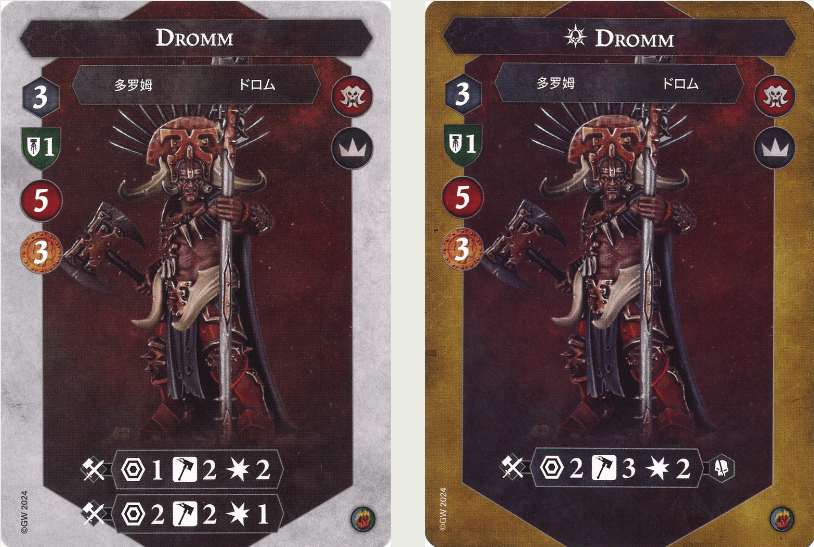
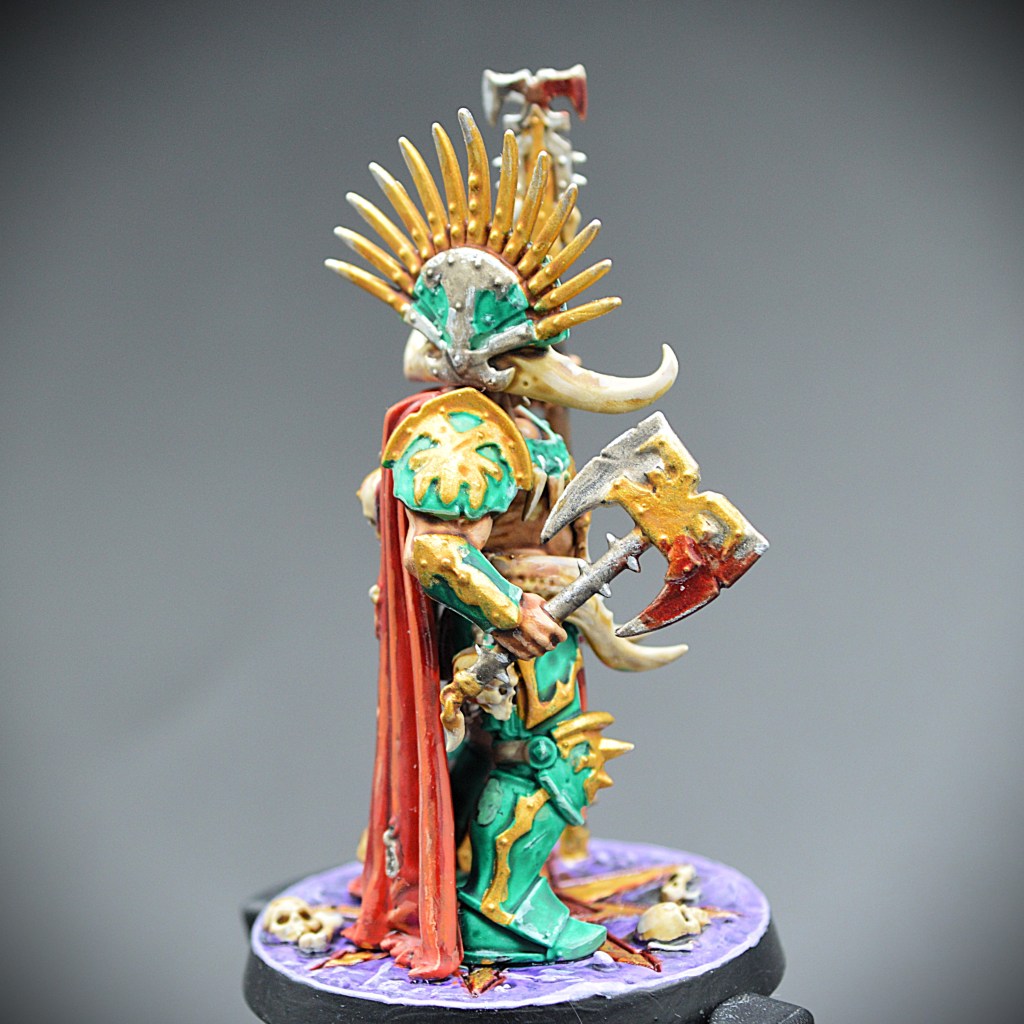
Your leader and far and away your most important fighter. Dromm has 3 move, 5 health, 1 shield, and two attack profiles both on a decent but not exceptional 2 hammers. The reason this man is so important becomes apparent on his inspired side: you’re rocketing to range 2, 3 hammers, 2 damage with grievous. The ability to reliably and accurately hand out 3 damage at range 2 is phenomenal and is a defining trait of successful Elite Strike play.
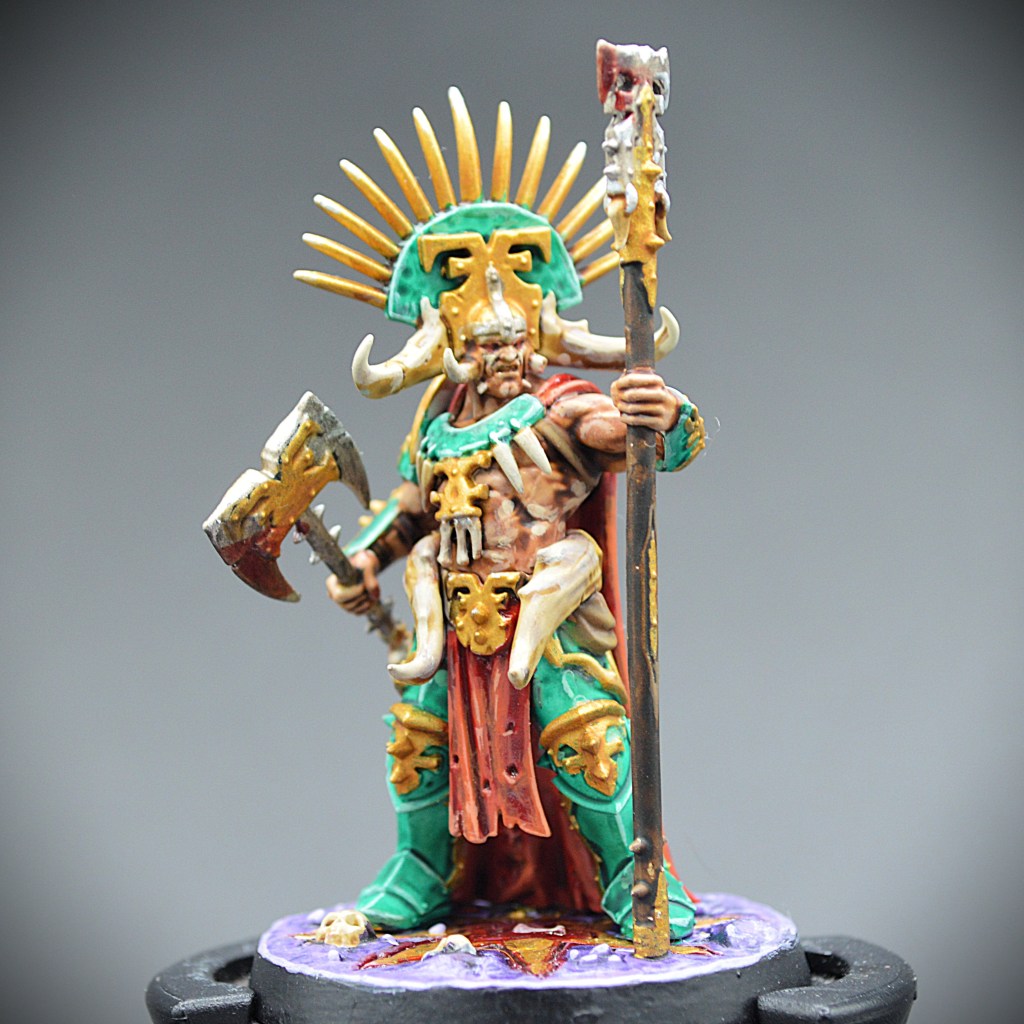
Do everything in your power to resist the urge to charge with him too early – savvy opponents know he’s the main threat you possess and will judiciously target him to get him slain as early as possible, his permanent 1 shield makes this something you had better be scared of. In chess, the pawns go first while your queen waits for her opportunity – Dromm truly is a Queen #Slay. Don’t hesitate to save Final Frenzy for him specifically, and deploy him a little further back using Call of Blood if needed to get him into charge range before his turn. If he dies, you lose a heck of a lot more than just the 3 bounty he gives up.
The Gorehulk
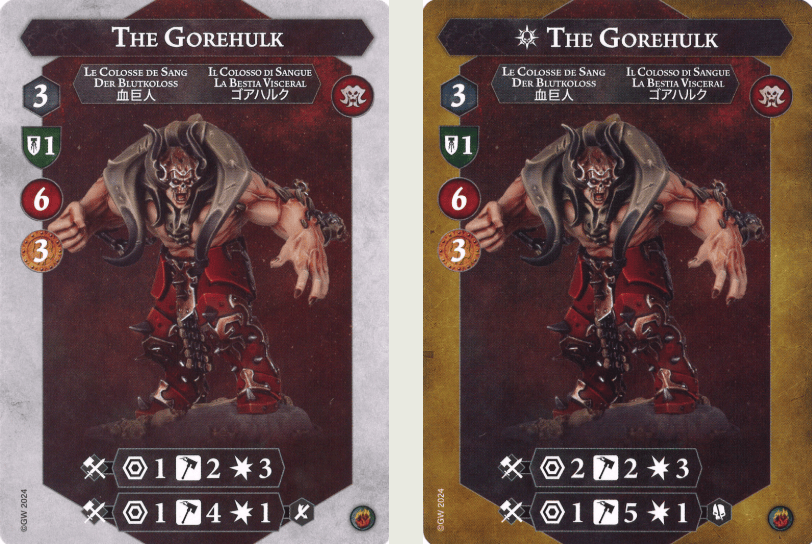
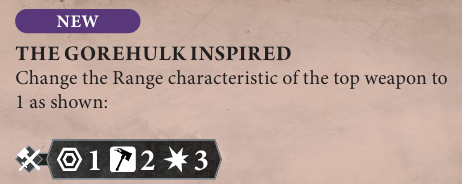
Please note his inspired side no longer has range 2 on the big punch. It’s a big hit to his power level but removed tome of the oppressive degree of damage output this warband once had and requires you to use him more sparingly.
Thicc Chungus has the honor of being the only non-leader model in the game who has a bounty characteristic of 3. This makes him useful for scoring bounty-related cards like Frenzied Rush, but it also means he gives up a lot when he goes down. His 6 health makes that a little less likely to happen though.
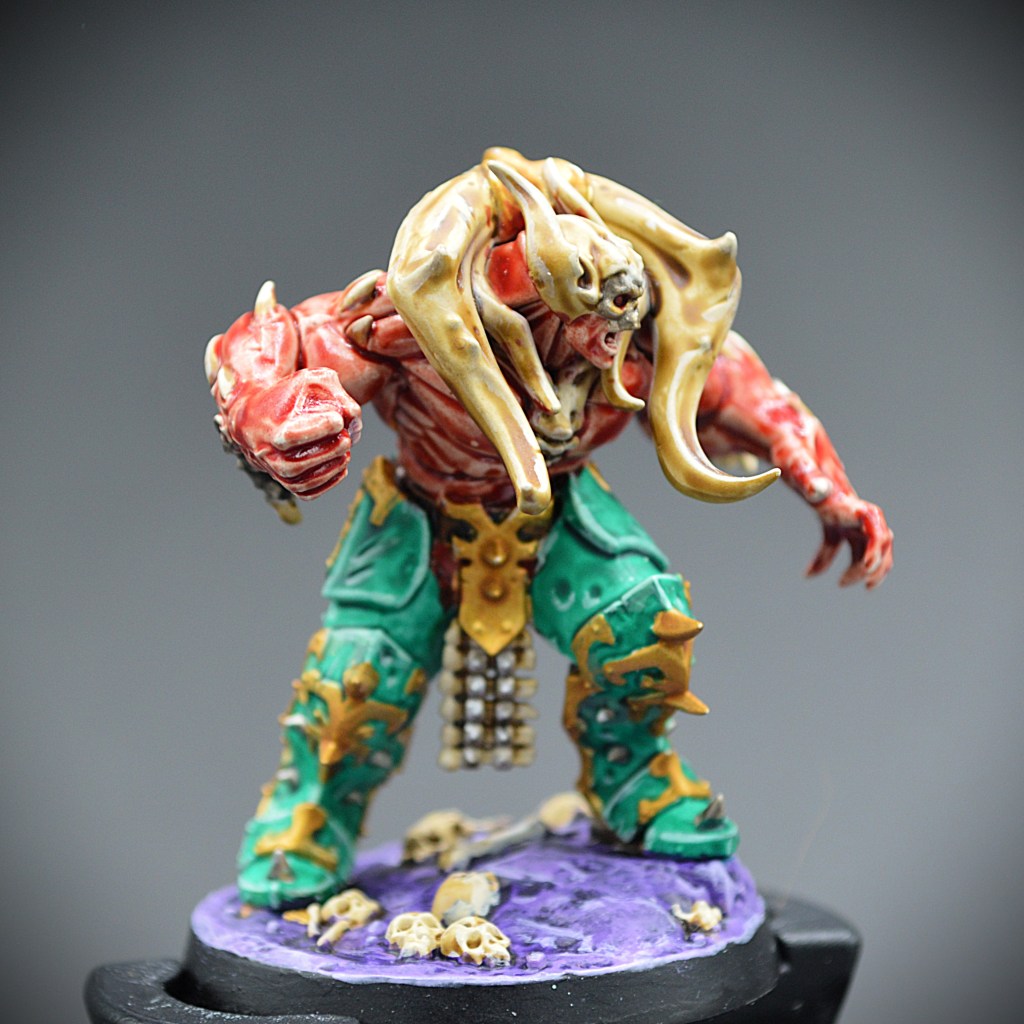
Goirehulk has two attack profiles: the first being his 3 damage Falcon Punch that’s a great tool for Strike to have, though it’s limited by his 2 hammers accuracy. If you really just need to hit something though, his second profile has an astoundingly accurate 5 hammers with ensnare for 1 damage, and when inspired it becomes 5 hammers and switches to grievous for a total of 2 damage. Early game you can take your chances to drop 3 damage on something and potentially slay it, or settle for the near-guaranteed Blood Tithe with his other attack. Once inspired, he is a horde killer and beefy fighter finisher extraordinaire.
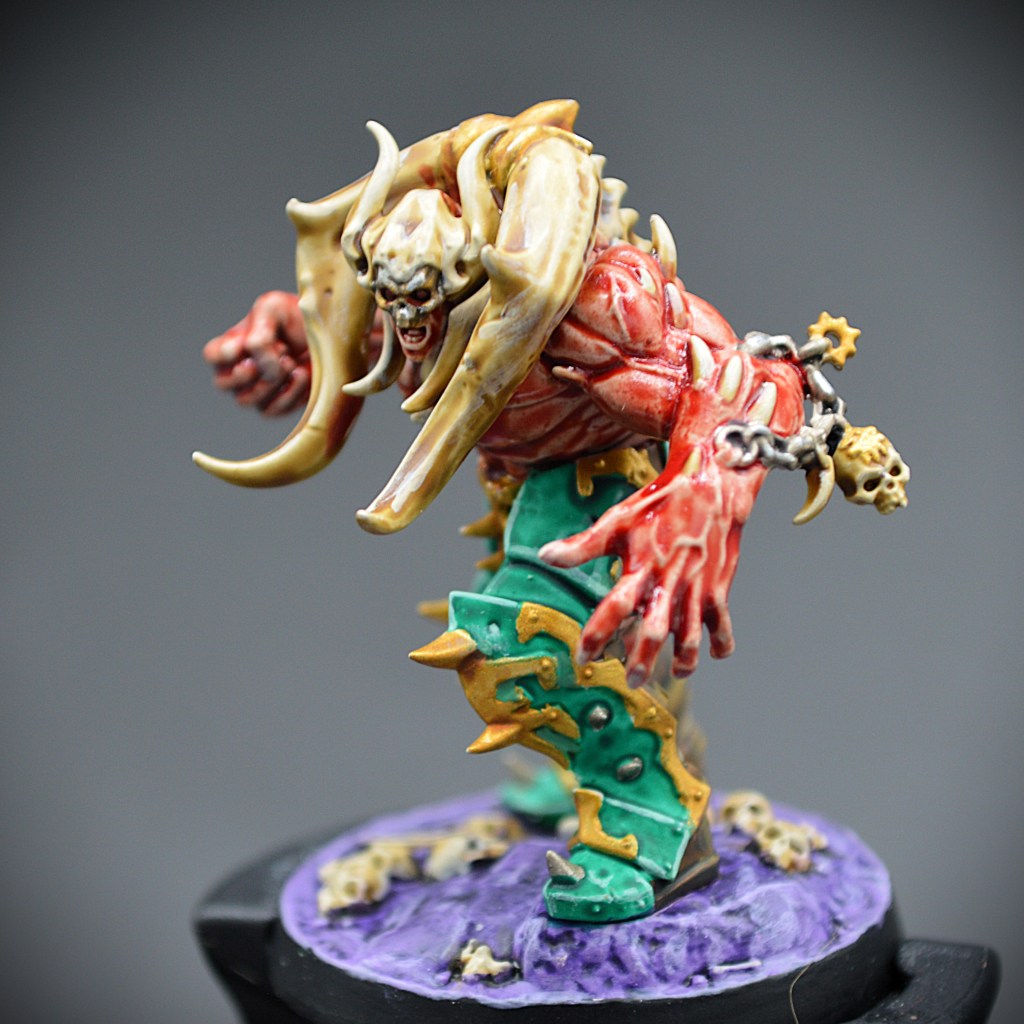
It’s tempting to give him upgrades like Duelist and Keen Eye, but I generally reserve them for Dromm instead as his range 2 makes much better use of them. Gorehulk is generally best as a fire-and-forget torpedo to set things up for the rest of the team. He does carry such hilarious language translation titles as “La Bestia Visceral” and “Il Colosso di Sangue”, which really adds to that dark ages daemon horror charm he’s got going on.
Skullgrinder Herax
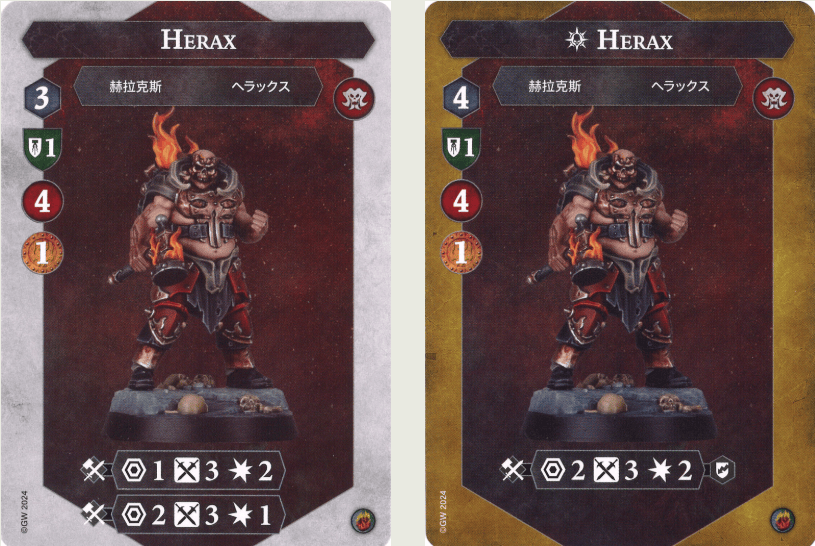
Herax is along for the ride, I guess. He only gives up 1 bounty because the other two gobbled it all up, but he’s closer to a 2-bounty fighter stats wise. He has a reasonable 3 swords attack profile that has both a range 1 and a range 2, and quite nicely goes up to move 4 when inspired and that combined with his then 2 range 2 damage hit makes him useful for getting to far-flung guys hiding from your bigger friends. The stagger is nice, I guess, but rarely is the difference maker for me. Use him to take hits to your better guys don’t have to, and don’t waste Final Frenzy on him except in exceptional circumstances.
Potential Pairings
Blazing Assault remains one of the strongest decks in the game for almost every warband, but this one is definitely on the list. Their biggest weakness lies in their accuracy, and this deck is quite helpful for that, as well as giving some extra damage, mobility, and an added control tool in Lure of Battle.
Countdown to Cataclysm is a strong deck for all comers but has special utility for this warband – Counter-charge is great for setting up future hits or flanks, they love the pings for accumulating Blood Tithe, and especially enjoy Utter Conviction for getting Dromm to a 2-4 shields profile. Desperate Rage gives them another source of 3 damage and also hurts you when you use it, all the better for more Blood Tithe!
Reckless Fury is a deck that is near mandatory for Gorechosen. The real reason lies in the Charge Token focus the deck has when considering their utility you get from your ability Enrage. So much of the deck asks for charge tokens to be in play and in specific locations, and the easiest counterplay is the simply not charge if you can afford it. The deck gives you a few tools to help out against stubborn opponents (Catch Weapon and Reckless Attitudes), but your warscroll having an undeniable forced charge helps to seal the deal and make you score buckets of glory. It also has few things that actually care about hitting or killing, so all you need to do is charge. Since this warband’s Achilles Heel is their uninspired accuracy, this is a blessing.
Wrack and Ruin is one of my favorite options for them, as it really helps drive the Blood Tithe up and get you inspired earlier. It also comes with some solutions to their accuracy problem. I wrote about it in great detail in my review of my RF/Wrack deck (and you can read the tournament report here where I finished in third at the Tacoma Open) but there are a few great combos here for you to make use of, particularly the upgrade Misfortune which lets you hurt yourself for Blood Tithe as well as the objective Living on the Edge which rewards you for having a vulnerable fighter alive in an end phase. This is something you can more reliably achieve with Final Frenzy.
Edge of the Knife is another fun, off the wall option for them. I wrote about it in my RF/Edge deck review, but you can do some wacky run things with it. Yes, you don’t have anyone tempered to begin the game, but you almost certainly will acquire this status and live long enough to benefit from it since you have so much health on your two big guys and can even keep them alive longer with Final Frenzy. You also can very sneakily ‘force’ them to temper a fighter by making them charge with Enrage should you need to. Check out Dan Knight’s Elite Edge primer to see how the strategy works and flex it to apply to Gorechosen.
Realmstone Raiders is a risky choice but one that can work. I have repeatedly written that their accuracy is a problem, so why would I pick a deck that requires you to hit to do anything? First off, Gorehulk hits very reliably if you use his lower damage profile, and secondly Dromm hits very reliably when inspired if you happen to get there. You have a double-sided ping in Fortune Faded that gets you two Blood Tithe in a power step and nobody will see coming either. I’m probably not going to win you tournaments, but I have gotten to obscene glory totals with Dromm RR in the past.
Raging Slayers is worse for them now that the deck doesn’t give rerolls but instead converts to crits, but still definitely playable. There are multiple positional charge things and even the blessed Unrelenting Massacre though a major drawback of the deck is that it comes with no tools to force it the way RF does. Good thing you have Enrage on your warscroll! It also is a leader-centric deck and Dromm is one of the better leaders to use for the conditions included in the card. You even have a real chance of scoring silly things like No Escape and Overwhelming Presence since you have Call of Blood and Enrage, and can utilize Final Frenzy to keep a Rage Token on the board for scoring conditions in a pinch.
Nexus of Power isn’t their best option to be honest, but you have some tools to help you make it work. You can use Call of Blood and Enrage to get guys off of cover tokens they’re occupying to stop you from being Covetous. Plus, you know Gorehulk wants his stretchy arms back and the plot card gives that to you. His 4-5 hammers accuracy attack can also be what you need to get some overruning onto tokens and flip them back for scoring purposes.
In Practice
Data from the Nemesis Statistics Project has them winning 55.7% of their games edition-wide with 610 recorded matches. Even in the most recent meta with their multiple nerfs, they’re still winning 54% of the time. Even though they’re ‘worse’ than they were before, they’re still quite good.
Our recent ITC event analysis demonstrated that based on registered tournament scored for the past year, Gorechosen are sitting in the B to C tier depending on which data subset you use. That makes them a middle of the pack choice, capable of taking on just about anybody but not as consistently as you’d hope for big tournaments. Don’t let that scare you away though! In their better matchups, they can be frighteningly strong even in Grand Clashes.
I personally have played this warband 41 times with a 73.17% win rate. Me glory differential is +204, or an average of +5 per game. That’s real, real good. It’s also the single warbad I have played most often in Second Edition, because they’re also real, real fun.
As referenced earlier, I went to the Tacoma Open with this RF/Wrack deck and landed in third. You can read the deck review here, and the tournament report here.
I also put together a cute little RF/Edge deck with which I went undefeated in causal and tournament practice and wrote up a deck guide you can read here
I’ve also had fun (and done well) with RF/Realmstone Raiders, BA/RS, BA/Edge, ES/Wrack, and Wrack/RS. There are loads of ways to play them and it doesn’t have to be full aggro. (I’ve actually never played them as BA/RF!)
Historically, BA/RF has been Dromm’s strongest combination and it’s unlikely this will change anytime soon. This deck took third place at the Moscow Team Tournament and is the most FaR appropriate one I could find.
Staggerers has frequently used Dromm to illustrate concepts in their Dexamples series. You can use these if you’d like to try a specific deck with them (always with Reckless Fury alongside it):
Raging Slayers/RF deck and the associated article
Hunting Grounds RF deck and the associated article
Realmstone Raiders/RF deck and the associated article
Finally, it should be noted that Matteo Zani came in second place at the World Championships with Cataclysm/RF, though with an older warscroll and no Forsaken or Restricted cards. his deck is not legal anymore and isn’t particularly useful as a reference point, but do note that this deck pairing still remains quite strong for them if you wanted to try it out.
Wrap
I know I wrote a lot, but this warband has so, so much going for it and has way more finesse points and thoughtful approach options than your standard hulk smash aggro that they may look like on the surface. If you’ve shied away because the warband is ‘too good’, rest assured they’re not the menace they once were. If you shied away because after their nerfs they’re ‘too bad now’, that’s also not true! They’re still capable of doing good work and happen to be a ton of fun.
Whether it’s your blood or theirs that waters the soil, I hope you have fun spending glory and attaining exaltation in battle under the Red God’s gaze in the Spitewood.





Leave a comment