
Please note: This article was written for the first edition of Warhammer Underworlds and as such some information may not be applicable to Embergard/Second Edition. The new Contender Series for Second Edition can be found here!
This article is a part of the Contender Series, the goal of which is to encourage players to begin participating in Organized Play events, attending tournaments and Grand Clashes, and overall up their competitive game to improve as players and ultimately win more often. While I am not personally some competitive ace taking home glass every weekend, I do have advice to help get newer players off the ground and set you on the path to success, and also can point you to better players than myself where you can get more focused advice when you’re at that stage. I will attempt to keep this article series ‘timeless’, so while I’ll reference specific warbands, cards, and mechanics occasionally, I want it to be relevant for years and so will try to refrain from focusing too much on today’s current competition climate. With those things said, let’s dive into this article’s main topic: How and where to place your fighters on the board.
Check out the rest of the Contender Series for more competitive pointers:
Warband Choice
Deckbuilding Overview
Deckbuilding: Objective Cards
Deckbuilding: Gambits
Deckbuilding: Upgrades
Board Choice and Placement
Objective Placement
Mulligan
Fighter Placement
So you won the roll-off, do you choose to go first or go second?
Practice
Check out other tournament related articles:
Participating in your First Tournament
How to Run a Local Tournament
Counterplay series: how to prevent your opponent from scoring
Overview
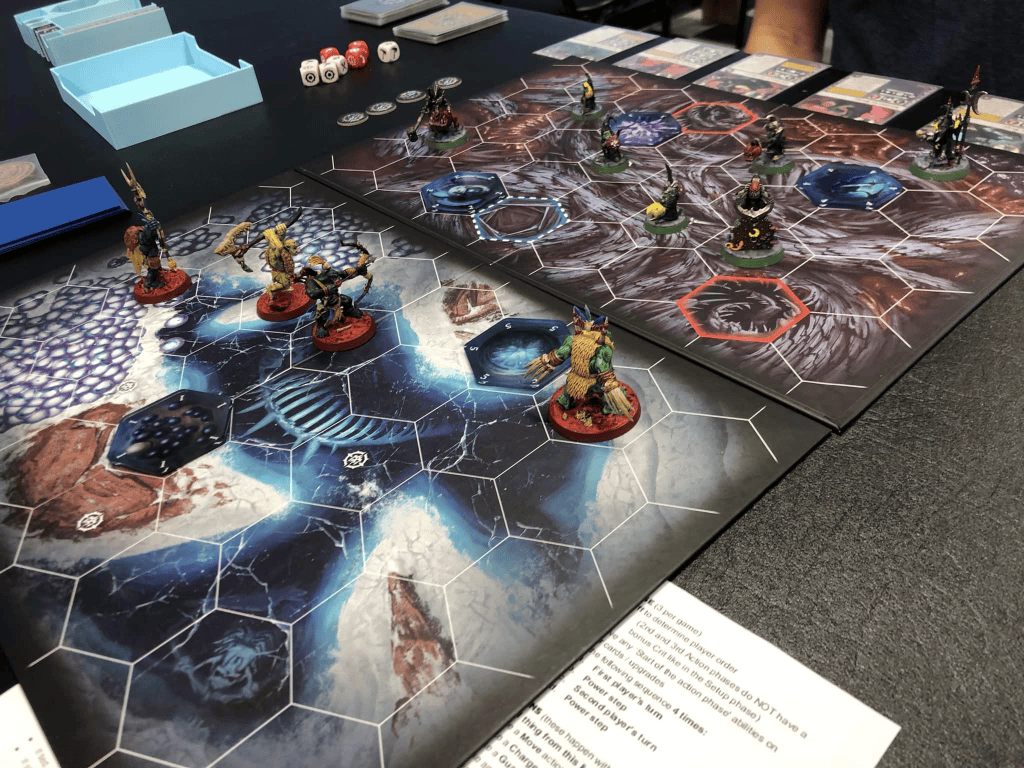
After board setup is complete and objectives have been placed and you’ve drawn (and perhaps Mulliganed) your opening hands, you’ll roll-off once again to determine who gets to place the first fighter. You and your opponent will then alternative placing models on the board in starting hexes (with some exceptions) until both warbands are fully on the board (with some exceptions). The winner of the roll-off chooses who places the first model, and depending on the warband you and your opponent are using and the strategies you will employ, it will benefit you to go either first or second. But if you win the roll, which do you pick?
All things being equal, for most players, it is to your benefit to place a fighter second. Going second lets you see where they put their first fighter (and who that fighter is) and can inform what you want to do next. They can tell you a lot about their plan by which fighters they place in what order and location, and the player who places second is going to have a more complete picture into their opponent’s plan earlier. Did they put their easy target on the left? Maybe put your accurate fighter on the same side so you can line up an early kill. Are they hiding a leader in the back? Maybe put your faster guys forward so you can more reliably reach them. Did they put something really scary right in the middle? Don’t put your ‘must survive’ fighters too close to it. Going second in fighter placement lets you respond to this information sooner, and forces them to make a placement without any info from you to work off of.
There are three general scenarios: Your warband has fewer models, your warband has more models, or both warbands have the same model count. If your warband has more fighters than your opponent, you’re guaranteed to be placing the last model (or four) without the opportunity for them to adjust their placements, so you can benefit by hiding your more important pieces until the end of the process. They can’t know where your wizard is going to go, and you can wait to see where their assassins land before you place yours, for example. IF you’re the warband with fewer models, you’ll have to do a little Sherlock-style deduction to see where they might land that important piece you care about. Even if they aren’t placing their leader or an important support piece early on, starting hexes are being taken up by other fighters so the number of possible landing spots for that fighter you care about will narrow regardless. You may be able to deduce where it’s likely to go based on feature hexes on the board, adjacent starting hexes, or other things discussed later in this article, so get out your crystal balls and try to make the best educated guess while placing your fighters since you won’t be able to play mind games once your warband is all down on the table.
Cheating ahead to roll-off article which is coming up next, after fighter placement is complete, there will be another roll-off to determine who decides which warband takes the first activation. In almost all circumstances, you want to win that roll-off, regardless of whether you want to activate first or second, because it allows you to choose. Continuing to cheat ahead, the player who finishes placing their fighters first gets a free ‘bonus crit’ in the upcoming roll-off, and is statistically more likely to get to make that decision. If your warband has more fighters, you’ll never get that free crit, and if you have fewer, you’ll get it no matter what, so in both of those instances you should have your opponent place the first fighter when you can.
However, this means that when you have the same number of fighters as your opponent, you’ll have a very tough choice to make. If you’re tied on fighter count, you’ll need to balance that ‘information advantage’ against the ‘roll-off advantage’. Which you choose is going to depend on which thing you find more valuable for your gameplan and the particular opponent/matchup, and it’s a judgement call that isn’t going to be very teachable in an article format.
I have a few general tips and strategies you may want to consider, which I will detail below.
What’s Actually In Your Card Hand
The way you win the game of Warhammer Underworlds is by having more Glory than your opponent at the end of the third round. The way you score Glory is mostly through achieving your Objective cards’ conditions. What I’m getting at here, is that you should be thinking about how you’re going to score the cards that are currently in your opening hand when putting your fighters on the board. If you have a Kill Surge that requires enemy territory, you’re going to want to be able to improve your odds of getting that kill, ideally in the first activation or two, and place your heavy hitters where they can reach their targets. If you have a Hold Objective card, you want to make sure your fighters can reach those objectives and stay on them for long enough to meet the condition. If you have a ‘cast X number of spells’ card, you’ll want to make sure you have a wizard with viable targets in range. Don’t fall into the trap of deploying the same way every game because it’s what you’re comfortable with! Sure, if you have a card somewhere in your deck that needs every fighter in enemy territory you’ll want to keep people able to make it over the line, but if it’s not in your hand at the start of fighter placement that shouldn’t take priority over the cards you can actually score this round. Everything from here on will assume that you’re aware of the cards you’re holding (and what you’ll draw into later) and then agree that a certain posture, order, or orientation makes sense for what you can achieve at the outset of the game.
Aggressive Deployment
To kick off this discussion, I’ll drop a quote from Leathanam, one of the US NorthBEAST heroes and an excellent competitive player.
“In any match up, you should ask that age old Magic: the Gathering question—”Who is the beatdown?” That is, most decks can score some degree of objectives without interacting or very limited interacting with the opponent. But likely either you or your opponent will have more than the other, such that if you both refused to engage the entire game, one would win because that one has more noninteractive scoring than the other. (That’s why, for example, surges that require taking an enemy fighter out are generally not to be included in your six if you can help it.)”
You’ll want to guess, either from the warband they chose, the Plot Card they revealed, and the board/board orientation they opted for, which one of you is more likely the be “The Beatdown”. If this is a best of three match and you’re into your second or third game, you’ll probably have a much better sense, but guessing this right will be a key to winning the fighter placement portion of the game.
Let’s imagine you’re the Beatdown, and will have to force the action in order to win. If you can’t get to grips with the enemy fighters and land some attacks or play your range-limited cards, you’re going to lose. This is going to require you to take a more aggressive posture in deployment – more of your fighters in forward starting hexes, with your more valuable fighters being given more aggro opportunity, but also relatively more exposed. This obviously introduces some risk that your leader can get stomped early on, for example, but the alternative is they don’t get into the fight until it’s too late and your opponents’ hold objective/passive play has the score run up out of your reach.
Defensive Deployment
A defensive deployment strategy will take the opposite approach – maybe you are confident that your passive scoring can outpace your opponent’s, and you have less incentive to engage (as in, you are NOT the Beatdown). Or maybe you want to scrap, but don’t expect you can go toe to toe with the opponent in a midboard brawl. Deploy your more important models further back (or around the corner in an offset board orientation), or even hidden behind blocked hexes and lethal hexes if that wouldn’t hurt your plans. It’s rare these days to be able to win without doing any kind of engagement with your opponent, but you don’t have to fight on even footing. Make them come into you, and take their fighters on one at a time in your territory where you have the advantage of supporting fighters and more attacks in range of a given model. Try and see where their most dangerous model is placed, and then put your more important pieces out of their reach wherever possible. Sure, their bruiser might take down one of your minions, but your keyworded fighter that you need alive to score some valuable Objectives can be safely on the other board edge, at least for the first round.
Board Orientation Considerations
If you are playing on a longboard or a max offset, No-One’s Territory will be much smaller – if that matters for your scoring, you may need to place more fighters up front than you usually would so that you have a better chance of getting multiple fighters into that area. If you’re planning to invade/be the beatdown, this is even more important. You will likely have to run father to get to the enemy territory relative to your starting hexes. If you’re playing more passive or expect your opponent to be the Beatdown, you don’t necessarily have to hide as far away in these situations because the natural chokepoint created by board orientation will slow them down. If you’re playing squared up, the width of the board may be the deciding factor for some things. Consider placing you ‘bait’ model all the way to one side to get them to place their big hitter on that same side, effectively putting them out of reach from whatever you want to protect on the other side of the board. If you’re the beatdown in a squared up scenario, especially if you have the lower model count and don’t have the luxury of information, your big hitter might need to go in the centermost/frontmost starting hex you can manage so they have the higher number of potential targets once the game begins.
Feature Hex Considerations
If you’re playing defensive, think about putting valuable pieces behind a lethal hex so that your opponent has to put themselves in some danger if they charge at them. You could also position them behind a blocked hex to stifle some incoming ranged attacks or make charge lanes longer and possibly protect them for a turn, so long as this doesn’t hurt you more than it hurts them. Definitely don’t put somebody important right in front of a lethal hex unless you want them to get driven back into it! Cover hexes can be nice to have in reach if you want to move a fighter onto one for some added defensibility, especially if you have cards or abilities that score/trigger off of cover hex occupancy.
In terms of Objective tokens, much of this strategy was covered in the Objective Placement article – but you need to keep it in mind during fighter placement. It does you no good to have placed an Objective in a brilliant spot if you don’t also put the appropriate fighter close enough to stand on it while also doing whatever they need to be doing.
Starting Hex Considerations
Some warbands care a lot about having two specific fighters adjacent to each other, and you benefit from them being placed that way during fighter setup so the ability of card can function at peak efficiency from the outset. unless the boards are oriented in a way that makes it a bad idea, or you don’t have the necessary cards in your opening hand, you may want to deploy those specific fighters in adjacent starting hexes where possible. If your opponent is playing one of those warbands and you see two adjacent hexes on their board, you might be able to operate on the assumption that they will be deploying them there and gain a bit of information advantage when determining which of your fighters to put down in a given spot.
Wrap
Ultimately, fighter placement is a delicately nuanced dance between you and your opponent, which hedges on a lot of guesswork about what your opponent might have in their hand or their deck and what their gameplan is. A successful competitor will work both to figure out what their opponent’s plan is and deploy accordingly, all while keeping their own plan and cards in mind yet deceiving their opponent about their intentions. It’s the type of mind game that has so many varieties and possibilities that I couldn’t possibly cover it in sufficient detail in this article, but suffice it to say that it’s a much more important phase of the game than it may look at the outset, and a skill you’ll want to continually hone as your play your games. Without hyperbole, you can lose the game in this step if you get it wrong before you’ve even taken an activation. Put things in the right spot and get your opponent to misdeploy, however, and you have a big leg up and a solid chance to come out ahead in the end. Now get out there, pick your spots, and don’t forget to spend some glory!





Leave a Reply