
As I was plundering larders and infecting innocent populations with the hungering parasite, I heard a faint whisper. A whisper of madness. THIS WAY BE DRAGONS… err actually Ghouls. Actually, ghouls who think they are knights. Actually, ghouls who think they are knights that are getting whispered to by masks. Actually, ghouls who think they are knights that are getting whispered to by masks that have been influenced by the dark powers…..
Only GW.
Anyways, something this insane didn’t belong on a normal blog. The blog would implode, being sucked into a vortex of doom, like the Purple Sun of Xerxes to a Dwarf army with initiative 2. This only has one place where it belongs, Sleeksbowl.
Fishmode has done his best to match and exceed the madness that I try to instill in the community with articles that border on insanity. This one is particularly primed for such a cause. So, enjoy the read, but beware, if you start hearing voices you have a choice to make. Read on and become mad yourself. Or skip the read and wonder what power you could have unlocked. DON’T CHOOSE OPTION 2.
-Sleek/Mike Prime
Hey Sleek fans – Fishmode here to cover a less-common, somewhat silly Nemesis pairing I have had some good success with recently – Malevolent Masks with The Grymwatch, in what I and others are uncreatively calling “Maskwatch”.
I had wanted to cover a pairing I have been messing around with that would be timely and useful to readers of the page, and originally wanted to cover a Skinnerkin Tooth and Claw pairing I have called Al Dente. I opted against it since Tooth and Claw will rotate out soon and so it won’t be useful for people to read about for much longer. You can totally argue that the Grymwatch are old and out of print so this article is maybe not useful for most readers either but, well, this is Sleek’s Bowl, baby!
I’ll get the elephant in the room out of the way and say that, as so eloquently covered in this Bacon’s Bits article, for most cases you’ll find Rimelocked Relics to be the superior Flex/Hold deck. Everything in that article is true. It wouldn’t be Sleek’s Bowl if the deck had a solid foundation and was meta-appropriate, after all. Malevolent Masks simply doesn’t hold up as well in the hold-and-fight gameplan. The good news is that’s not my gameplan – here I’ll be leaning almost entirely into holding objectives with very few attacks, especially in my final iteration of the deck. Secondly, Malevolent Masks does work a little better for warbands that have resurrection mechanics, and the Grymwatch have that ability, so it’s not totally a lost cause. That, and the Masks are cooler than light-up sneakers. As the etching on a desecrated tomb reads: “Trust the masks, and power shall be yours for the asking. Betray them, and suffer most horribly”
Why Grymwatch?
Good question, homie. There are a dozen or more warbands who could potentially play a Hold Objective Masks deck, and the Grymwatch haven’t exactly kept up with the times. Sepulchral Guard have movement economy and resurrection as well. Lady Harrow’s has shown to be quite potent with the passive approach. Hexbane gets free upgrades out and is a top tier warband. I have played against masked Skritch and masked Exiled Dead and seen some silly stuff. Wouldn’t any of those be better? Need I remind you that this is Sleek’s Bowl, so no, better isn’t always better. The major reasons I went this angle were:
1) Grymwatch had been sitting on my shelf for more than a year, unplayed since a failed Illusory Might experiment
2) Grymwatch have some solid pushes and surges for holding to help get masks out
3) I have retained a probably incorrect belief that the Grymwatch can be the world’s greatest warband in the right hands, ever since I was brutalized by my buddy Nolan for months in Beastgrave. Aman of Path to Glory (back when he wan running Hexes and Warbands) felt the same once upon a time, which you can hear about in his article “The Grymwatch Problem”
4) I read the Direchasm Anthology (and you should too), which had a stellar short story about Valreek and what it’s like to be a delusional crypt ghoul that occasionally glimpses the truth that made me willing to go back and give them another spin.
5) Who better to handle those wretched Rimewyrm eggs than some fine and noble knights of Bretonnia? We can’t be letting them hatch and threaten our ‘crops’ or menace our ‘peasant folk’, after all.
Maskwatch, on the Record
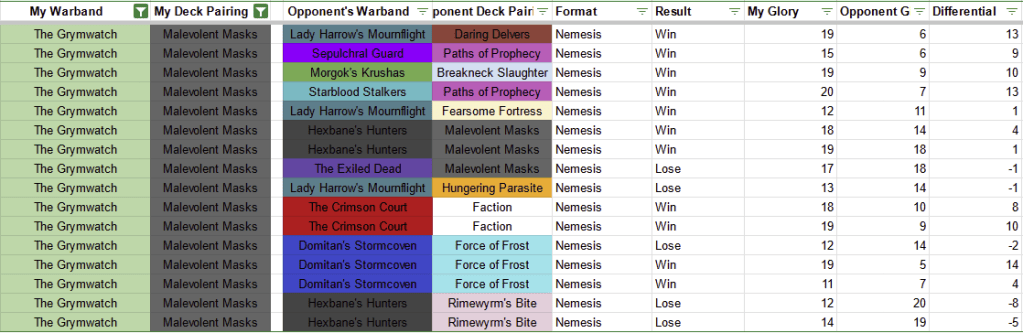
Thus far I have played the pairing 16 times including at a local 12 man tournament, with a total record of 11-5 with a glory differential of +70 for an average +4.375. Not bad for a season 3 Hold Objective horde warband in the greatest ping meta of all time. I did use three versions of the deck, so the article will be a little scattershot, but I wanted to lay out the ‘evidence’ so you can weigh the deck’s merits with this context in mind knowing what it faced and how it scored.
The Deck, in Three Iterations
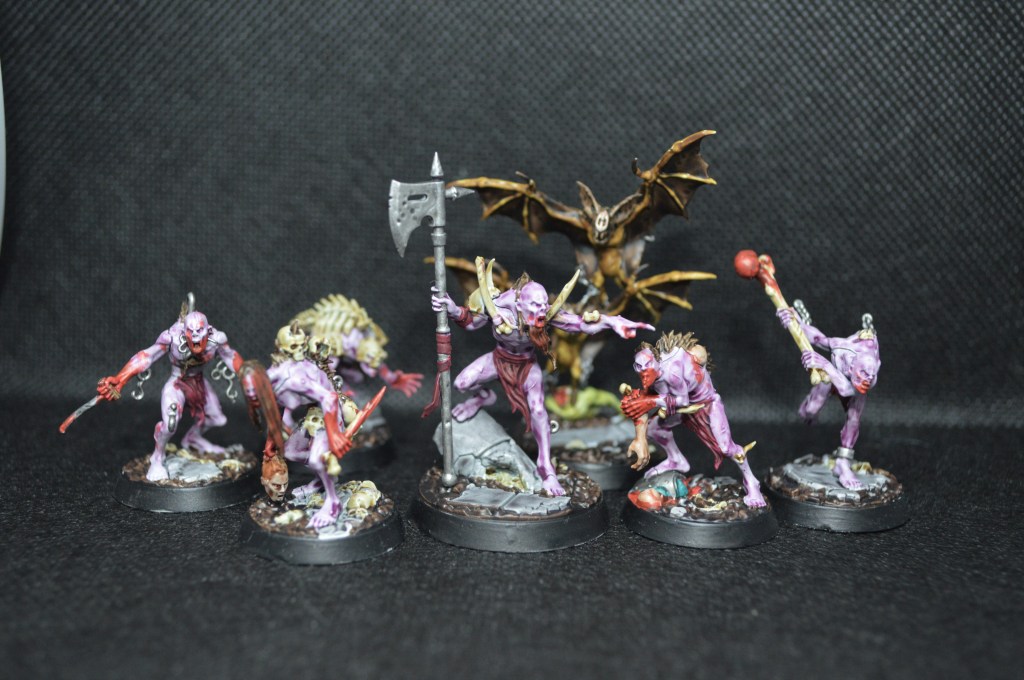
I’m going to spend most of my time this article discussing version 3, which I believe is the cleanest and best version of the deck, but I did want to provide some context about how I got to this point.
The first edition which can be found here was taken directly with no edits from a test build that Davy of What the Hex had put together and shared with me. It had several fighting related objectives, most notably Totally Overpowered, and kept some good upgrades for plus dice and damage, but I felt that splitting my attention here was causing me problems. I only lost one game with this version of the deck, against Val (a worlds-level player) when I actually didn’t realize I had this ‘old’ version loaded into Vassal, but my concerns did come to reality there as I struggled to hit with my low accuracy and get the damage out when I needed it. I was facing a relatively passive Mournflight Parasite and I mulliganed into a garbage hand and took some risks that didn’t pay off, eventually losing by 1 (13-14). Despite effectively needing to throw Valreek to the wolves for Shifting Madness and allowing him to get multiple inspirations and surges scored for swooping around her (and failing to capture the objective to boot) AND being out of position to score Totally Overpowered since I didn’t expect to have it, I still held my own. So losing here isn’t too bad, or that’s what I’m telling myself anyway. Davy builds a mean deck. See if you can’t beat him at the Madtown Throwdown on August 17th.
Version 2, which can be found here removed some of the aggro objectives and leaned more into the raw hold. I was successfully able to out-hold both a Prophecy Starblood and Harrow’s Fortress, and outscore a Masks Hexbane, and things were looking better. I did eventually lose once with this version playing into Exiled Dead (also with masks) as I couldn’t compete with the action economy to occupy tokens, didn’t have the defensive and mobility stuff I felt I needed to survive and get where I had to go, couldn’t inspire, and lost at the very end by 1 glory (17-18). This led me to look for ways to trim more aggro out and add some action economy for myself, up my speed, and put in a couple more gotchas and assorted BS cards to out-gimmick what I couldn’t outpunch in the first place.
These experiences led me to concoct version 3, which I took to the local tournament. You can see the deck here.
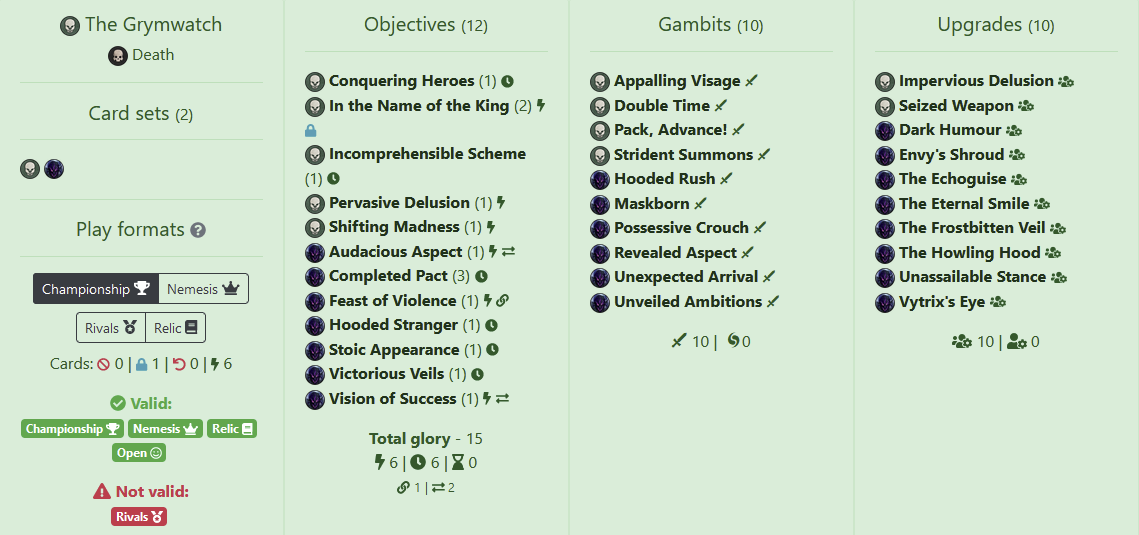
Let’s cover the general theory, then get into the card choices, and finally I’ll cover the tournament report.
Maskwatch: in Overview
The deck doesn’t need any kills or damage for the most part and you only really need attacks for Feast of Violence. Your main goal is to find a way onto tokens with masked fighters, and hopefully get yourself a good surge and a mask to get the ball rolling. I would like to see at least one mask (or Unveiled Ambitions, which lets you chose whichever one you want) in your opening Power hand, and at least one of Shifting Madness (if Objective 1 is a reasonable get) or In the Name of the King in my Objective hand. I absolutely hard mulligan for these in most cases. You can possibly make the surges Audacious Aspect and/or Vision of Success work for this opening hand since there are non-mask ways to score by holding objectives, but they’re less ideal.
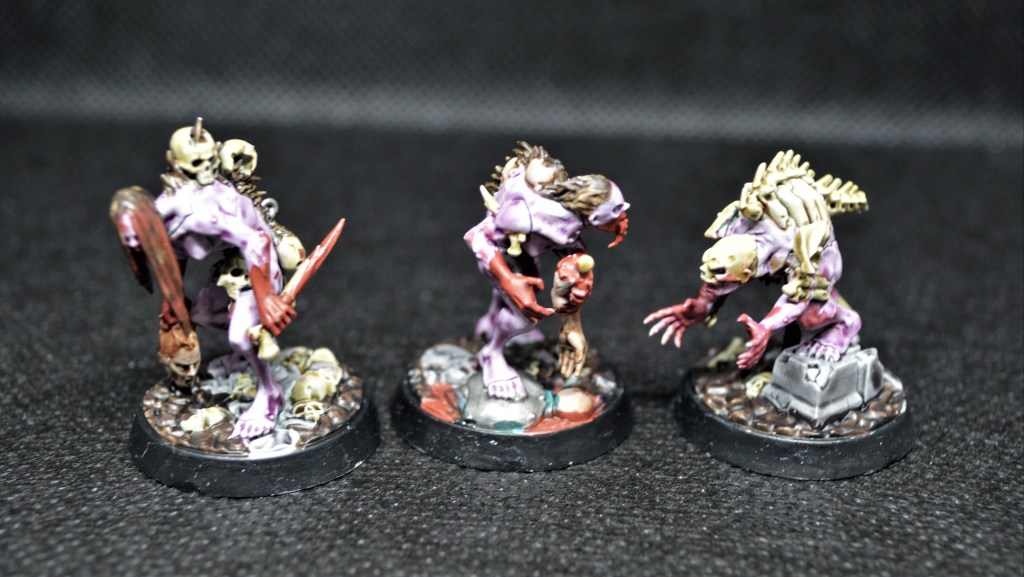
Once you have glory to buy a mask, slap it on somebody and start scoring like butter. Ideally your masks go on the three Crypt Ghouls since they can be resurrected with the Ghoul Call ability, though these fighters are easier to kill so it may be somewhat situation dependent. Gristlewel, Valreek, and the Duke can’t come back if they die, so they should only be masked if you feel like you can keep them safe or you really need the benefit it provides – if you position well they won’t be the ones who ‘need’ to have a mask. Once the masks are on, you’re really only using them to score the objectives for having masks – you’ll basically never take any mask actions. The one exception to this is Reverberating Call on the Echoguise, because three of these cards care about numbers and it’s nice to be able to shuffle tokens in a pinch.
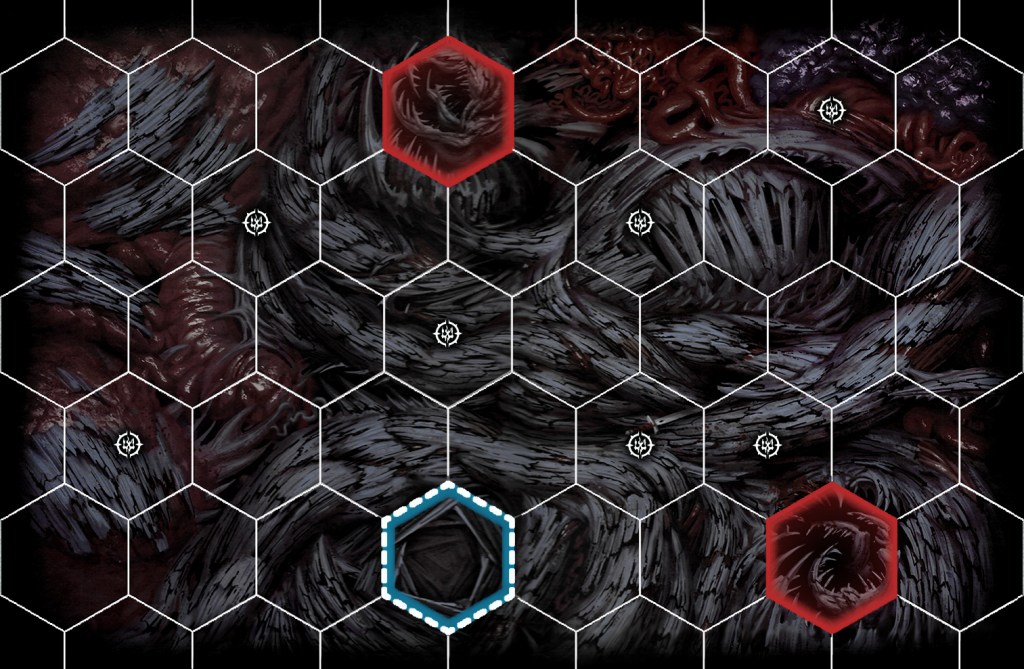
For boards and setup, my favorite (outside of the Rimewyrm’s Bite matchup) is ‘The Moltscape’ board from Gnarlwood. It’s a very good one for this build because it gives you a good spread of starting hexes and the potential to push people into lethal hexes if needed to finish them off – with basically no damage or accuracy support in the deck but a few pushes, you should be able to make use of these. I ususally try to orient the boards and do a max offset so they have a harder time blocking your inspire. You don’t like, need to inspire, but helps with your defensive stats somewhat. It also puts pressure on your opponent to rush in, which makes it easier to have a backfield respawn for Hooded Stranger or Conquering Heroes. Fighter setup priority is generally Duke Crackmarrow in the back, safely tucked away, Crypt Ghouls near tokens so they can move onto or be pushed there by Pack, Advance, and the bats in the front as bait. The Duke’s Harriers can’t hold objectives and so are your least important fighter – make them an appealing target for your opponent to hit. The three wounds means that it might even survive the first shot! I sometimes use Valreek as the ‘get on a token in enemy territory’ fighter since she also has three wounds, but if she dies (and she often will) you can’t bring her back and that could be a lost mask as well.
Major changes from the prior versions of the deck dropped all plus dice and plus damage effects, all Objectives that required kills or damage (save for Feast of Violence), and got rid of Taking Over, since, really when am I needing a mask action? 4/5 times I was using it to fire Vytrix’s Eye, and I just removed most of the reward for doing that. I added Double Time for more movement, and Conquering Heroes to lean more into the hold strategy. I added Unexpected Arrival to help my more important fighters escape danger or pull off some shenanigans, and Unassailable Stance to maybe live a little longer. The idea was to mask up and get running faster than they can get killing.
Maskwatch: in Detail
Surge Objectives
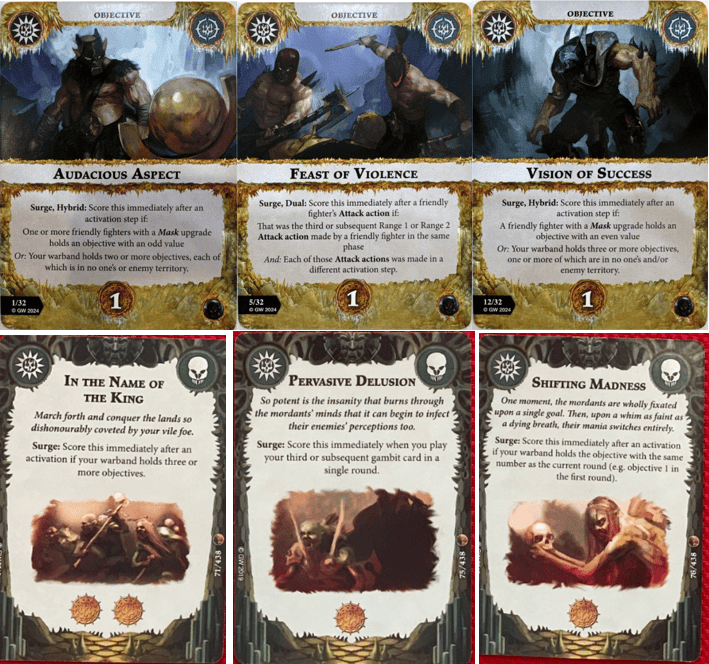
– Audacious Aspect – Hold an Odd with a mask. Trivial if you have a mask, and conveniently has a way to score without masks.
– Feast of Violence – make three range 1 or 2 attacks in separate activations. Easy because you don’t have to hit or kill anything, tough because you might not want to attack and the Vytrix’s Eye’s attack does not help score it.
– Vision of Success – Hold an Even with a mask, harder masks condition with an easier non-mask option. Stand on stuff with masks, check.
– In the Name of the King – the reason for this pairing, tbh. Hold three, get two glory. That’s two masks. And then you’re already on tokens, so you’ll score even more.
– Pervasive Delusion – play three gambits. Easy when you have the cards, but not perfect. Some games it will just score for you without effort.
– Shifting Madness – my favorite card to start the game with. Unless your opponent is savvy to it or the board setup is rough, you should be able to sprint onto Objective 1 in your first action, get a glory for basically nothing, and let the masks flow.
End Phase Objectives
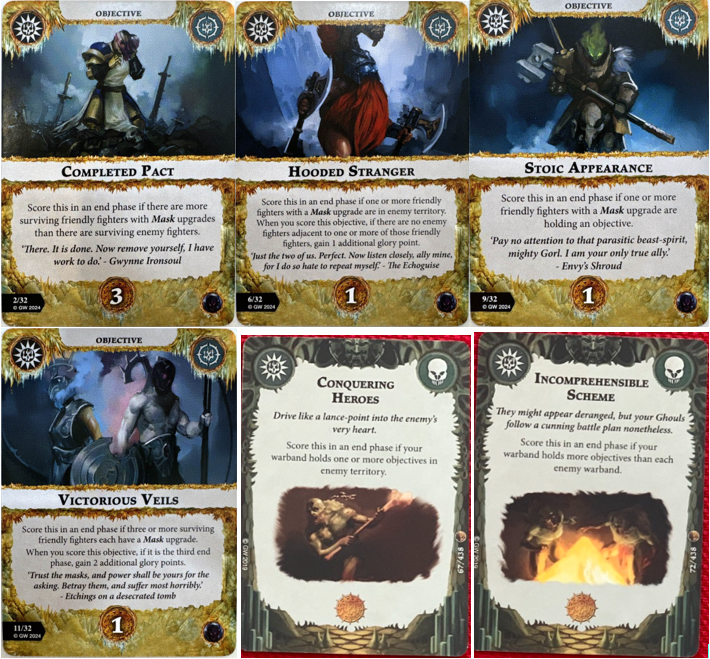
– Completed Pact – have more surviving masks than surviving enemies. Later in the game, this might be pretty easy, but in some matchups it can be rough. You don’t want this card too early since you won’t have masks and they’ll still have all their fighters. Mid game against an elite warband? No problem. Three glory is worth the risk.
– Hooded Stranger – get a mask in enemy territory, bonus glory if they’re alone. You’re fast enough to make this happen, and Ghoul Call can make this trivial in many situations.
– Stoic Appearance – hold with a mask. You’re doing this anyway, or you’re losing bad.
– Victorious Veils – have three surviving masks. 1 glory, or 3 if it’s the third end phase. Ideally you save this for the end, but if you worry you’re going to get all your ghouls killed I sometimes jump for the 1 glory in round 2 just to salvage what I can get. You don’t like to see this round 1 in most games.
– Conquering Heroes – hold in enemy territory. Most games this is doable unless they’re also focusing on defensive hold. Ghoul Call again, along with Double Time means this is easy. Ideally you grab this, Hooded Stranger, and Stoic Appearance all in one end phase to really pile it on.
– Incomprehensible Scheme – hold more than your opponent. Most times this is no problem.
Gambits
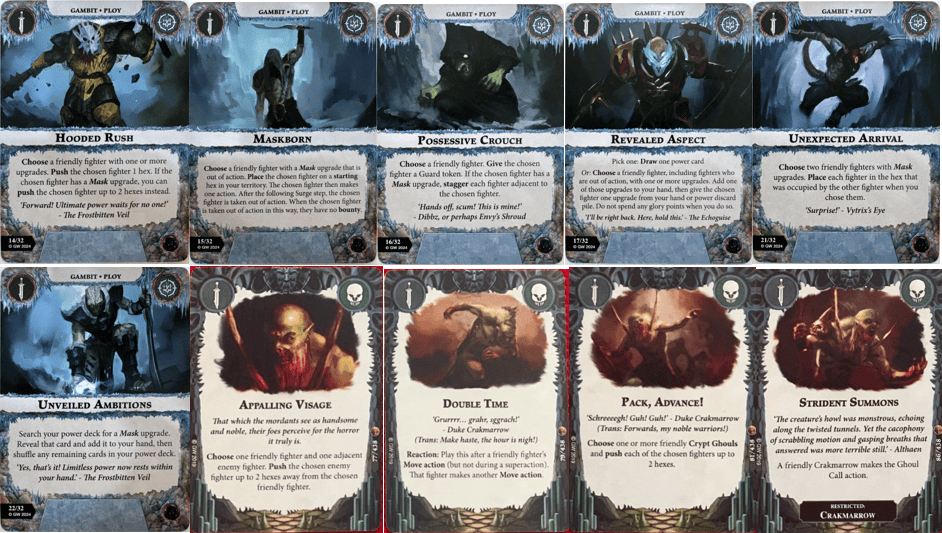
– Hooded Rush – Sidestep is good. Sidestep 2 is better. I’m usually masking early and so it’s a great card that can help get me on a token without needing to spend an activation, making those surges land much faster and the end phases happen when my opponent thinks they’ve denied me.
– Maskborn – Initially I used this to get another swing with the Duke or to fire Vytrix’s Eye one more time. That’s the wrong move. You do this to get another Ghoul Call after your opponent thinks that’s off the table. You can also drop a Howling Hood next to somebody holding a token you’d like to occupy and launch them off, preferably out of your territory to help inspire. Maybe you just drop them, run on a token, and score a surge before they vanish again. Worst case it helps you score Pervasive Delusion.
– Possessive Crouch – Guard is good for this build – you want to stay on those tokens. If you’re inspired and on 2 dodge, even better. If you stagger your opponents that’s gravy but rarely worth waiting on; I drop a guard token when I need one and don’t worry about the rest.
– Revealed Aspect – in the worst case this is a deck thinner that helps you find a mask or score Pervasive Delusion, in the modest case it brings a mask back from the grave, in the best case it takes a Perfect Blade or Bane of Heroes out of the equation. Unfortunately in most games it was just drawing a power card, but still nice (and can help you score Pervasive Delusion if you draw into another Gambit).
– Unexpected Arrival – I had originally read this card as a way to ambush somebody who was far away from a dangerous fighter and thought that teleporting a slow damage dealer wasn’t the thing I needed to do in this deck, but I eventually reconsidered for version 3. This lets me take the Duke out of danger. This lets me put a masked-but-about-to-bite-it Valreek/Duke/Bat/Gristlewel in a safe spot and hand them a resurrect-able Crypt Ghoul instead. This lets me put a 3-4 wound fighter in where a two damage attack would kill the Crypt Ghoul I need to live. Using this a defensive get-out-of-jail saved me more than once.
– Unveiled Ambitions – get a mask, and get exactly the mask you want at the time you want it. This card is great. A little less useful in the later game but the number of times this buys you the Echoguise early for surge tomfoolery or Envy’s Shroud to survive the round 1 attacks makes it worth it’s weight, and increases the odds you’ll eventually score Victorious Veils and Completed Pact.
– Appalling Visage – get somebody off a token you want, get somebody dangerous away from you, or kick a fighter out of your territory to inspire. It doesn’t always work, but the games that it does, a Distraction 2 can be so punishing to your opponents, especially if you can deny them positional scoring you know their pairing wants.
– Double Time – a late add, you get to move twice in a since activation but not charge. Not perfect since it opens up multiple reaction windows for Hexbane’s Funny Gun, Frozen to the Spot, etc, but being able to move 8-10 means you get to land on the token you need, or get the heck away from that bully who wants an important fighter dead. You could go 12 with inspired bats, but they can’t hold so that’s too bad.
– Pack, Advance! – Absolutely necessary card. Double Sidestep 2 makes scoring hold stuff so much easier. It’s Crypt Ghoul restricted, but still is a money maker
– Strident Summons – get a Crypt Ghoul back on the board without burning an activation. You NEED those maskwearers on the table, and this makes that easier for you while keeping your activations open for move or guard actions. In a pinch, I’ve used this right before I knew Crackmarrow would die and up the odds I get to score my Victorious Veils.
Upgrades
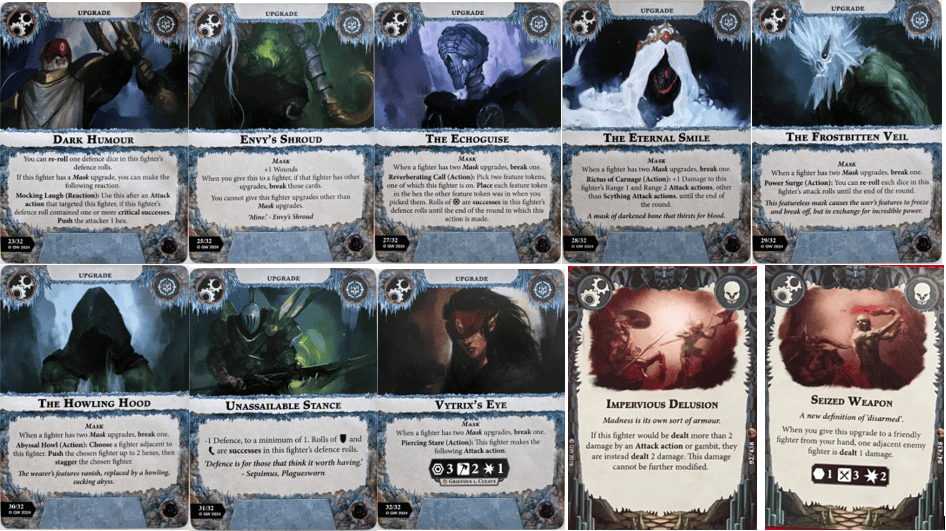
– The Hexen Masks – you’re taking all six to maximize your chances of drawing them early and making use of them and scoring for having a bunch at once. Your favorite depending on your circumstances will be either Envy’s Shroud (+ 1 wound can keep a fighter alive for one activation longer, but note that you can’t have any other upgrades on them), The Echoguise (for the cool token swapping, but note it will ‘waste’ an activation) and rarely the Howling Hood (nice to have a push available to you to clear out a token, push the second fighter out of your territory to inspire, or dunk somebody in a lethal). The other three are a definite waste of time with this objective spread so you only apply them because they’re masks and not because you want their actions.
– Dark Humor – great to have a defensive re-roll, especially on your two dodge fighters once inspired. The mask-restricted push on a crit is nice but not the main draw.
– Unassailable Stance – most of our fighters are one dodge, and everybody is while uninspired. This puts them on pseudo guard and roughly doubles their defense chances, which you’re going to appreciate. Probably don’t give it to the inspired 2 dodgers since it reduces defense to 1 die.
– Impervious Delusion – While 3+ damage in Nemesis is somewhat rare, I really don’t want Crackmarrow to take that much. Being limited to only 2 damage on a given attack makes sure he doesn’t go down to a 4 damage hit or a 3+ping and forces the opponent to spend more time on him. Can also theoretically keep a 3-wounder alive a touch longer.
– Seized Weapon – this one is more for fun than anything else, but it has a nice benefit of being a ping AND a weapon upgrade in the event you get desperate to put some damage out, but it doesn’t do much to help with the deck’s goals. I do love that it’s ‘a new definition of disarmed’.
Maskwatch: in Practice
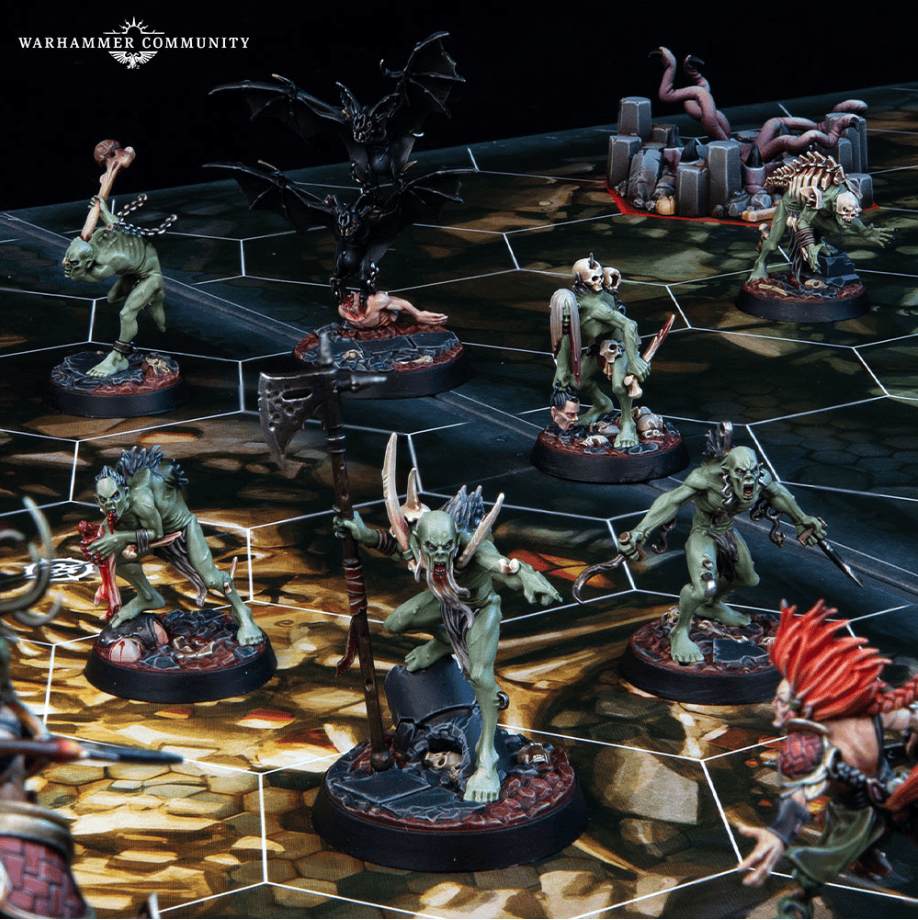
Having gone 7-2 up to this point, I decided to bring the Maskwatch out to a local 12 man Wintermaw tournament to see what they can do under pressure. I had never tested out the full-passive version 3 up to this point, so it was all up in the air.
Match 1: Crimson Court
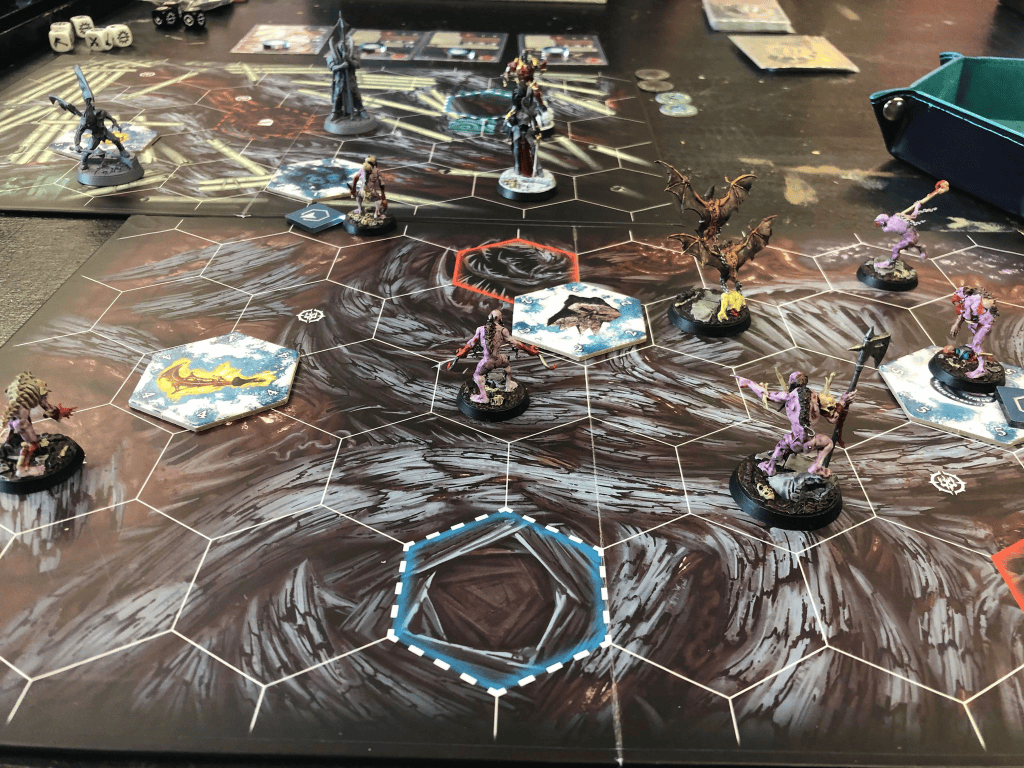
I opened into Chris B who had brought Crimson Court with no Nemesis pairing, running their straight Rivals deck. I’ve faced CC enough times with other warbands enough times to know they’re nothing to sneeze at, Rivals or otherwise. Quite fortunately, I was able to survive on some lucky early crit defenses, and in both games Gristlewel hit his round 1 charge, and both games I was able to use a Seized Weapon ping or a lethal push to finish a fighter off, so I got a kill or two without losing too many fighters and that overcame bad opening hands for me both time, winning the set 2-0 with +18 glory differential. Had he paired with Force of Frost or Breakneck Slaughter, we might be having a totally different conversation.
Match 2: Domitan’s Stormcoven
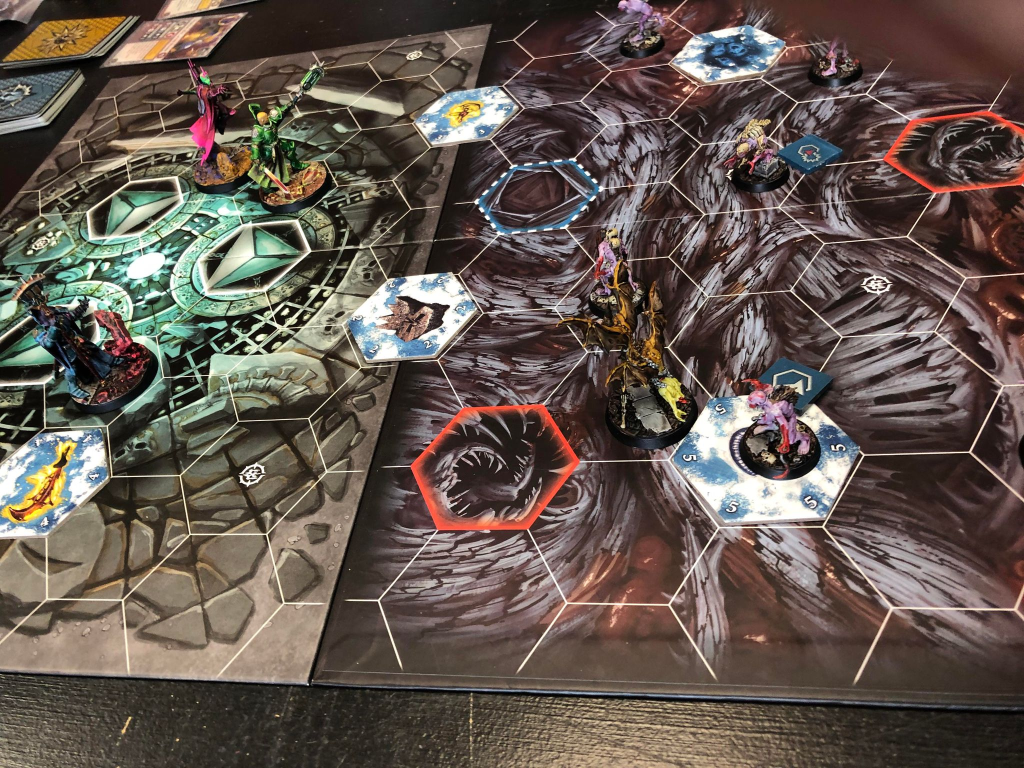
Round two saw me on the top table against Dan playing Force of Frost with Domitan’s Stormcoven. A unique test, as Dan had built his deck to look quite similar to Aman’s that won the World Championships last year, and seeing how many 2 health fighters I had made the ping scenario pretty scary. I did end up losing game 1 when I ate an Avalanche that dropped 6 damage on me near the start of the game. I managed to keep myself in it, but four glory for casting four spells right at the finish of the game closed the door on my hopes and I lost 12-14. Games two and three went much better for me, getting the early surges I needed and some better card sequencing to pull of ‘some real bullshit’ to quote my opponent (he wasn’t wrong!). This allowed me to occupy tokens at the right time and get the surge ball rolling. Hugely beneficial in game three was a failed casting roll for Abasoth’s Avalanche. I won the second game by 14 glory and the third by 4 (thanks again to some lucky defensive crits) and ended up heading to the top table for the finals with a 2-1 win and a +16 differential.
Match 3: Tournament Finals vs Hexbane’s Hunters
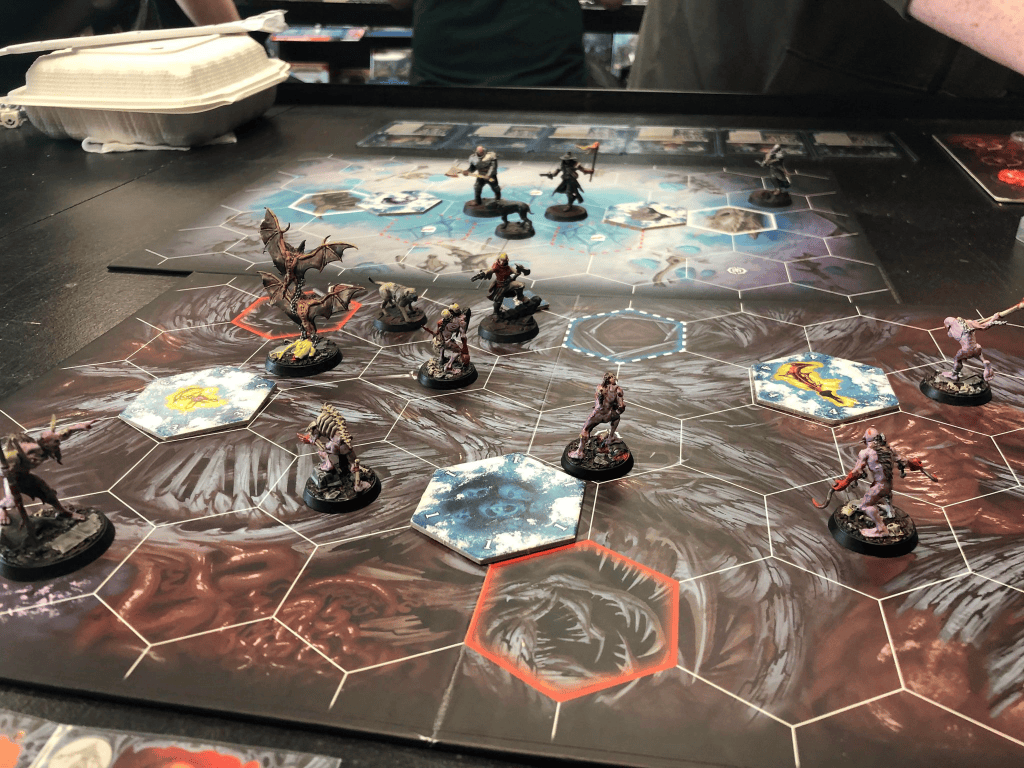
Finally, I lost twice in the tournament final against Hexbane Rimewym’s Bite which just mowed down my fighters pretty efficiently, getting the Duke out round 2 both games while blocking tokens and movement paths with dogs very well. Both games he won the roll-off, opted to go first, and obliterated Valreek with Bryget, which hurt pretty badly, and I didn’t learn to hide her for game 2. I also made a mistake of taking a busy board for Rimewyrm in the first game and ate plenty of ping that way. The lethal hexes helped him score Deadly to All as well, rookie mistake for me! I had played Andrew a dozen times prior to this with his own Masks pairing and foolishly thought ‘no plot card, so must be masks’. I think he even told me it was Rimewyrm – tournament brain burn is real, folks. Considering it was a 6 fighter warband and I would at best be eliminating 2-3 fighters while losing several of my own, it was much too difficult to score Completed Pact in this matchup as well. With no glory for the first dog kill I really had a low glory cap, which among other things cost me the matchup unless luck really went in my favor. It didn’t. I lost 12-20 and then 14-19 and was soundly defeated. Andrew has proven once again he’s a menace with Hexbane and went home with yet another glass trophy – well deserved!


Next Steps
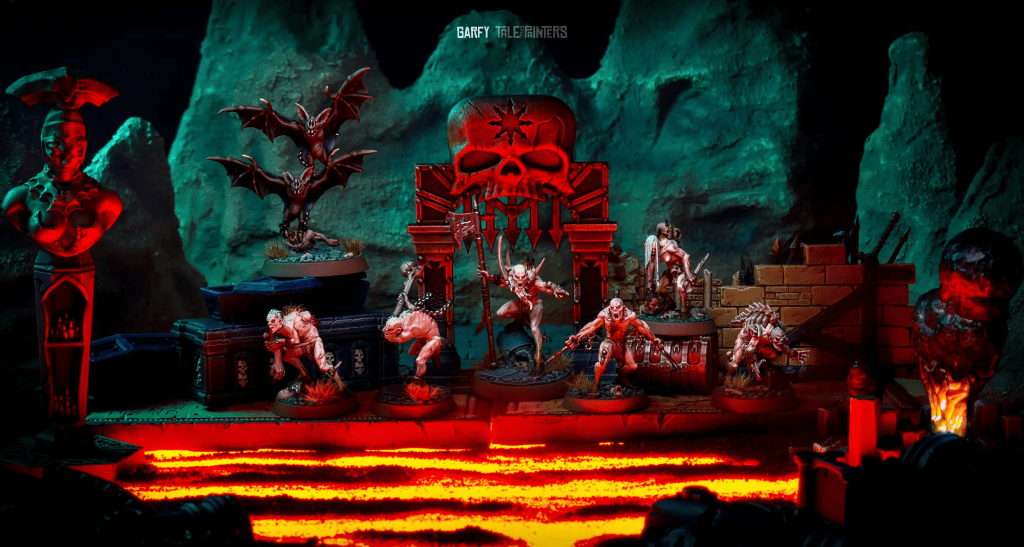
Ultimately I believe I’m leaving the Grymwatch on the shelf for the next while, but if I eventually return to the deck, I may try to trim out those last aggro touches. Feast of Violence has caused me some problems early game when I don’t have enemies in range for the attacks, mid game when I surge draw into it mid-round and I haven’t made the attacks necessary to score it, and late game when I’m low on fighters and would rather run away. Unfortunately there aren’t many great alternatives from the surge options I haven’t already taken in this pairing. Domino Dominance is the only viable option, and seeing how Andrew quite effectively blocked my inspire both games it wouldn’t have been much more useful, though it could have helped in my other matchups. I also might cut Seized Weapon, because while It’s great to have a ping (and a non-gambit ping, which cuts through some cards that might block it), I realistically don’t need to deal damage and should lean on some defensive or mobility tech to score out the hold cards I do have. Aura of Command or Grip of Madness look like options here, or maybe Displacing Figurine.
Wrap
If you like Grymwatch, and want to read more about how they’re best used from somebody who has more experience with them, I strongly recommend this article from The Underdogs: Certainty of Death page. It details a Fearsome Fortress build so there’s some overlap in strategy, and is definitely more professional and concise than this guide is!
What has your experience been with Malevolent Masks? Have you tried the Maskwatch pairing before, or are you inspired to give it a spin? Let me know your thoughts at SpentGlory@gmail.com and as Envy’s Shroud says, “Pay no attention to those (hungering) parasitic (decks), mighty reader, I am your only true ally”. Until next time, get out there and spend some glory (on mask upgrades!)





Leave a comment