
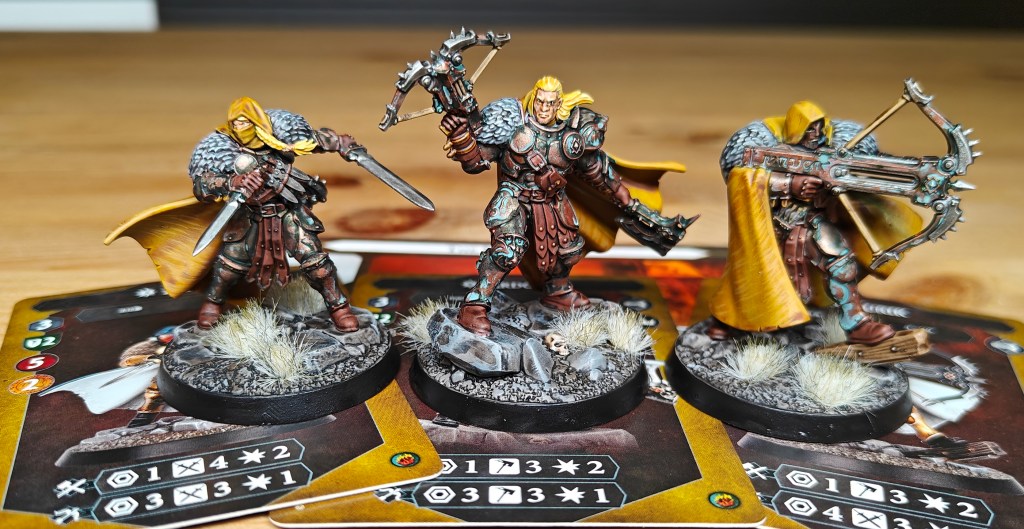
Howdy gang, we’re continuing the Emberwatch love on Spent Glory this week. Welcome back to the Love Letters Series, where readers discuss the warbands and pairings that they enjoy the most. This one has been penned by the Netherland’s own Kevin van Ravenswaaj who competed as part of team NL at the World Team Championships in Vienna, Austria last month after successfully winning the Benelux Clash with the same deck. While Realmstone Raiders has only been available for a short time, we’re already starting to see it used in some unique and unexpected applications – this pairing with Emberstone Sentinels and the Emberwatch is no exception. Lets’ dive in to hear the Dutchman made it work, and performed especially well despite being designated to be ‘thrown under the bus’ and handed his team’s most challenging matchups.
Love Letter/Deck Guide
Background
Hi, I’m Kevin, an underworlds player from the Netherlands. While the Venn Diagram of underworlds and Middle Earth Strategy Battle Game (MESBG) players is likely incredibly small, a small handful of you might know me from the Lowlands Wargaming podcast, where I spend a lot of my time discussing competitive MESBG.
Although this is my first foray into content for Underworlds, I have actually been playing the game for about four years, mostly practicing with a good friend of mine and playing in local tournaments (with consistent podium finishes).
I recently won the Benelux Clash with Emberwatch paired with Emberstone Sentinels and Realmstone raiders (ES/RR), going 5-1. I also took the pairing to the WTC in Vienna as part of team Netherlands, and won 3 out of 5 matches despite being ‘bussed’ by my team (more on that later). The two losses were both to Gitz, the current boogeyman of the meta (more on that later as well).
I was only one of a handful of RR players at the WTC, and the only one running ES/RR specifically. I got a lot of comments on my unusual pairing, with opponents confused by it and surprised at it working, so I figured I’d do a write up and show the method to the madness.
Why the Emberwatch?

Let’s start at the beginning. Like most people I started with selecting a warband. I was looking for a new warband to sink my teeth into about half a year ago, when I decided to join the Dutch team at the WTC. With the WTC not allowing duplicate deck pairings and no-one else in the team interested in a Take and Hold play style, I figured I’d give it a shot.
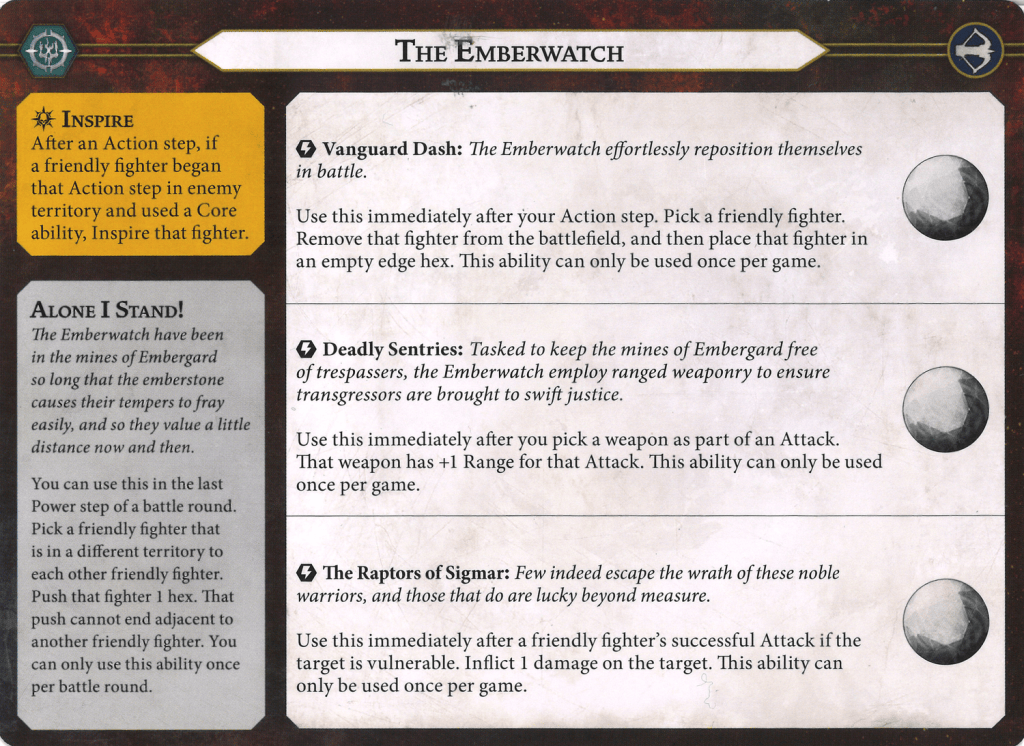
I quickly narrowed down the options to Myari, Emberwatch and Thundrik. After some quick and dirty playtesting I quickly settled on the Emberwatch. Their end of round push, once per game teleport, good melee, range and survivability make them very good at taking a position and then holding it despite your opponent’s best efforts. When played well they can also easily take out a few of your opponent’s fighters in the process, netting you some extra glory.
Road to Realmstone Raiders

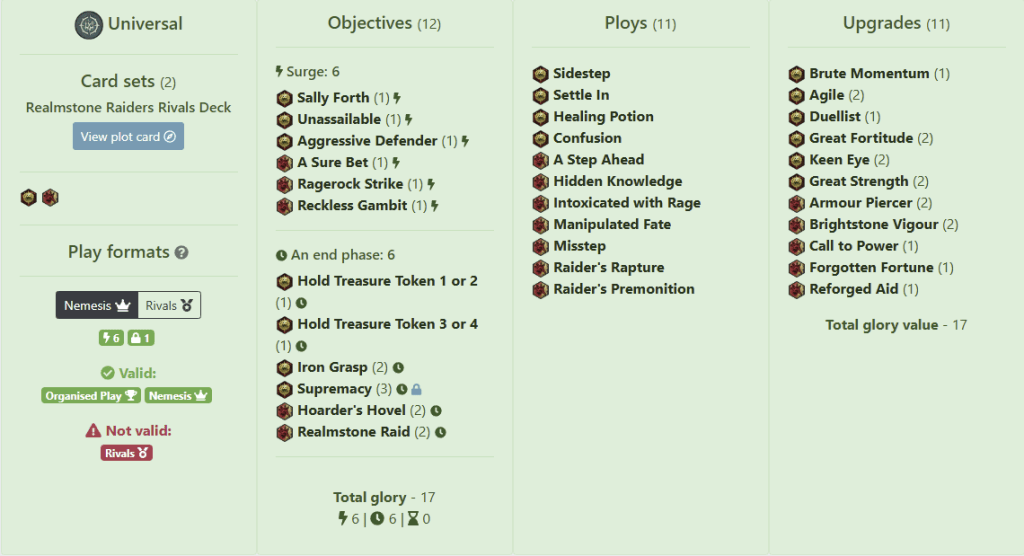
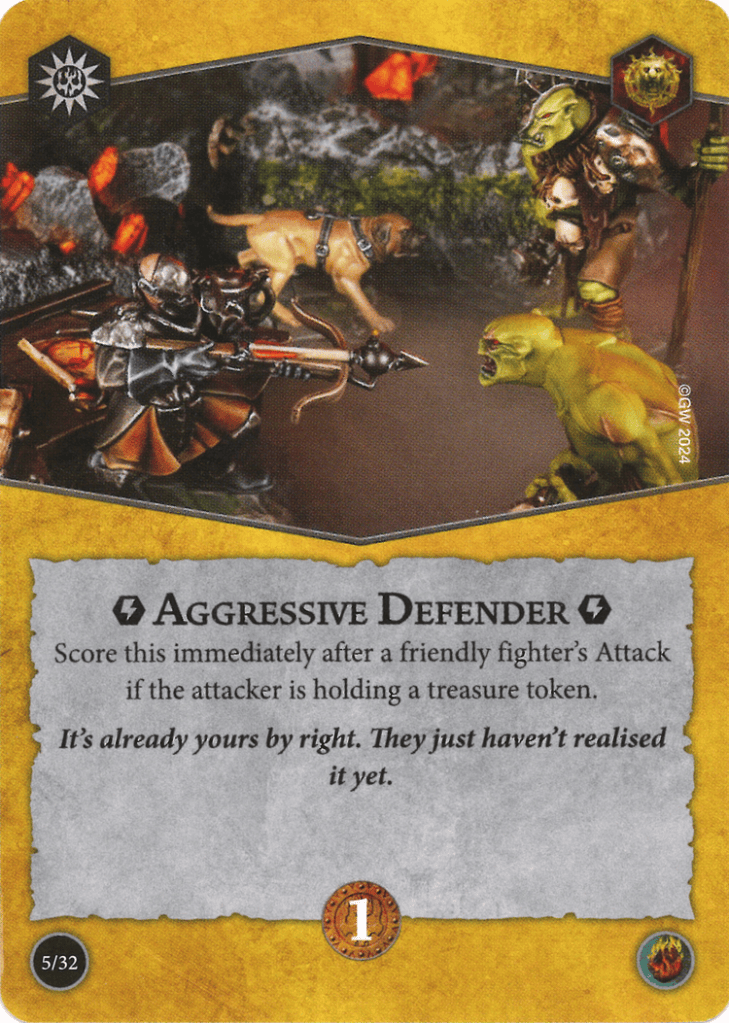
When you’re playing hold objective there’s no surprise that the first component of the pairing is ES. It’s literally the only Take and Hold Rivals Deck at time of writing (GW please). It gives you access to some incredible scoring cards like Supremacy and Iron Grasp, and has one of the easiest to score surges in the game in the shape of Aggressive Defender. It also has access to solid ploys like Confusion, Healing Potion and Sidestep, and the staple upgrades of Great Strength, Great Fortitude, Keen Eye, and Duelist.
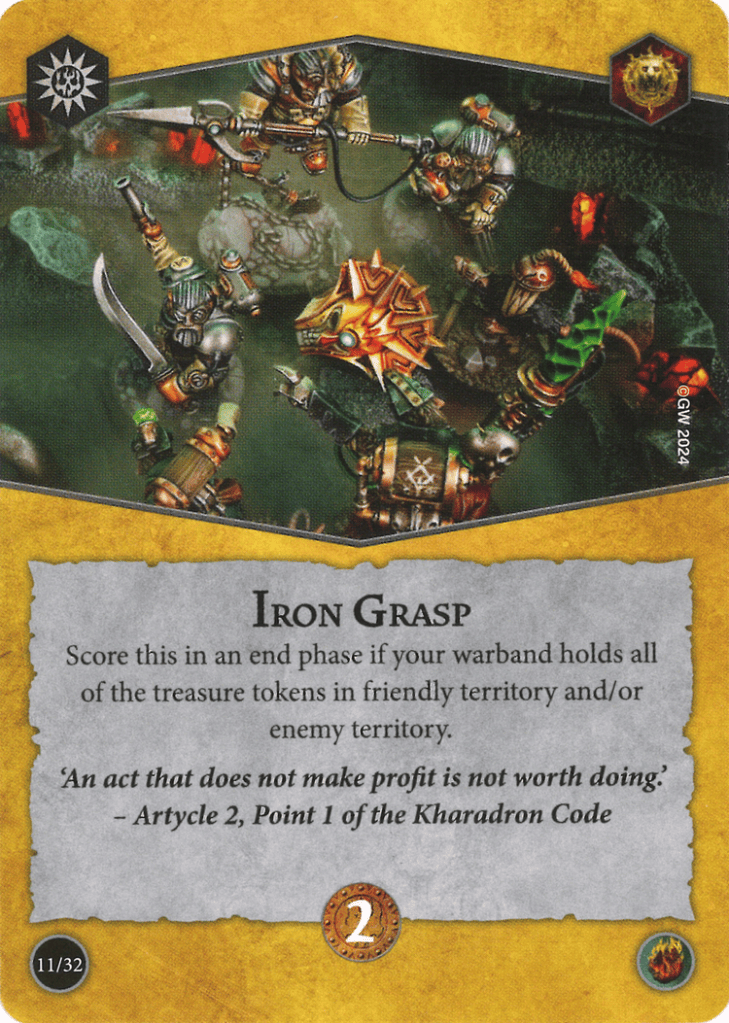
But of course every rivals deck has its limits. ES in particular has mediocre surges (aside from aggressive defender), and the rest of its end phases aside from Iron Grasp and Supremacy are passable at best. Its ideal pairing would be a partner that helps it achieve a higher glory ceiling and better surges, while adding some mobility options and potentially killing power.

I initially paired with CTC, but quickly found that the pairing struggled to score. The glory ceiling was fine at 17, but some of the surges were really difficult, and set explosives is basically a harder to score supremacy for this warband. The surges also weren’t particularly deep. Running Collateral Damage basically relied on being the underdog, as you typically try to avoid having a Stormcast die. With the recent changes to underdog it is even worse.

Next up I ran it with BA for a while, and found it worked much better. Until Realmstone Raiders was released (and the underdog changes) this was my pick for the WTC. It features some fantastic surges and some end-phases that are easy to score. BA does suffer from not having any multi-glory end phases due to supremacy, so I found myself having to run slow advance, which is quite tricky to score. That card aside, I found myself consistently scoring every other objective in the deck in most of my games. Add to that some glory from bounty, and you end up with a respectable glory count.
In terms of ploys and upgrades, BA adds mobility in the form of illusory fighter and commanding stride, and killing power via determined effort, sharpened points, accurate and the like. Unfortunately the recent balance changes made illusory fighter restricted, which means you can’t run it with ES as no-one in their right mind would give up supremacy (also restricted).

The loss of Illusory Fighter combined with the low glory ceiling made me start considering Realmstone Raiders as a different option. At first glance this sounds like insanity, as most reviewers and players labeled the deck anywhere between ‘pretty bad’ and ‘outright garbage’. As a rivals deck, I don’t disagree. The deck has some of the weirdest design choices we’ve seen to date, with poorly written rules and some objectives and surges that are incredibly difficult to score.
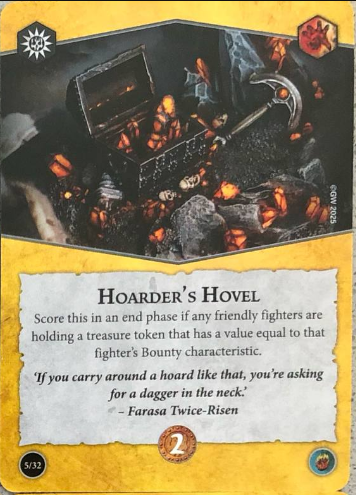
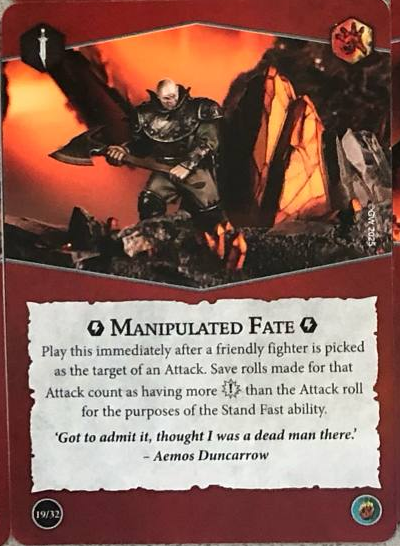
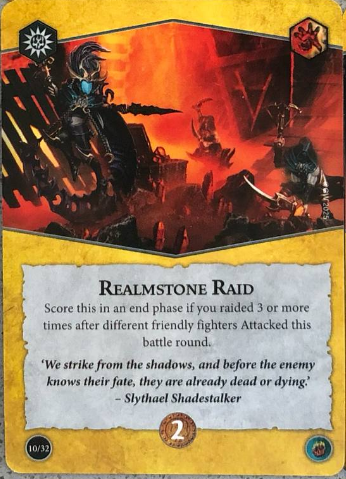
But the deck also has a few gems in it. Hoarder’s Hovel was the first thing that drew my eye, and fits right in the game plan. It is also scorable with only 1 fighter remaining, a big plus. Realmstone Raiders also stood out as a good end phase for a warband with accurate melee attacks like the Emberwatch. The fact it doesn’t require you to hit any Emberstone cards makes it very consistent. The deck also has Manipulated Fate, which I think is one of the best ploys in the game, especially for Take and Hold.
Unfortunately we can’t just ignore the raiding mechanic, because we also need some surges and that’s where hitting realmstone cards comes in. Ragerock strike, a sure bet and reckless gambit are decent surges but all require you to hit emberstone cards while raiding.
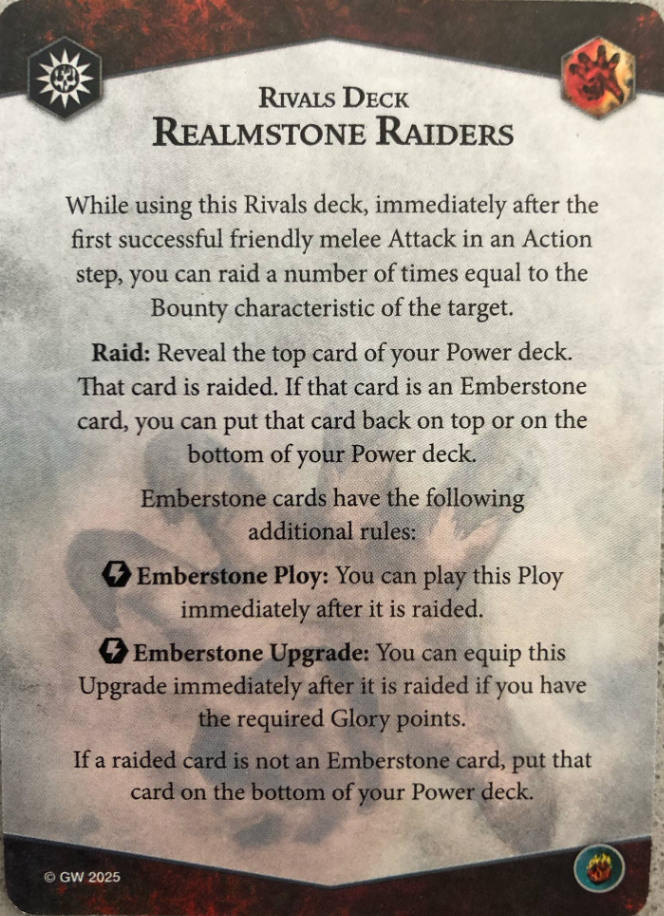
To achieve consistency, I ended up running 10 total emberstone cards to hit in a deck of 22. I also cut out by the numbers to avoid unnecessarily drawing my Emberstone cards. Running this many meant not only that I would be able to score my surges, but I could also use these cards for ‘free’ when raiding without too much worry of being unable to score them later on. I typically just raided upgrades to the bottom in round 1 to ensure having a few cards to hit in later rounds. Being able to cycle an objective or give an opposing fighter a stagger token for free after an attack is quite nifty!
Tournament Runs
In the recent Benelux Clash I managed to get a 5-1 record. Two games of note were (massively) losing one game to Grymwatch, and narrowly winning another game against Grymwatch on the third tie breaker. Turns out raiding is quite hard when everything is worth either 1 glory or 0. I wasn’t running Raider’s Rapture yet at this point, but decided that needed to change after this event. Scoring the raid surges was proving to be quite difficult against horde and/or raise warbands.
The WTC requires a bit more context. As mentioned earlier, the format didn’t allow teams to run the same deck combo multiple times, which is partly what led me to explore hold objective options. Additionally, there is a draft system that teams use to determine the matchups. I won’t go into full detail here, but long story short if your warband was put forward, the opposing team would select two of their warbands to play against you. You then choose one of those two to play against. In effect this means that if you’re being put forward you have to choose between the two worst matchups for you (usually). You’re kind of getting thrown under the bus (getting ‘bussed’).

We figured that my pairing was an ideal candidate to get bussed, banking on the fact people would be unfamiliar with the combo and hopefully present options that actually were a good matchup. As mentioned earlier, I was the only person in the event running the combo, so we didn’t expect our opponents to have a lot of practice against it.
This turned out to work quite well. On two occasions I had to pick the lesser of two evils in the shape of the Gitz (instead of Grymwatch). Despite running decent games against them, the Gitz simply outscored me, having a high glory ceiling that is hard to counter.
The other three matches I managed to win, netting me a decent 3-2 record despite ‘getting bussed’. I played against Blackpowder, the Beastgrabbaz, and Ylthari’s guardians.
How To Play
Let’s get this out of the way first: don’t expect immediate success when you’re trying out this combo the first time. The Emberwatch is a strong warband that requires you to play at a knife’s edge. You want to move up, claim tokens, be in enemy territory to inspire, be spread out to be able to use pushes, be in melee range to be able to raid, etc etc. It is a quite demanding playstyle in terms of positioning. It takes some practice and repetitions to get a feel for how aggressive you can be without over exposing yourself.
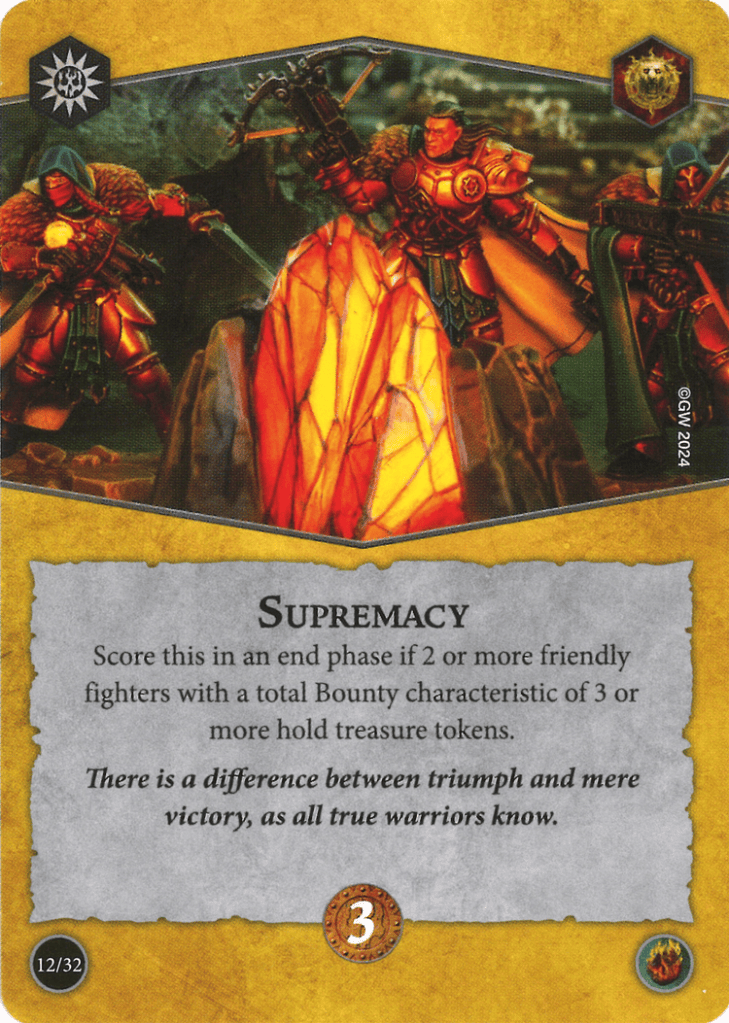
With that said, let’s go over what to look out for, beginning with setup. You’re generally looking to mulligan for Supremacy. Realmstone Raid tends to be better in round 2, as you sometimes don’t want to commit to melee immediately in round 1. Similarly, Sally Forth and A Sure Bet are better in later rounds. A sure bet can only be scored by Farasa uninspired. For the others it requires inspiration or the Keen Eye upgrade. Hoarder’s Hovel and Iron Grasp are fine keeps, but you should be able to score these in later rounds as well. A perfect opening hand has Supremacy, Aggressive Defender, and Unassailable, as well as Manipulated Fate or a way to put the fighter that’s holding that treasure token on guard.
Speaking of power cards, aside from the usual strategy of favoring ploys over upgrades in round 1, you also need to see how many realmstone cards you drew. Any realmstone card drawn reduces your chance of hitting them with raiding later. 4 or 5 is a hard mulligan. 3 is keepable only if the hand is good otherwise. Ideally you have 2 or less.
If placing the board you generally want the side without blocked hexes, and to choose the layout so that there is more neutral territory (a solid ribbon). This makes it easier to use ‘Alone I Stand!’ in the last power step.
If you get to place treasure tokens, it is generally a good idea to place your first token smack dab in the middle. This means your opponent has to put their first somewhere to the side in neutral, allowing you to put your second also in neutral, leaving only 1 in enemy and friendly territory. Why? To make scoring Iron Grasp easier. It also make scoring Desolate Homeland easier for your opponent, but generally that’s hard to prevent anyway. Some notable exceptions to this strategy is if you have Supremacy in your opening hand and are facing down a hard aggro melee warband. (Krushaz, Gorechosen, etc). In such cases it is wise to put two in your territory so you can easily score Supremacy in round 1 without overexposing yourself.
In terms of playstyle, it pays to be opportunistic. In an ideal game, you stand on treasure tokens, your opponent tries (and fails) to hit you off them, and you use whatever activations you can to melee enemy fighters to death for extra kill glory and raid scoring. As mentioned before, positioning is key. Farasa and Ardorn really want to inspire to get to two block, so your aim should be to teleport one of them into enemy territory at some point during round 1. Where and when is an art, and something best learned through practice. Yurik is fine with remaining uninspired, but can melee just as well as Ardorn, so don’t underestimate that either.
`Alone I Stand!` is basically your insurance policy against enemy pushes. If you don’t need it for objectives you can also use it to set up positioning for the following round. A neat trick is to push one of your fighters into enemy territory so that they can inspire when you activate them.
There’s a few tips and tricks around raiding as well. Raiding happens at the same time as things like Duelist and using the ability of some of your Emberstone upgrades. You can (ab)use this to choose the sequencing that benefits you most. If you’re capped out on glory for instance it might be smart to break one of your upgrades first so that you have the glory available to equip a new Emberstone upgrade should you reveal it. As one of my opponents remarked: ‘you must play blue decks in Magic as well?’
In round 1, I generally send Emberstone upgrades to the bottom, unless I have a direct use for one (such as scoring Ragerock Strike). Glory is at a premium in round one, because you want to get things like Keen Eye, Great Fortitude, Great Strength, and Agile online. Additionally, raiding a few things to the bottom is good insurance against bricking your surges in round 3 due to running out of Emberstone cards in your deck.
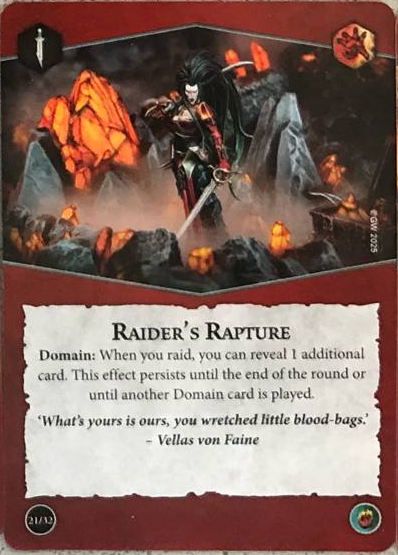
Raider’s Rapture should be played when you have one or more raid surges in your hand. Due to how raiding works (you raid x times where x is the bounty value), Raider’s Rapture lets you reveal 2 cards every time you raid, effectively doubling the cards revealed. Combined with the 10 total targets to hit in the deck, it makes scoring the surges very consistent. For example, don’t be afraid to hang on to this card if you draw it in round 1 and don’t expect to be raiding a lot in the round. It’s a fine card to have at the start of round 2!
Also, due to raiding it’s not uncommon to see your entire deck. Take note of the cards you’re sending to the bottom and in what order. If you memorize them you will know exactly what you’ll draw/raid later in the game.
Closing Remarks

Whew, that was a lot of words! To close things off, I just want to make it clear that I don’t think this pairing is a S-tier combo. It’s very decent and has great potential to catch your opponent off-guard, but doesn’t have the same potential as a pnp/ctc gitz deck (then again, what does?). It has a few bad matchups that can ruin your day, but on the flip side, some matchups are very favorable for you instead.
With the new Raging Slayers deck releasing soon, and a new expansion on the horizon, who knows what the meta will look like? Maybe you can catch some people with their pants down with this unexpected deck. I definitely recommend giving this a spin if you have the warband and decks!
I hope this was an interesting read, and gave good insight into the thought process behind the pairing. I’d like to give special thanks to my Dutch teammates for putting up with my antics and providing the necessary practice matches!
That’s a Wrap! Thanks again to Kevin for providing this overview, and letting the Take and Hold players out there get another angle and perspective on the playstyle. Let me know if you bring a variant of this deck out for a spin! I’m excited to see how it performs in more people’s hands.
While there are a few Love Letters in the works, there is always room for more. I’d love to hear your thoughts about an older or lesser or weird warband/pairing, what drove you to fall in love with it, and how you’ve piloted it to success – and especially piloting it to fun. If you have a warband you’d love to wax poetic about and serenade the wider community, let me know! I’m always accepting new submissions at SpentGlory@gmail.com. Until next time, grab the warband you love, a couple friends, and Spend some Glory!





Leave a Reply