
Today I’m righting a wrong, and starting to work on the backlog of second edition warbands that haven’t been reviewed on this page. The Crimson Court were released as a Flex warband for second edition with the Revenants of the Realms box alongside Embergard in 2024, before Spent Glory was part of the Creator Programme. Since then, the warscroll has had a complete overhaul and was fully redesigned and released in a rules update.
However, nobody has dedicated a full article or episode to the warband in their newest iteration. I figured this would be a great place to start! The warband is fun, flavorful, and better than people first gave them credit for especially now that they’ve been reimagined, and they’re now the first to be reviewed in retrospect rather than preview on Spent Glory.
Click here to see a Master List of all warbands in the game
Crimson Court: The Lore

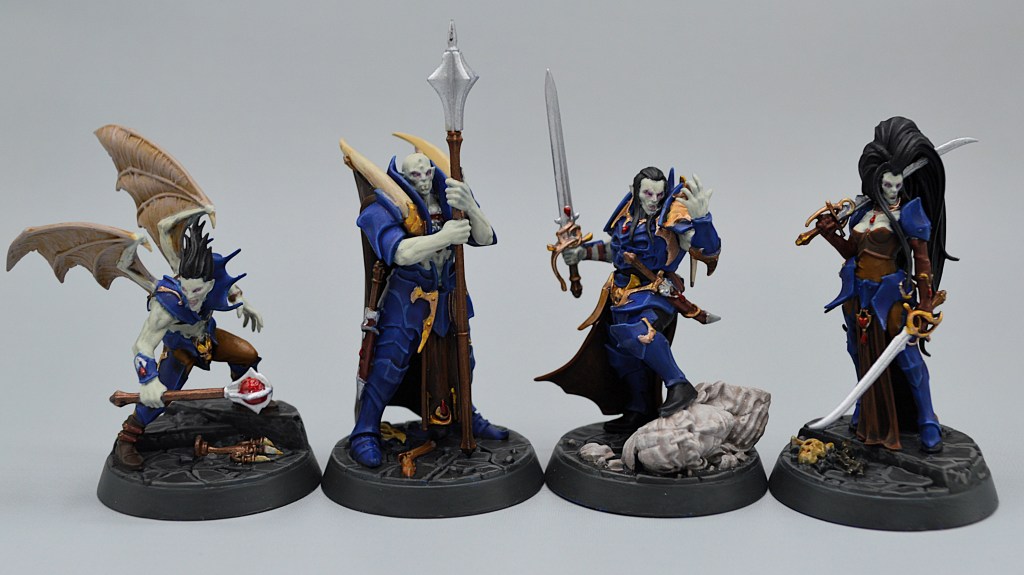
Originally released in the Direchasm season from first edition, the Crimson Court were a quartet of Soulblught Gravelord vampires who found their way into the mountain ‘through a splinter of the spreading Katophrane Curse’ and delighted in the variety of prey available to them there. Described then and now again as a hunting party, they’ve come to Embergard and beyond to continue to compete amongst each other for spectacular kills and the opportunity to slake the thirst of their curse, or give in to the beast within.
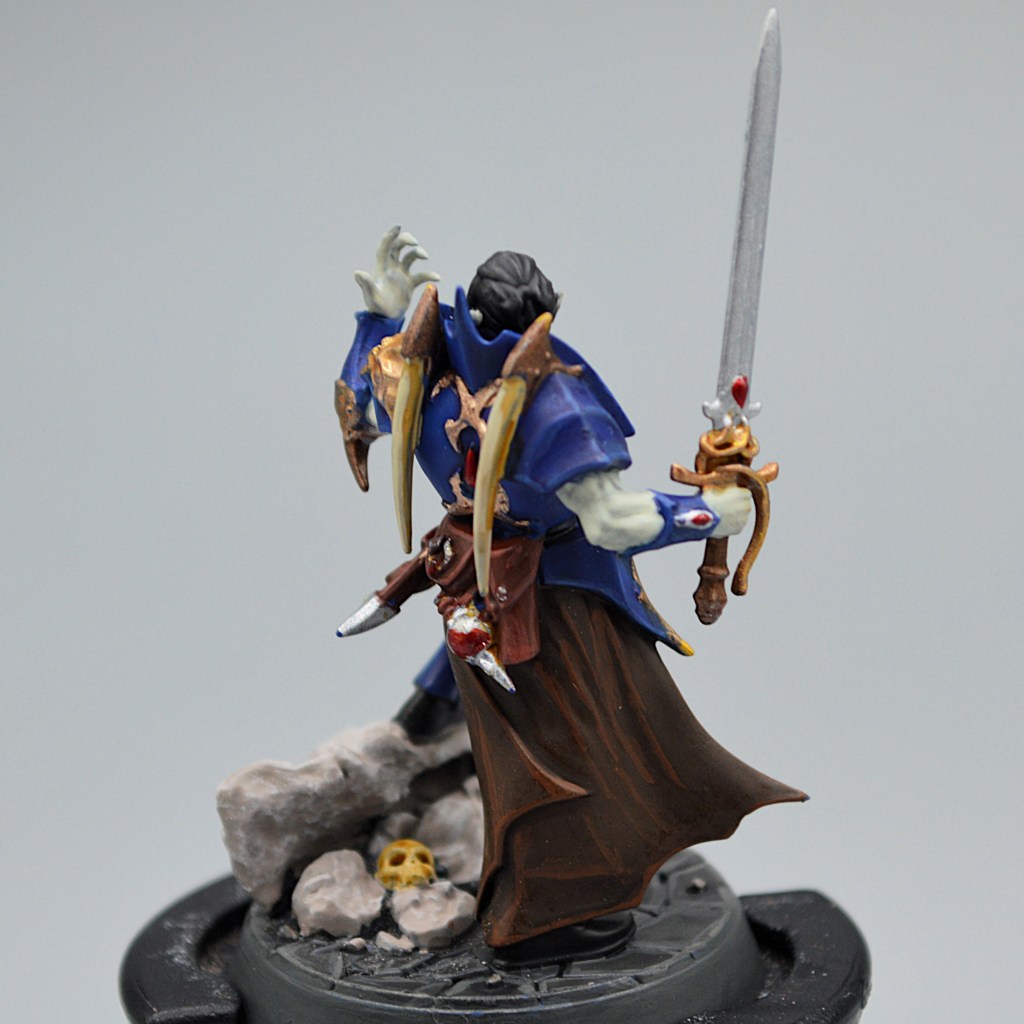
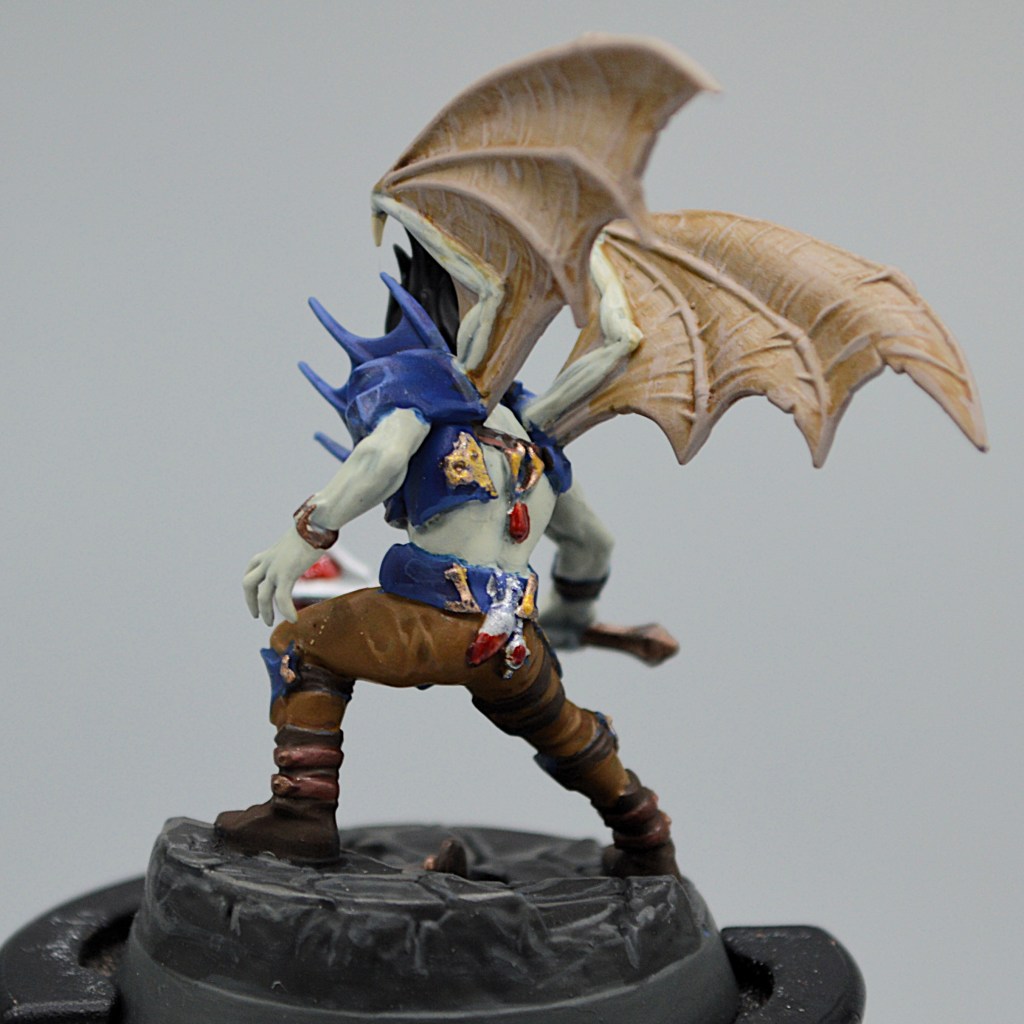
Prince Duvalle is the leader of this expedition, and his dominating will leaves his foes defenseless. (He’s also the most eligible bachelor in the Underworlds). Gorath the Enforcer is a ‘hulking, towering’ vampire who relies upon his might as much as his enchantments, Vellas von Faine is a swordstress and a master duelist with a reputation for using her twin blades with uncanny skill and speed. Last of all is Ennias Curse-born, a bestial, winged creature who is twisted of body and soul and fights with ferocity and gluttony in equal measure. Ther first edition lore card described them as “all but unstoppable when drunk on the blood of their victims and terrifyingly savage should they be denied it”.
Ultimately, they’re here to show one another up and have some snacks while they’re at it and are a delightfully characterful bunch. Underworlds Underground has a Vibe Check podcast episode covering this warband (though related to their older rules)
Crimson Court: The Warscroll
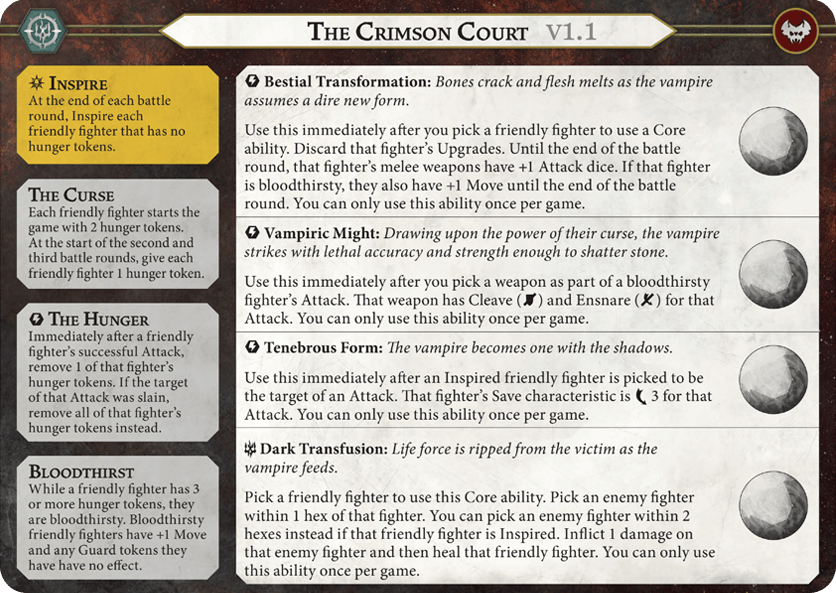
This new warscroll does away with the previous requirement to ditch power cards while holding treasure tokens, and now inspiration and bloodthirst are based on getting hits and kills to manipulate hunger tokens. Fighters can be inspired, bloodthirsty, or neither, with warscroll abilities operating differently depending on a fighter’s status. Let’s go through each section one at a time.
Inspire
You inspire a fighter at the end of a battle round if they have no hunger tokens. We will look at this process in the next handful of steps, but in my estimation this is one of the biggest factors limiting the warband’s competitive success. It’s not very easy to remove all of a fighter’s tokens and they don’t get the benefit of inspiration immediately upon clearing their hunger, instead having to wait until the end of the round. The good news is you don’t have to inspire as their base stats are fine, and they can also go in the other direction and choose to be bloodthirsty instead, opening up different warscroll abilities. Who you inspire, who you bloodthirst, and how you use them opens up a lot of skill expression but getting it wrong can cause you to struggle.

The Curse
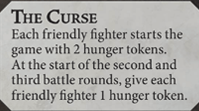
To open the game, a fighter begins with two hunger tokens. That means to inspire them, you’ll need to find a way to remove two hunger tokens by the end of round 1, or a total of 3 by round 2’s end. Removing them in round 3 won’t benefit you since they won’t inspire until the end of the game. It’s cheating ahead a bit, but it means you can be bloodthirsty to open round 2, but not before. None of your four fighters will benefit from either status during round 1.
The Hunger
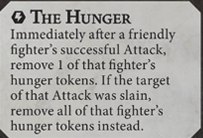
If a fighter successfully attacks, you can drop 1 of their hunger tokens as they have a quick swig o’ blood. If their attack slays an enemy, they can remove all of their hunger tokens. To inspire, you’ll have to kill something or hit multiple successful attacks with the same fighter in a single round, which can be a tall ask depending on the matchup.
It’s a surge reaction, so it’s optional to remove the tokens. Should you be aiming to become bloodthirsty, you don’t have to undo your progress or remove the condition just because you hit or killed something. That said; even if you don’t inspire, you may still want to do this if you’re attempting to avoid the bloodthirsty status which we will cover below.
Bloodthirst
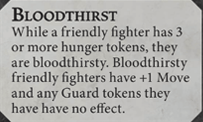
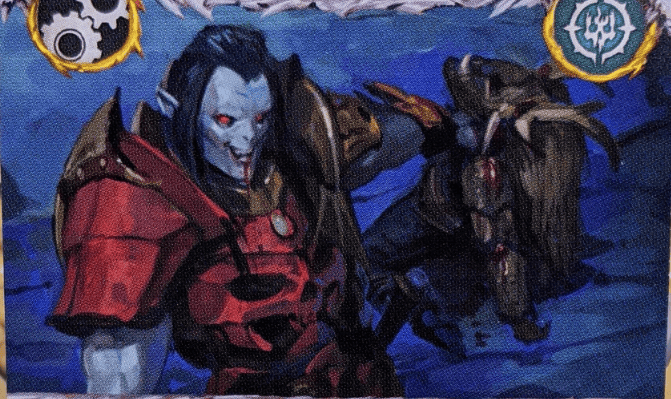
Once a fighter reaches 3+ hunger tokens, they gain the Bloodthirsty status. This can’t happen until round 2 or beyond but gives them an extra 1 move to help you reach where you need to go, as well as unlocking/enhancing some abilities on the right side of the warscroll. Fighters who didn’t hit an attack (or maybe weren’t even activated) in round 1 will have this status in round 2. This means if you, for instance, didn’t use somebody in round 1 and they’re out of position, they’ll be more able to join the fight in subsequent rounds with extra move distance.
Beware though – bloodthirsty fighters don’t gain any benefit from guard tokens. You can still have one if you need it to score a card, but they won’t get the defense boost and will still be able to be driven back. If you’re planning to play a hold or positional playstyle, this may be undesirable. Figuring out how to hold while also hitting attacks might be a challenge, so plan carefully!
Bestial Transformation
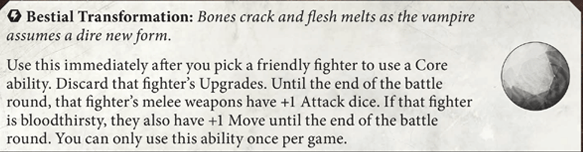
Our first once-per-game ability is Bestial Transformation, and it can be a game-changer though is challenging to make best use of. Once you pick a fighter to use a core ability, you discard all of their upgrades. For the rest of that battle round, the fighter has +1 attack dice on their melee weapons. Since you do this after you’ve picked them but before they take the action, they’ll get the benefit of the +1 dice in that attack.
If the fighter was bloodthirsty when you chose them for this ability, they’ll also gain +1 move which stacks with the bloodthirsty +1 move for an effective +2 move. If you need to make a long bomb charge, this one will get the job done – assuming you don’t mind losing the fighter’s upgrades. Per an FAQ, you can select a fighter with no upgrades for this ability, so don’t let that stop you! This ability breaks any upgrades the fighter is currently wearing but does NOT preclude them from having upgrades applied afterward. Use it, hit your attack, then load them up with something tasty afterward and enjoy the best of both worlds.
There are a couple different ways to make good use of Bestial Transformation.
The first is for a fighter who is about to make an attack that you’d like extra dice on, ideally NOT as part of a charge. This way, they can attack a second or subsequent time and benefit from the +1 dice for the duration of the round. Unless of course you’re about to charge out and want to make a charged-out attack with them afterward! This can help you hit, score cards like Branching Fate and more, and ups your attack reliability significantly, especially for your hammer fighters. Couple this with holding treasure and being Covetous with Nexus of Power and laugh as you spam hyper-accurate range 2 attacks multiple times a round.
The second is if you need to get somewhere you previously couldn’t. Gorath and Duvalle are only move 3 while uninspired or bloodthirsty, and making them into move 4 fighters can be a big advantage depending on your board state. I occasionally use this to open a game to make a charge my opponent thought they deployed safely from. In an edge case, an inspired or bloodthirsty Ennias using this ability becomes move 6 while flying, so few enemies are safe while this is available to you.
The third is a bit niche, but sometimes you are wearing an upgrade you’d really rather do away with. You can break every upgrade a fighter is wearing with this ability, so if you have something that limits you (such as this fighter can only make charge actions due to Murderous Instincts from Raging Slayers, or the inability to be pushed due to Stubborn to the Bone from the same deck), this ability lets you remove that restriction. Other upgrades might prevent you from rerolling on attacks, using critical abilities and more which you may decide isn’t a condition you’d like to have anymore. Additionally, say a fighter is wearing several upgrades that you no longer feel the need for and you’re starved for glory – you can break them, get the glory refunded, take their action, and then use that freed-up glory to buy something new and more useful.

Vampiric Might

This ability is only available to Bloodthirsty fighters, so you’ll never be able to access it until round 2 or 3. That said, cleave and ensnare are both great to have, and being able to use the one you need for a given attack is awesome. If you decide to go all in and stack this with Bestial Transformation on a bloodthirsty fighter, you’ll be +2 move, +1 dice, and cleave or ensnare for one attack that you really need to land.
Tenebrous Form

Now we’re onto our ability that’s only available to inspired fighters, so again it’s not able to be accessed until rounds 2 or 3. Once per game, when targeted, an inspired fighter can go to 3 dodge on defense as they turn into a cloud of vampire smoke. This can keep an inspired fighter alive for an important defense roll and gives you solid odds to crit and stand fast as well. It’s not marvelous and they might outright whiff or still hit you anyway, but it can absolutely be a difference maker. The funniest use is if an enemy chooses cleave against a shield fighter and you give them the slip them with this as an Uno Reverse. Bonus points if you’re in cover at the time.
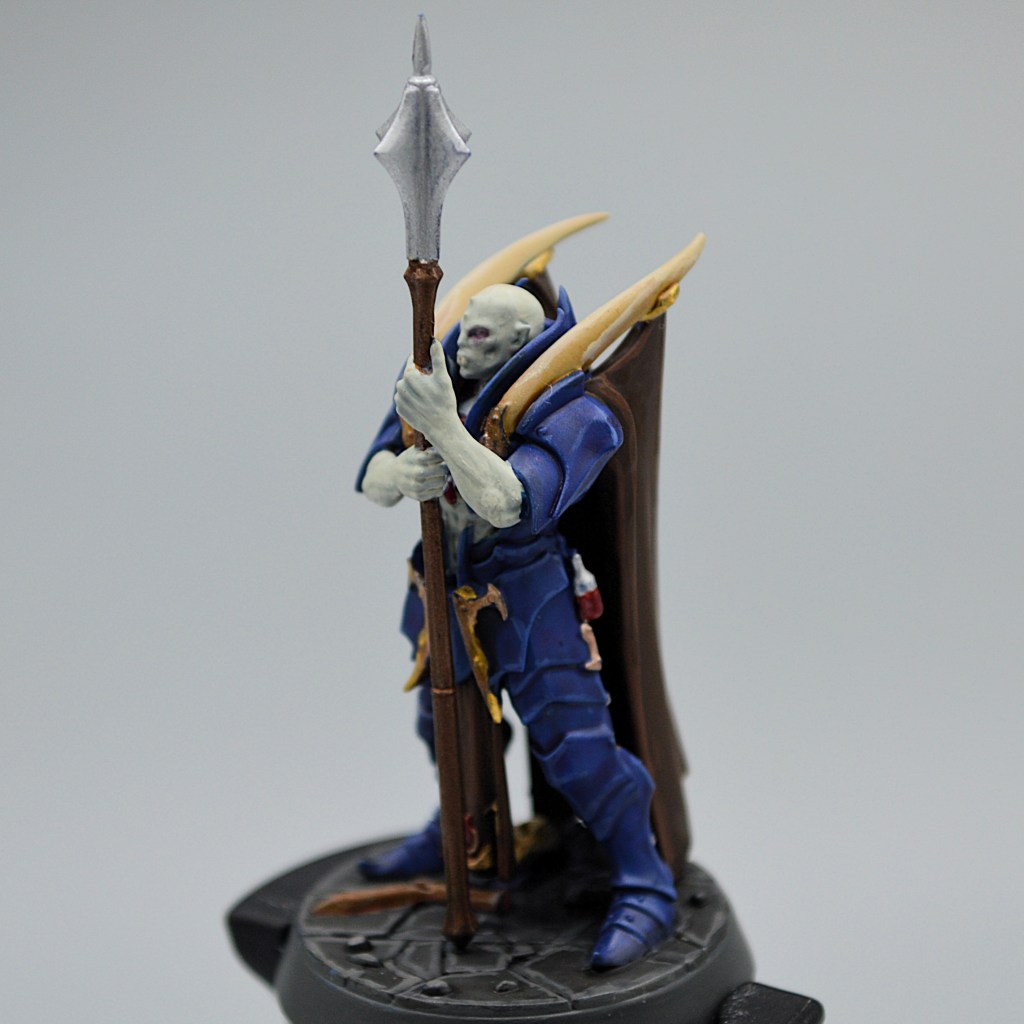
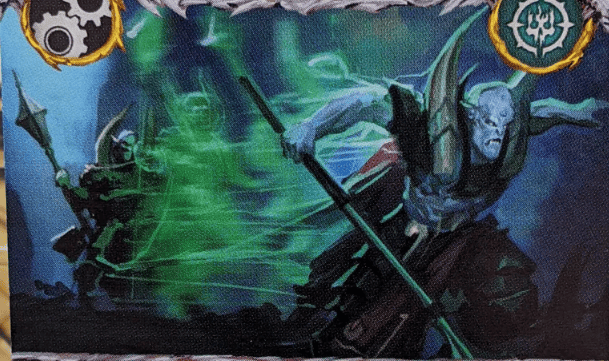
Dark Transfusion
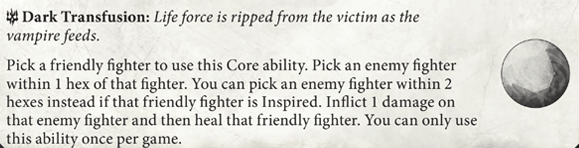
Dark Transfusion is the final ability on our warscroll, and it’s a fun one. Once per game as a core action, a fighter can drain a health from an enemy within 1 hex which both damages the enemy and heals your fighter. If you’re inspired, you can do this to somebody two hexes away instead. There will be times when you really need an extra health to get yourself out of kill range or deny some enemy scoring (say, if they need you Tempered for something in Edge of the Knife or damaged for something in Wrack and Ruin). There will be other times where you have an enemy you’d really like to put one damage on, and this is guaranteed. They can’t defend against it, and you CAN slay an enemy fighter with this ability.
It’s a core action, so it takes one of your twelve activations and won’t always be the right play. Though if it kills something important, keeps you alive longer, or helps you score a card or two, it can be huge. Notably this action can be taken by a fighter who has already charged if need be since it doesn’t specify your move or charge token status, and you don’t even have to be charged out to do it since it’s not limited by the core rules in that manner. Note that this is not an attack and will not help you manipulate hunger tokens (even though, like, it should slake your thirst?!) or score cards that specify attacks rather than damage.
Crimson Court: Fighter Cards
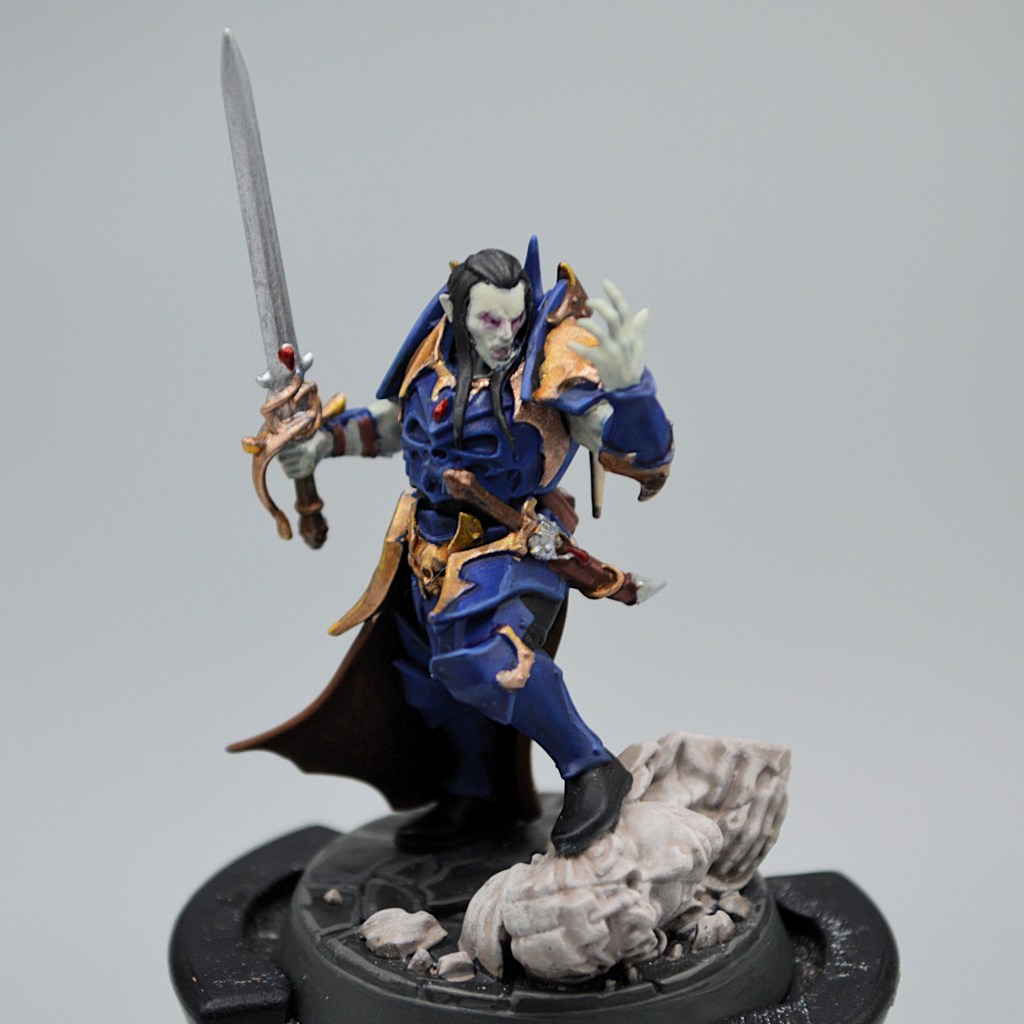
Prince Duvalle
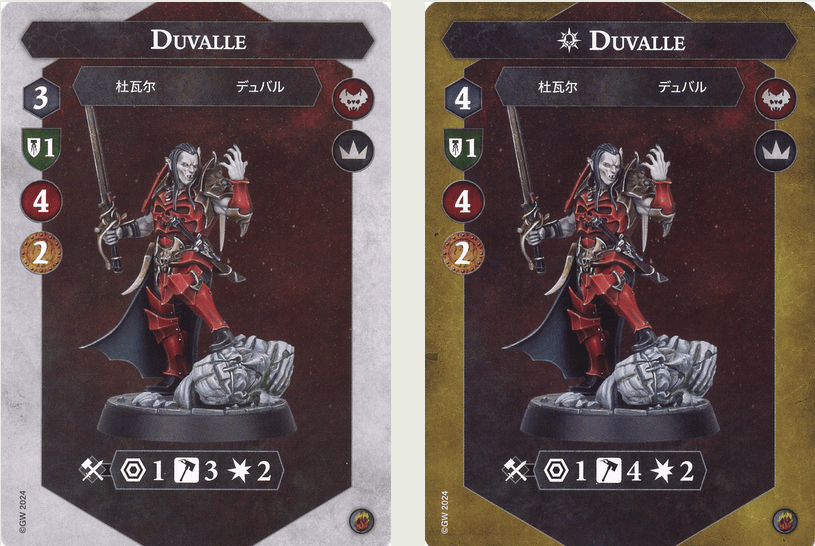
For two bounty, Duvalle is a solid leader. Starting on 3 hammers for 2 damage is really accurate against nearly any target, and if you can get him inspired he goes to 4 move and 4 hammers(!!) so he will be a constant threat. He’s a great choice to give Grievous upgrades to as well as any defense or health upgrades you can spare. While I prefer him inspired, he’s a fine choice to bloodthirst as well. Expect him to do a lot of work for you unless your opponent can dogpile his 1 shield 4 health profile or effectively play keep-away.
Gorath the Enforcer
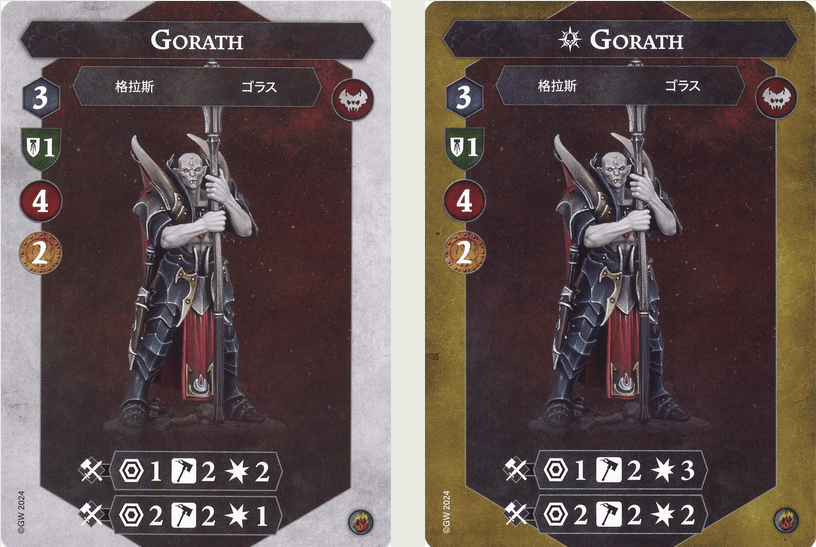
Gorath is slow, but hits like a truck once inspired. He’s an excellent candidate for accuracy-increasing upgrades and things like great speed or duelist to keep him swinging and dishing out of good damage. He’s also one I prefer inspired, but depending on your opponent you may not feel the need for 3 damage and won’t mind the bonus move/access to bloodthirst abilities later in the game. My usual approach is to soften up a target with your other fighters and have Gorath swoop in for the kill to set up his good damage profiles for later rounds.
He’s also an excellent choice for Bestial Transformation, since his range 2 attack will make you more likely to be able to benefit from the +1 dice more times in a round (especially considering it brings him to 3 hammers, which is a great place to be), and he appreciates a plus move as much as anyone.

Vellas von Faine
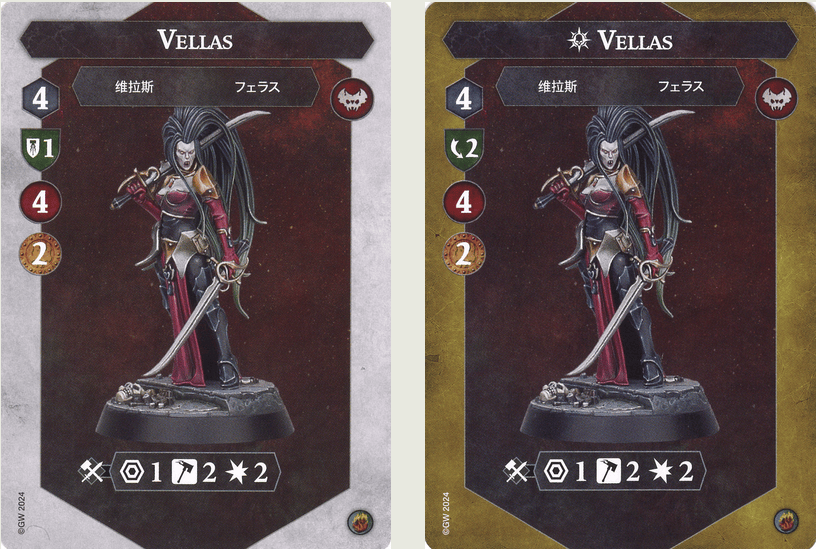
Vellas is a bit underwhelming for a two-bounty fighter. She only side-grades from 1 shield to 2 dodge inspired, and otherwise gains nothing. As a result, she’s likely someone you’ll want bloodthirsty instead. I have found her best use is as an opening piece to set up a kill and inspire for one of your other fighters that you’re hoping to inspire.

Ennias Curseborn
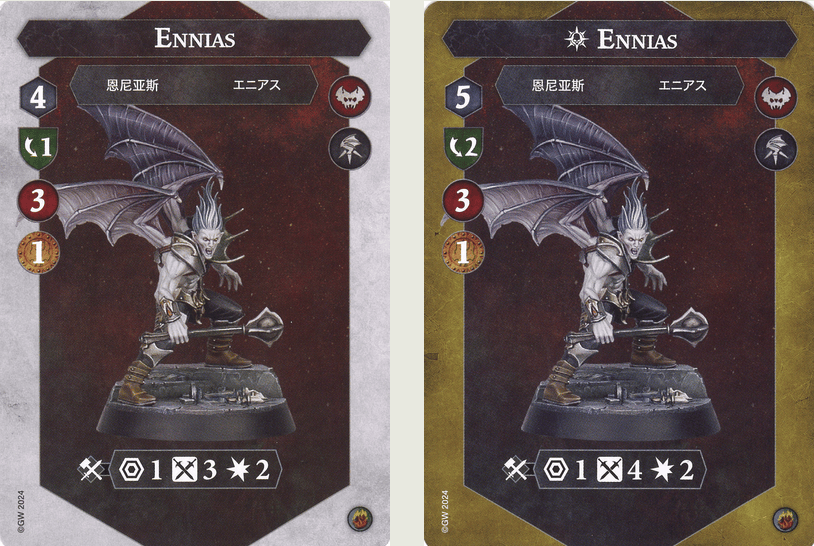
Ennias is only 1 bounty, but be careful; he starts the game on 1 dodge and has only 3 health. If you use him too early, he’ll get slain without much trouble. He’s also the only fighter on your team that hits on swords, so he’ll benefit proportionally more from making flanked attacks or from things like Hidden Aid from Blazing Assault or Hunting Grounds as well as the United condition in Deadly Synergy which will also help his survivability on defense. Should you so happen to inspire him he jumps to 5 move and 2 dodge, and since he has the Fly runemark he’ll be useful for grabbing key positions or getting into distant fights.

Potential Pairings
Blazing Assault is a solid choice for most warbands in the game, and Crimson Court are no exception. Their accuracy is pretty good, but their damage output is lacking and they can benefit from the power cards quite well. Their ability to swing with high accuracy and many dice makes scoring the surges pretty smooth as well.
Countdown to Cataclysm is an excellent deck for Crimson Court, as it helps out with their mobility and defense. The warband is as well-positioned to score Wreckers as anyone can be, and Improvised Attack is a cheeky way to make an extra attack and potentially sneak out an inspiration.
Adam P brought this BA/CC deck to the 2025 World Championships if you want to use it as a starting point. I would be hesitant to take Annihilation though!
Reckless Fury is a good choice for the warband since they’re generally going to be able to make charges with most of their fighters and will hit more often than not. RF doesn’t care as much about slaying enemies as other strike decks do, so their limited access to 3 damage won’t hurt as much.
Wrack and Ruin is a solid choice as well – you have some extra damage in the power deck to make up for their base 2 damage hitting power, and their high accuracy means you’ll hit things (but not necessarily kill them), allowing you to score heaps of glory. They also can make extra special use of Dark Transfusion with this deck. Plus, it’s super fun to play.
Realmstone Raiders is a better fit for Crimson Court than many other warbands because of their pretty reliable accuracy. The deck asks that you hit things to raid and doesn’t care as much about slaying enemies, so again you mitigate some of the lower damage output.
Raging Slayers isn’t a perfect choice, but being able to turn a success to a crit will help you prevent enemies standing fast and keep the damage output consistent. It’s also a leader-centric deck in a warband that has a pretty good leader. And who wouldn’t love a Duvalle-Inspired Haymaker for 4 hammers 4 damage?
Deadly Synergy is an interesting choice because it doubles down on the accuracy by providing flanking, and again the deck cares about making attacks and getting hits more than getting kills. Your fighters are relatively mobile and accurate, and are able to make use of this deck if you’re deliberate about landing spots to maintain unity.
Hunting Grounds, while not perfect for anyone, is a tasty choice for Crimson Court if you can convince your opponent to step into the vampire’s lair. You’ll hit with abandon and drive back all day long, scoring plenty of Glory – though make sure to pair with something that convinces them to play the beatdown so you can hang back.
Nexus of Power is the newest deck at the time of this article, and CC have a decent time with it. Their accuracy doesn’t need as much help from the deck since the fighter stats and warscroll can cover you but getting to range 2 when holding treasures is nice. You may struggle a bit without movement shenanigans, but there’s an angle there that I’m sure a canny list builder can tease out.
In Practice

I personally have a record of 3-2 in casual play with the warband, grabbing two wins with Blazing/Cata and one match with Realmstone Raiders/Raging Slayers (using the older Plot Cards for those decks). My losses were with Blazing/Wrack (very close against a strong BA/CC Jaws of Itzl) and Blazing/Realmstone Raiders (where the defense/rerolls on BACC Knives of the Crone really hampered my scoring and I lost by a ton).
A local player in the Seattle scene has been playing them a lot recently with BA/CC and has performed quite well on weekly game nights, as well as finishing a strong fifth place at our most recent 16-man tournament, taking only one loss to a multi-time Grand Clash winner and World Championships competitor (who I also never can beat in competition).
That said, the Nemesis Statistics Project shows the warband performing at an underwhelming 25.7% win rate across 74 games. Their best pairing there does appear to be Blazing + Cataclysm at 40.9% wins, and their best opponent is Grandfather’s Gardeners – likely because of their ability to reliably hand out 2 damage to 1 shield fighters and not be bothered by the 2-damage cap on the daemons.
Most of this data comes from earlier in the edition when fewer decks were available and their warscroll was considerably worse. The Crimson Court haven’t had matches recorded very much at all since their rules update, so it’s difficult to say how well they would be doing since their rework. If people are willing to put the reps in and get skilled with the warband (and record their games for the stats project! It’s really not that hard) I imagine they’d perform closer to the 45% win rate and be a reasonable though not outstanding competitive choice.
Wrap
Hopefully this review shines a light on the updated Crimson Court and convinces people to give them a second look. While they don’t have reliable access to 3 damage attacks, that doesn’t mean you can’t have strike-related success with them and flex play is still totally viable. Lean into the accuracy, find cards that enjoy hits or damage rather than kills, and send those bloodsuckers on the prowl. You’ll get to have loads of fun with some of the most gorgeous models the game has ever seen, and you might surprise yourself with how much they can do once you have their warscroll down. However you choose to play them, I hope you enjoy spending your glory!
Be sure to check out Spent Glory’s other review articles here






Leave a Reply