
Back from the dead in an almost completely new take, the classic Thorns of the Briar Queen have arrived in the Spitewood and remain a Horde Take and Hold Warband. There’s a lot to unpack with this new warscroll, that keeps some of their core identity but also put a fresh new face on the warband that’s now seen its fourth iteration across the life of Warhammer Underworlds. I never dove too hard into them in the past, but this newest warscroll has me mighty tempted to make them a core focus of my competitive play for the next few months at least.
What’s got me so excited? Well, mugging people while mean mugging them, and bringing a wave of terror to literally any corner of the board, nearly at will, multiple times per game. You like positional control, incredibly reliable attacks, and frustratingly dodgy fighters? You’re gonna love the Thorns.

Thank you to Games Workshop for providing the page with an advance copy of this product for review and content creation.
Click here to see a Master List of all warbands in the game
Thorns of the Briar Queen: Lore
One of the two featured warbands in Underworld’s first expansion Nightvault back in 2018, the Thorns of the Briar Queen are a delightful batch of murderous convicts who seek to take out their malicious urges on whoever might try to pillage Shadespire, and I guess everywhere else too. Way back when, Nagash cursed everybody in Shadespire for daring to try and cheat death, and the Briar Queen was chilling in the dungeons at the time, so he granted her freedom (or, as much as he’s liable to do, anyway).
The Briar Queen was once a powerful death mage and enemy of Shadespire, trying to tear down what the city had built. She was eventually defeated, trapped in shadeglass, never allowed to die, and became straight crazy, having basically only hatred towards those who doomed her in this way left to her. After she was freed, she was given command over several other prisoners and tasked with assassination missions at Nagash’s behest. She did this, but always came back to torment the city’s inhabitants on her free time.
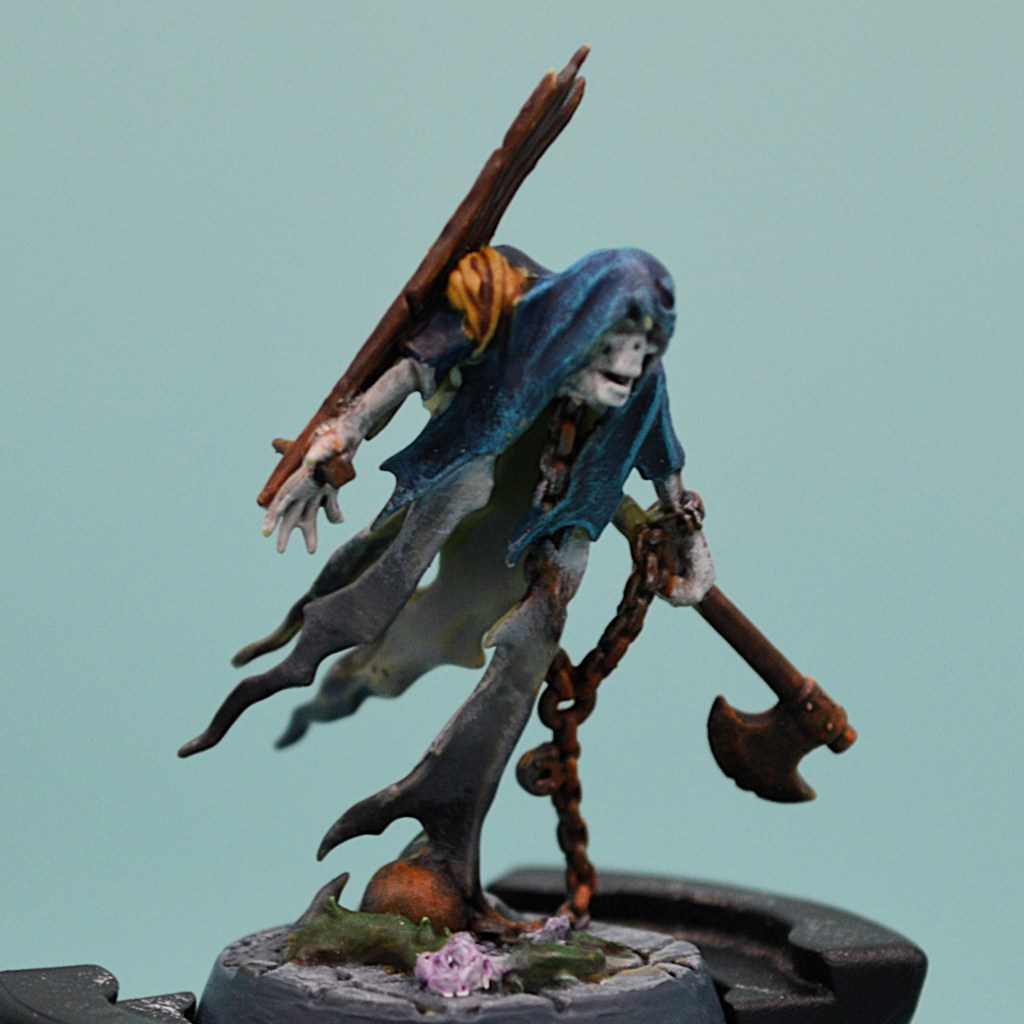
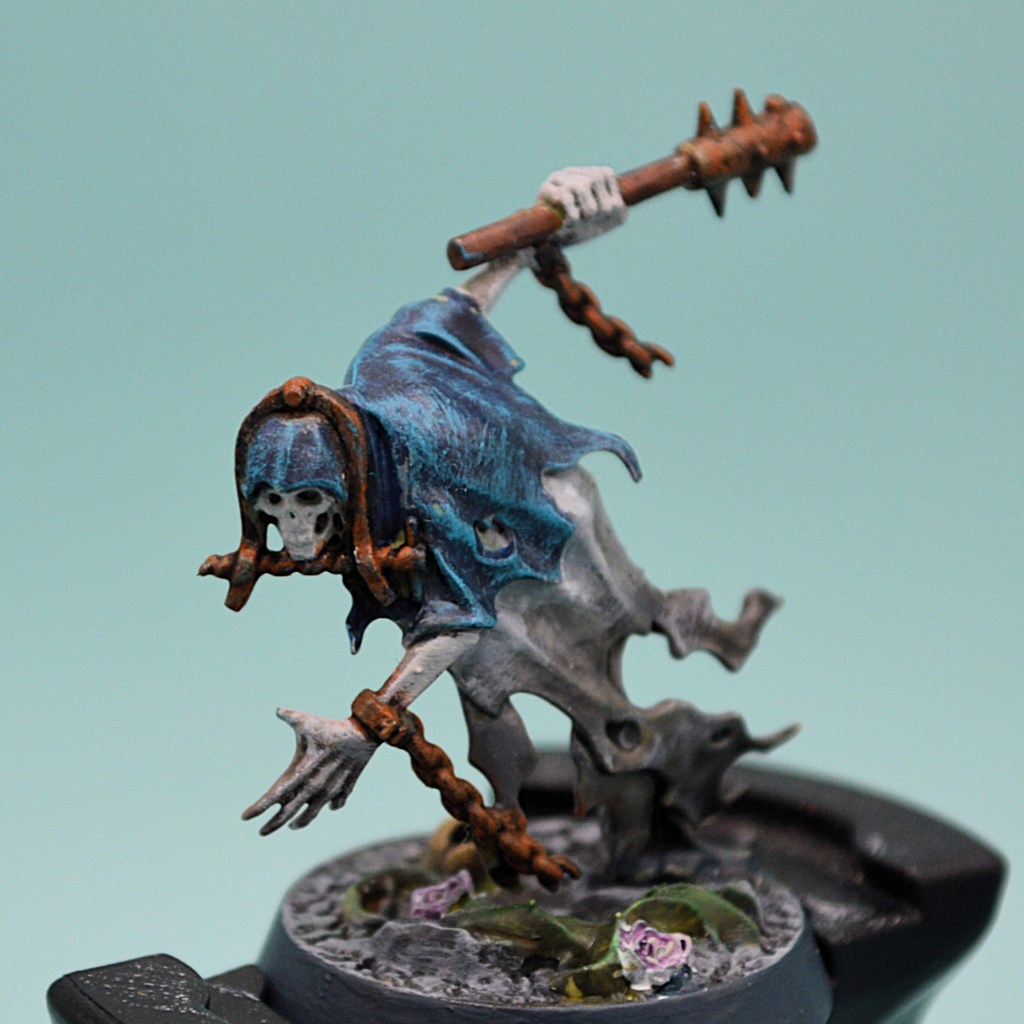
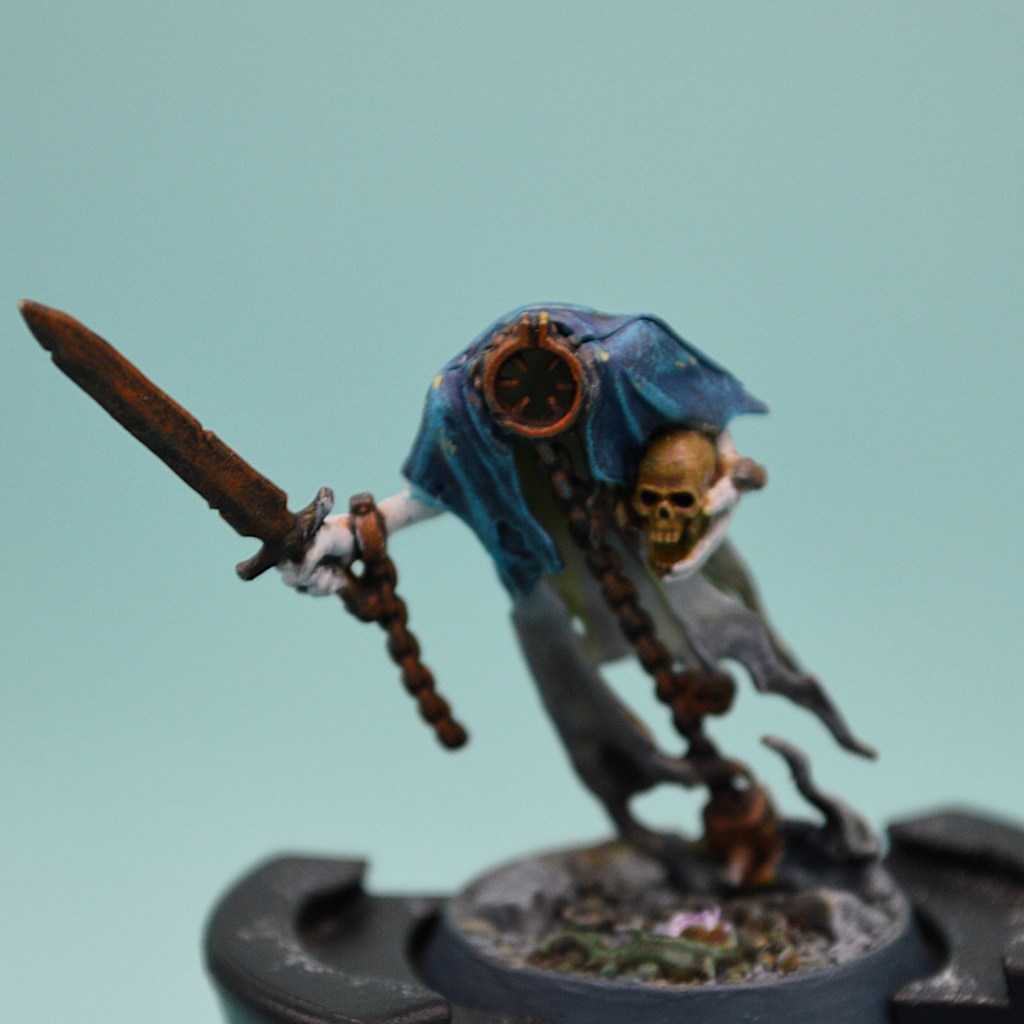
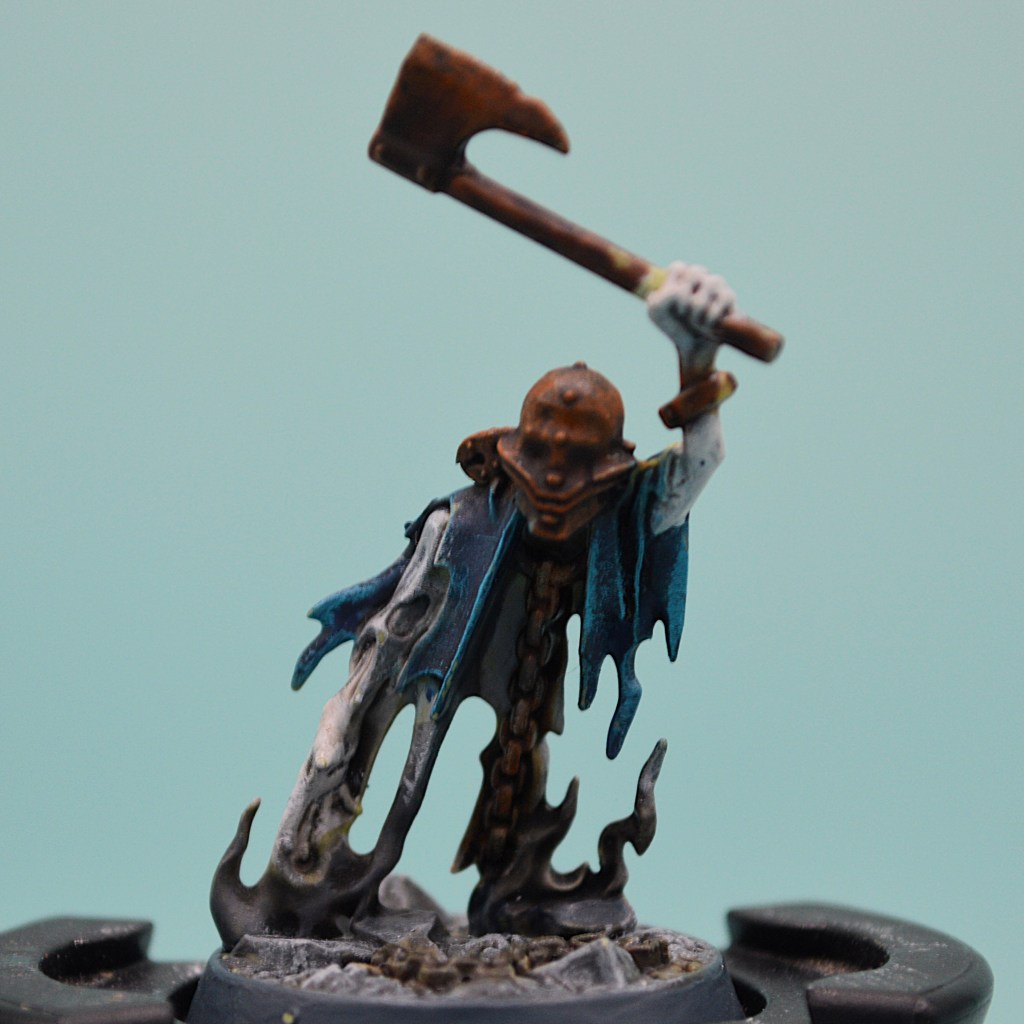
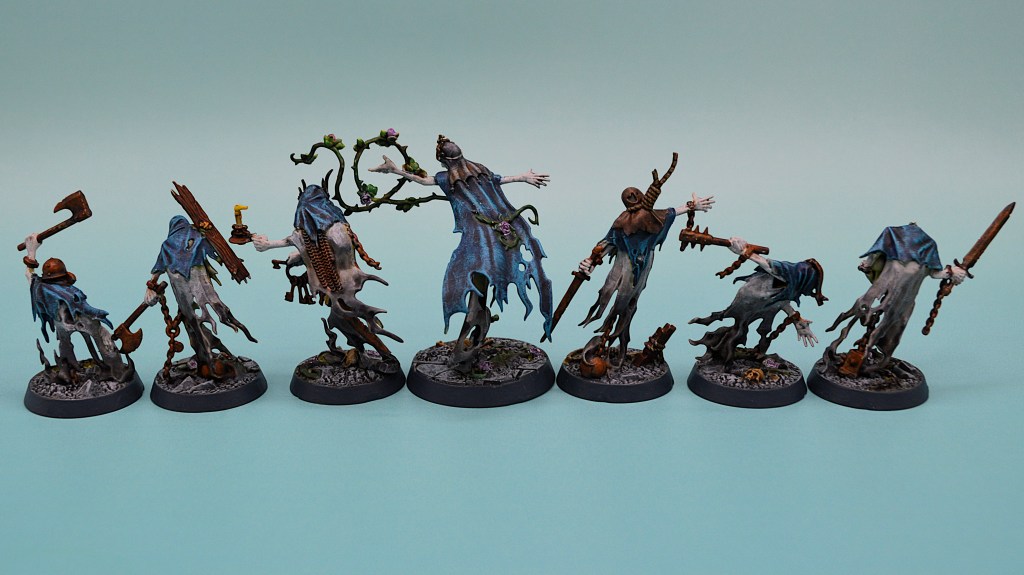
Her crew consists of Varclav the Cruel, who actually used to be the warden of the prison until he himself was thrown in after he was implicated in a string of murders. She also rolls with the Ever-Hanged, a remnant of a serial murderer who was – you guessed it – hanged for his crimes. The warband is rounded out by four chainrasps with different torture instruments and signs of punishment, but they’re all identical mooks from a storytelling perspective.
In life, these ghosts were sadistic, merciless, and hateful killers. Nothing has changed.
Thorns of the Briar Queen: Warscroll
Inspire
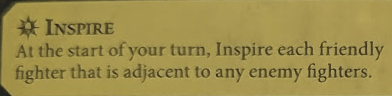
At the beginning of your turn, you inspire any fighters adjacent to enemy fighters. This is roughly how it’s always been, but it is still a pretty cool inspire condition. We will see later in the warscroll, but you actually have a lot of agency in forcing this to happen in the power step or after an opponent’s actuivation, and so can selectively inspire fighters with relative ease. Another nice thing to note is that the inspiration happens at the start of your turn, which means you can then immediately attack with that fighter using their inspired profile. So many warbands inspire after something happens during your activation, and the Thorns get to take advantage a little earlier.
The other nice benefit is that your warband has 2 dodge on literally every fighter, even uninspired. The only changes inspiration brings are to things like movement speed and attack profiles, so you don’t even mind waiting until your turn to inspire since you already have the defense you’re looking for.
Wave of Terror
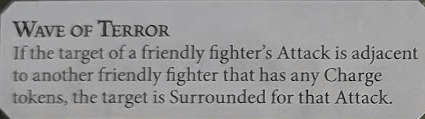
Another holdover from the last iteration of the warscroll is the Wave of Terror ability. Should you have an adjacent friendly during your attack, they get to flank and surround the target (instead of just flank) should they have a charge token. This is nice for boosting your accuracy for certain in nearly any matchup, but is also beneficial when you’re up against something like the new Heralds of Kurnoth, who can’t be flanked (but can be surrounded) in their territory.
There are two downsides – first is that this surrounding effect only happens during your attacks and does not apply to defense, but it’s still really nice to have (and you’ll still at least get the flank on defense). The second is you somehow need to finesse a charge-token-bearing fighter adjacent to your target. Most warbands would struggle with this, but as we will see, the entire rest of the warscroll is juiced for exactly this condition, so don’t stress, my ghosties. You got this.
Soul Warden
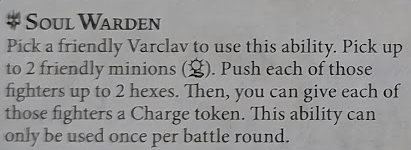
Our third returning ability is Soul Warden, which has been a staple of the warband’s playstyle since its inception and remains incredibly flexible. Let’s review, since it has changed a touch. If Varclav is alive, you can choose him to use this core ability in an action step. Pick up to two friendly minions (the five who are not Varclav himself or the Briar Queen). Push each of them up to 2 hexes, and then if you should so please, give them charge tokens. You can use it once per round.
It comes at the cost of an activation, but you get to reposition two fighters two hexes. Action efficiency is one of the ways to win this game, so you like to see this boost. Then, you get to decide what you want to do with it, since it has tons of uses. Let’s list just a handful:
- Push two fighters onto tokens for the cost of one action. This establishes board control quickly for decks like Emberstone Sentinels and Pillage and Plunder.
- Push two fighters adjacent to enemy fighters. Since most warbands won’t have this kind of efficiency, they can only run one fighter away and/or hit one other fighter, so they probably won’t be able to displace both of your pushed fighters’ adjacency, which means you’re probably inspiring at least one of those pushed minions.
- Push two fighters adjacent with charge tokens, to set up a Surrounding Wave of Terror hit with somebody next activation
- Reposition two fighters in a pinch to score a dozen different objective cards or counterplay a dozen more your opponent might have.
- Get to Charged Out status much faster if needed, potentially allowing Varclav or the Briar Queen an additional attack your opponent wasn’t counting on
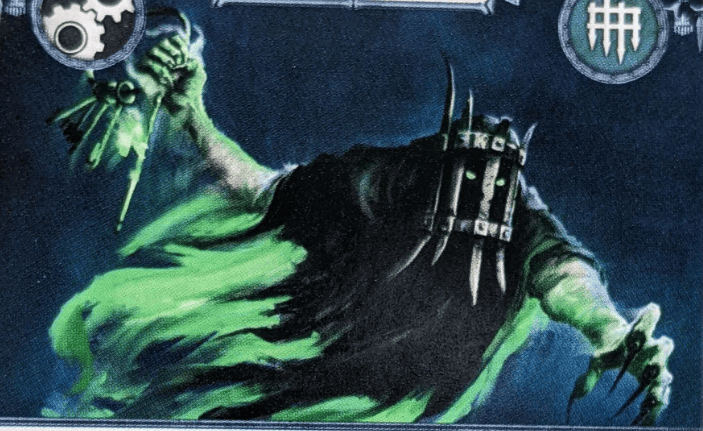
Mugged
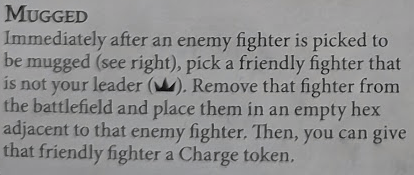
Now our final left column ability is Mugged, and this one is going to apply to all FOUR of the right column abilities. Fist thing to know is, zamn zaddy, this warscroll has lots of abilities. Second thing to know is that Mugging is going to be all gas no brakes for almost any playstyle.
We will look at how exactly a fighter can get Mugged in the subsequent entries, but for now let’s cover the specific effect. You pick any of your six non-leader fighters to Mug somebody. They immediately teleport into an empty hex adjacent to the mugging target. Then, if you want, give then a Charge token, which helps out with Wave of Terror among several other things.
Read that again. Six of your fighters can teleport the entire distance of the board and breathe down the neck of one of your opponent’s fighters. This is going to potentially happen 4 times a game. Then, at your discretion, give them a charge token to score cards, get charged out, apply a Wave of Terror, whatever you need. Or don’t, and then inspire that fighter and immediately attack with them next activation. What an awesome ability.
Anywhere you want to be, there’s Mastercard Mugging
Paired Thugs
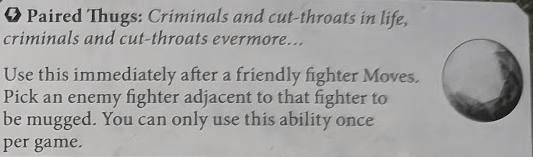
Onto our first Mugging. Immediately after a friendly fighter moves, pick somebody adjacent to them and Mug them. You can only do this once per game.
It may not be clear to newer players so I’ll spell it out explicitly. A charge action includes a move and then an attack. If you want, immediately after the move part of a charge, you can mug the guy you’re about to swing at. This means, for most purposes, charge fighter #1 into an enemy, and before you roll dice, teleport in a supporting fighter (#2). Give that teleported #2 fighter a charge token, which triggers Wave of Terror, and they will flank and surround the mugged target for fighter #1’s attack, nearly guaranteeing a hit.
At will, you can reposition a fighter, flank and surround a target mid-charge, and roughly double your odds to hit an attack. Do this right and you’ll also inspire one or both fighters involved, and score cards for flanking/surrounding/being in a territory etc.
You have complete control over Paired Thugs, and it’s hot fire.
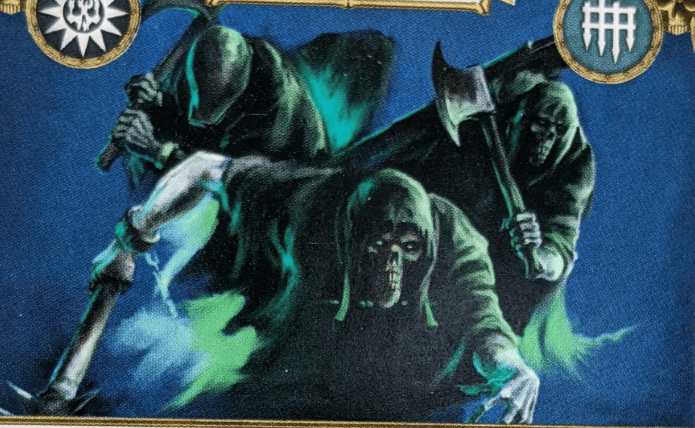
No Room at the Top
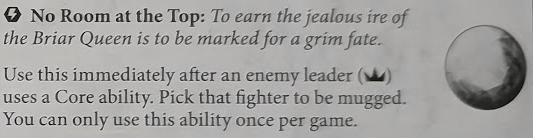
Mug number 2 is also pretty awesome, though from here on out you’ll require your opponent to help you trigger it. The Briar Queen isn’t interested in sharing her lead, and that includes enemy leaders. If your opponent’s leader uses any core ability, once they’re done you can mug them. Now, if your opponent doesn’t activate their leader, you can’t do it. If their leader is slain before you use this, you can’t do it. But chances are they’re getting at least one action out of the leader, and they’ll have a new friend right up in their grill afterwards if you want.
A leader runs away, well now they’re still in danger. A leader comes in to hit, and you can hit them right back after the fact. A leader is dumb enough to move adjacent to an unoccupied feature hex? That one’s yours now, fam.
Assuming they don’t have a way to get out of there in the power step, you’re also going to be inspiring whatever fighter you picked to Mug them pretty shortly thereafter. You can give them a charge token to make them flank and surround, or not give them a charge token, inspire them, and then be swinging for 2 damage next activation.
Reprisals
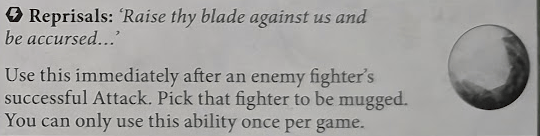
Mug number 3, Reprisals, also requires your opponent to do something. But let’s be honest – even with 2 dodge and the likelihood of a flanking defense roll, you will eventually fail and get hit. You can immediately repay that kindness with a mugging once per game. It doesn’t specify any further details besides successful attack, so this can be a way to reach that backfield archer. You can have a friendly holding a treasure be slain or driven off, and then mug somebody over the take it right back. You can do lots of good stuff with this.
Leave Well Alone
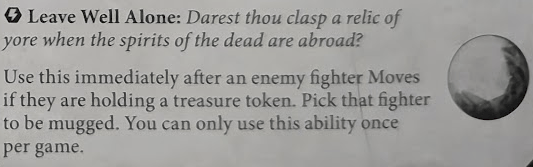
Our fourth and final once-per-game mug ability is Leave Well Alone and is another one you need your opponent’s help with. This is probably your worst Mug, since it potentially has the least common window and is more restrictive to your positioning than the others. But being the worst mug is kind of like being the worst ice cream flavor at the store – that stuff is still ice cream, and yes you’re absolutely still gonna buy it.
After an enemy fighter moves, if they’re holding a treasure token, you can mug them. Let’s view the restrictions first – the enemy fighter has to have moved onto a treasure and hold it. If they push on, it doesn’t work. If they can’t hold treasure, it doesn’t work. If they moved onto the cover side because somebody already flipped/delved it, it doesn’t work.
However, it’s still quite useful, assuming your opponent wants to stand on some treasure someday. You CAN use this after the move part of a charge, so you can mug them before the attack and get yourself a free flanking fighter on defense. If you want those treasures for yourself, you can set yourself up well for a flanked and/or surrounded attack on that fighter next turn. You’re also able to force an inspire with it in most cases.
If you brought also brought Confusion along with you, then rev up those laugh tracks!
Thorns of the Briar Queen: Fighter Cards
The Briar Queen
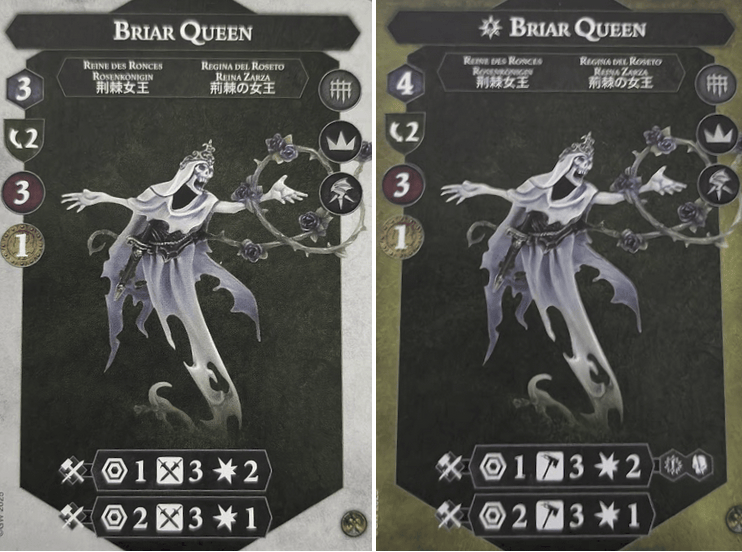
Our lady of the graveyard is one of your principal damage dealers, though she’s not as dominating as she once was. At 3 health 2 dodge, she’s not bad for a 1 bounty fighter, and has two attack profiles for range 1 and 2. Whole 3 swords doesn’t feel like a lot, remember how often you’ll be able to set up flanked and/or surrounded attacks with this warband and realize her accuracy can be quite high. She’s a great target for Great Fortitude, Great Strength, Duelist, etc since you’re probably going to want to do lots of work with her.
She’s also the only fighter who cannot teleport with any of the Mugged abilities. Keep that in mind when you deploy her! If you risk her being adjacent and get her inspired, she goes to hammers on her attacks, will like, never miss, and has crit greivous on her range 1 just for funsies.

Varclav the Cruel
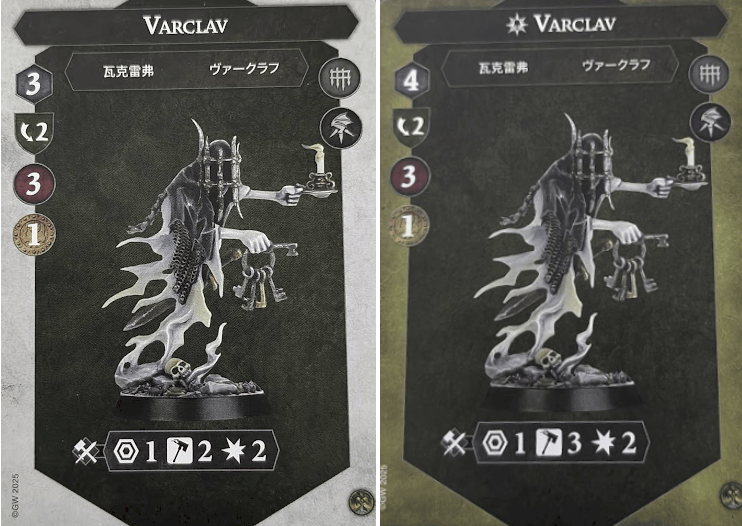
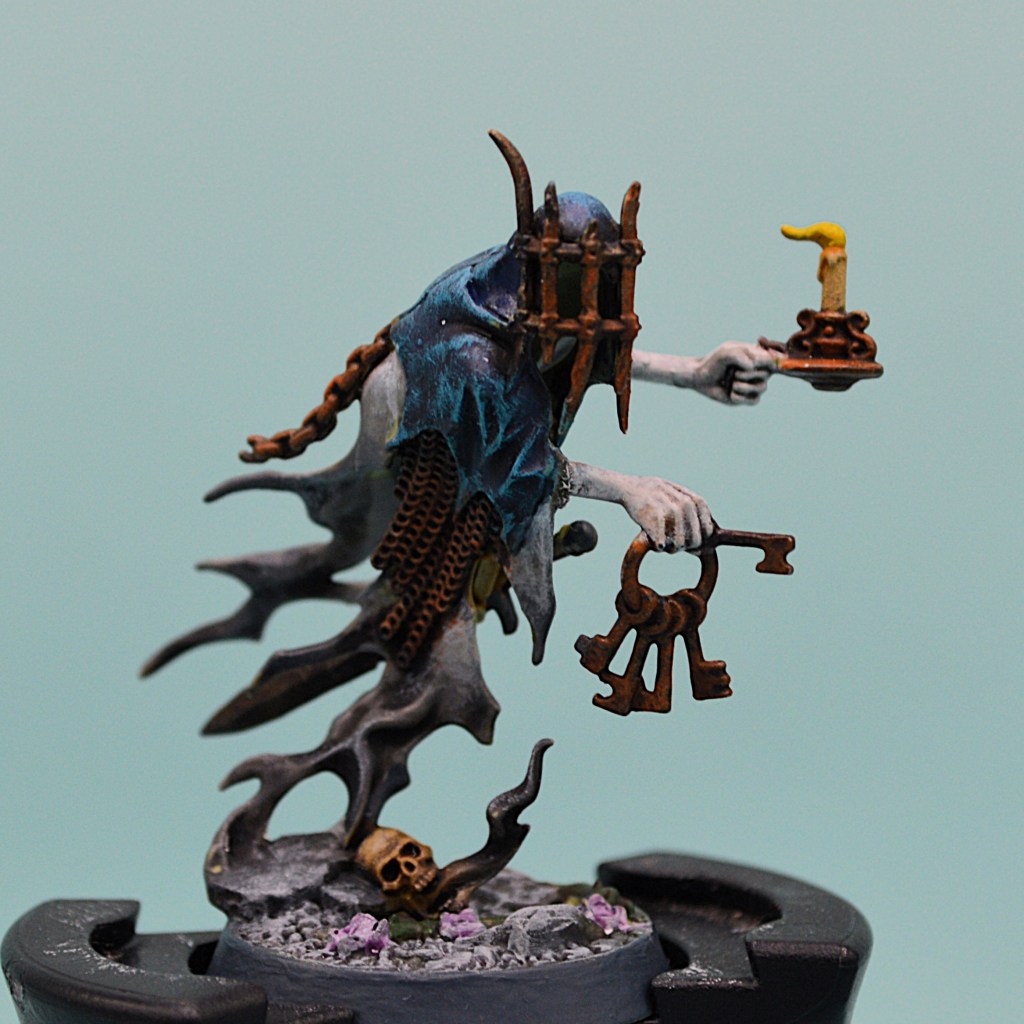
Varclav is quite important for this warband, as much now as ever. He is the only fighter who is capable of triggering Soul Warden, so if you want to use that ability you’ll need to keep him protected. However, he also can dish out a relatively accurate 2 damage at range 1 and is also capable of teleporting for Mugging, so you might want to get him involved early.
In a take and hold/delve approach, he’s probably deployed safely in the back and conducting the orchestra. In a swarm aggro approach, he’s probably diving in with a quickness.
The Ever-Hanged
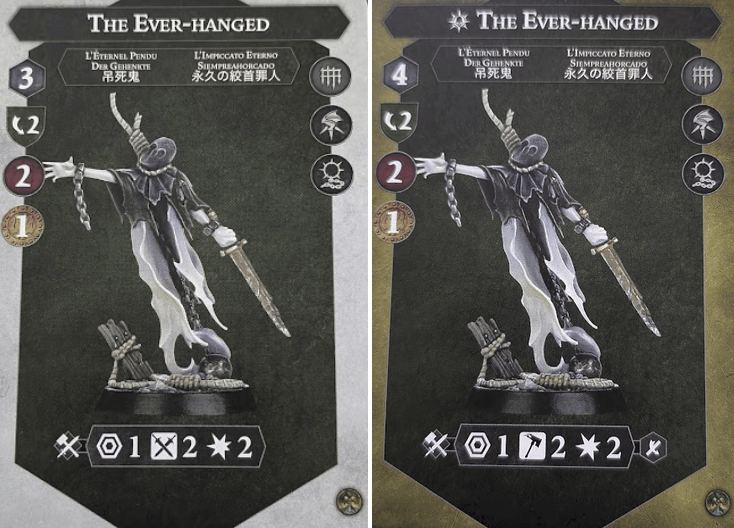
The Ever-Hanged occupies a special position in the warband. They’re a minion, so they can be pushed with Soul Warden. They’re also doing 2 damage uninspired, so they act like one of your two bigger fighters. While we inspire to gain ensnare here and escalate to 2 hammers, that’s a niche improvement over the other minions who benefit from inspiration a lot more. If you’re planning to blitz, the Ever-Hanged is a source of early damage. If you’re planning to Hold or Delve, they’re better kept safe for if you need an uninspired couterpunch later on.
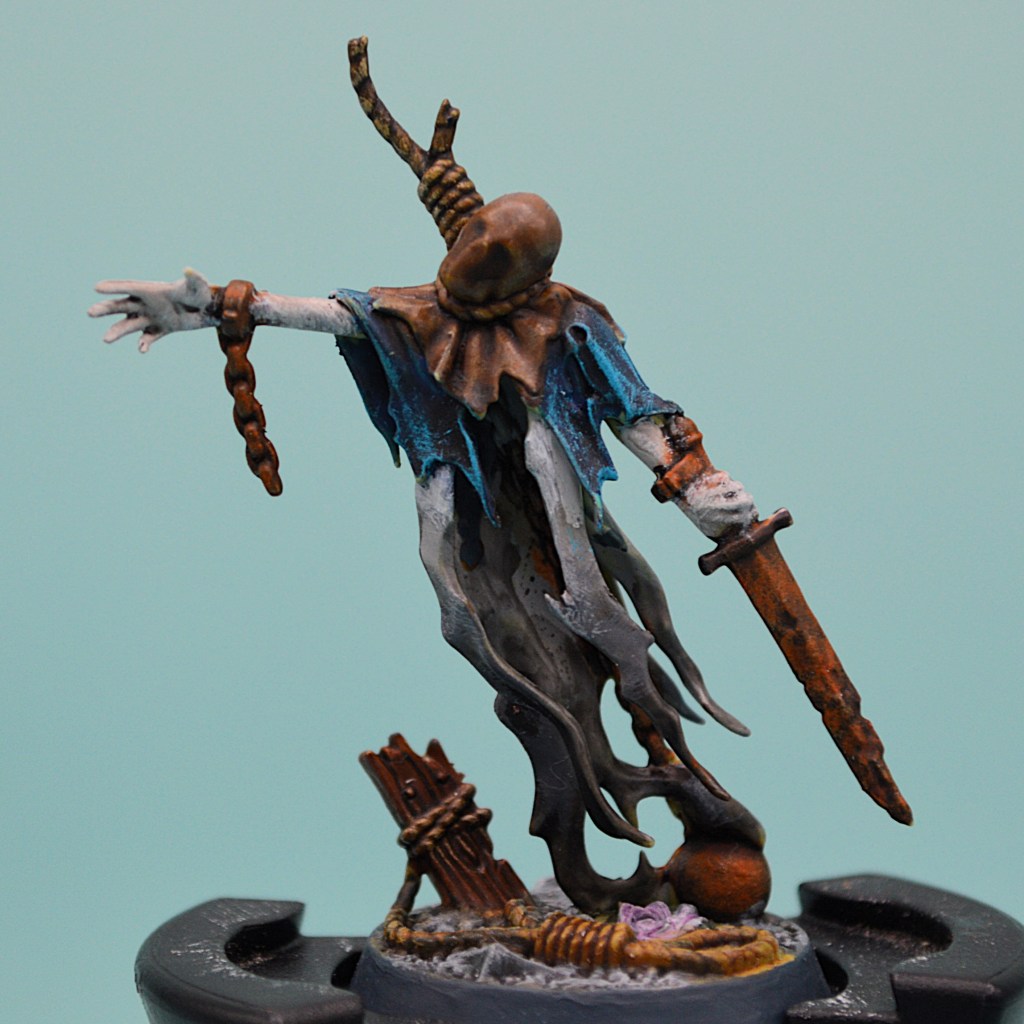
Mooks 1-4

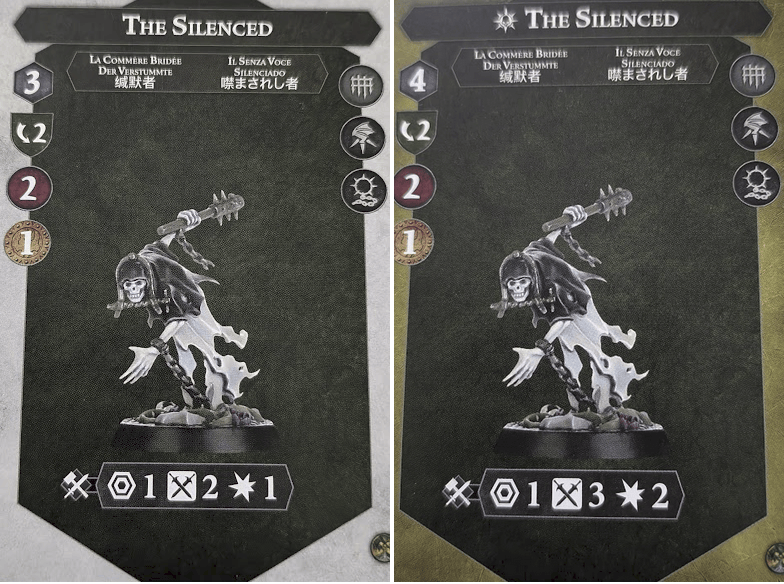
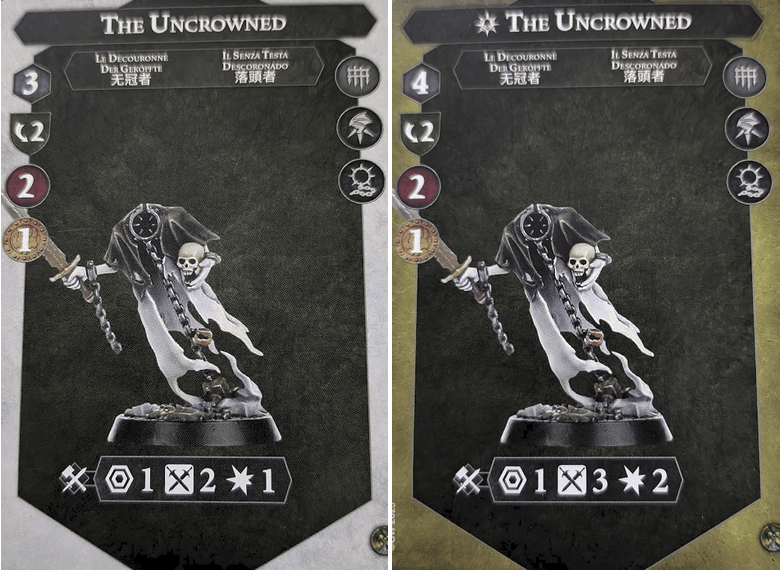
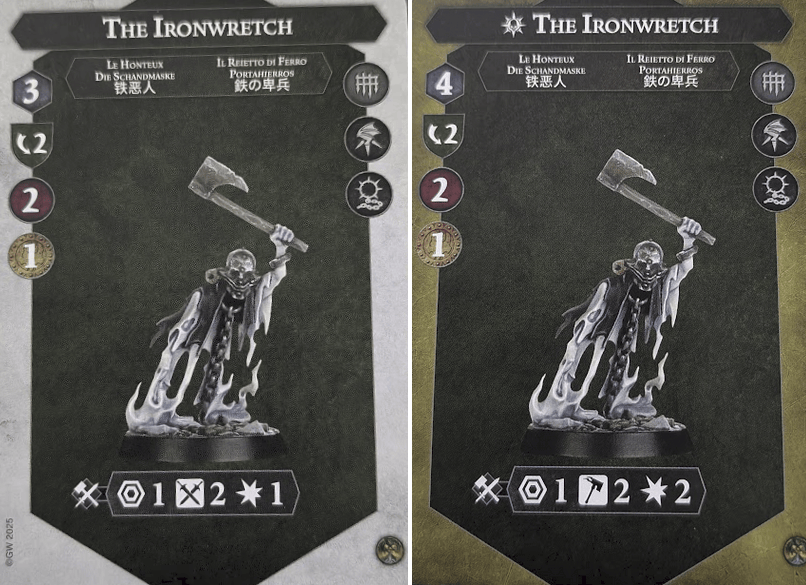
These are all effectively identical, with the same garbage 2 swords 1 damage profile uninspired. The axe-wielders inspire to 2 hammers 2 damage, while the other two go to 3 swords 2 damage. The nice thing is they all have 2 dodge, and all inspire to 2 damage while gaining a move. They should inspire relatively easily once you’ve mugged with them to set up a big swing with a more important fighter, or after a Soul Warden push should you choose to use it that way. Otherwise, they’re excellent token squatters for the take and hold or delve gameplans, and will do you just fine when you need somebody to provide a flanked and surrounded Mugging for those swarm aggro enjoyers out there.
The Ironwretch (lovingly known as Pisspot in my play group) is the best and most beautiful boy though. He never fails to roll double crits on defense when you really need it.
In Practice
I played three test games with this warband – once with Blazing Assault/Edge of the Knife in Nemesis, once in Rivals using Deadly Synergy, and once again in Nemesis using BA/DS. Blazing/Edge felt like it had some ok options, and being able to Mug along with a charged fighter with Paired Thugs right away allowed me to immediately kill something and get the bounty train rolling in activation 1. It sort of unraveled from there as Varclav and the Briar Queen died earlier than you’d like and I hadn’t inspired nearly as many minions as I needed to make things happen, as well as getting some really cold dice on round 3.
However, playing them with Deadly Synergy was loads of fun. It was even Rivals! Sure, some parts of the deck weren’t smooth, but this warband can unify with a quickness. Four times you can mug teleport and do so adjacent to a friendly if you play it right. Once a round you can push people together (assuming Varclav lives). From there you are enjoying two dodge with flanked on everybody in your unity ball, and if you have charge tokens, 2-3 dice surrounded on your attacks. The ability for the Thorns to have such great mobility, everybody starting on two dodge, means you’re able to meet so many of that deck’s conditions much easier than other teams might. Flying was great too, since you can get to the other side of the Unity pile/chain much easier.
The Blazing/Deadly Synergy build was a RIOT. I was able to form a unity ball so easily, and had lots of fun actually tabling skittershank despite losing the Briar Queen effectively immediately. Getting so many 2 hammers or 3 swords flanked and surrounded sometimes with rerolls was letting me just spit out 2 damage all day, and their 2 dodge with flanked made them really hard to shift. If I had to lock in a pairing today, this might be the one. I even scored all 4 of the ‘bad’ 2 glory end phases from Deadly Synergy, which may have been somewhat due to luck of draw order, but the point is this warband is fun and cool and the deck really surprised me.
Potential Pairings
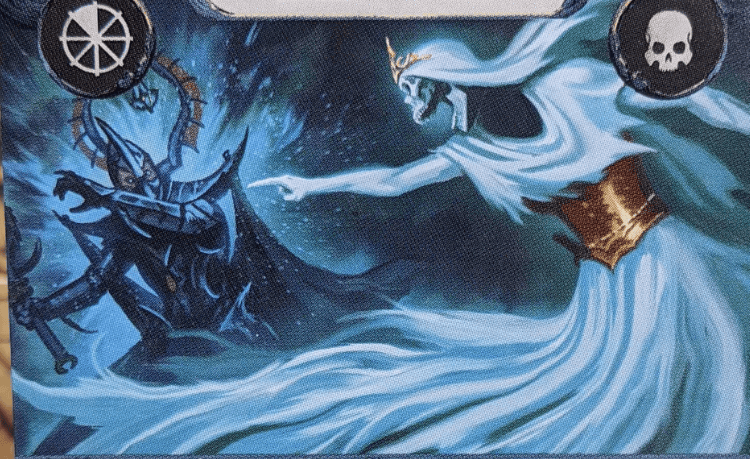
This warband has two general approaches, and depending on which you want, you’ll need different decks.
If you want to Take and Hold like the marketing material suggests:
Emberstone Sentinels is an option, and Soul Warden will be your friend for grabbing tokens. You’ll enjoy two dodge across the board to help stay on the tokens, and can teleport to tokens with Mugging. Appropriately applied, you’ll have great ability to stand where you want when you want. For the same reasons, Pillage and Plunder is an excellent choice for this warband, and has the added benefit of encouraging people to trigger your Leave Well Alone mugging.
If you want to Flank and Surround 1-2 damage papercuts and drag down your opponents:
I had a blast with Deadly Synergy, which because as described above, this warband finds Unity remarkably easy to achieve. Blazing Assault is hard to go wrong with in any aggro situation, and since 5/7 fighters are Tempered, repositioning is a breeze, and you can do 2 damage easily enough, Edge of the Knife has some real strong playlines.
If you can set up your mugging/wave of terror well, you’ll have a much higher than average enjoyment of Realmstone Raiders compared to other warbands since you’re so accurate with surrounds and it also has delving/holding synergy, which means it can slot into just about anything you want to pair with using Thorns.
Wrap
Can I just say something here?
What a home run. This warband has an identity now that allows them to do so many cool things and in a way no other warband can. Considering how long they’ve been around, to refresh them so radically yet also keep their core identity was really impressive to me. They’re new and exciting, yet still themselves. They look frighteningly potent, but not in a way I think makes them unbeatable or even ‘too strong’. You’ll have a ton of fun playing with them, if my one game is any indication.
For the first time possibly ever in the past seven years this warband has existed, I am super pumped both to play with and against Thorns of the Briar Queen. I might even bring them to worlds!
Be sure to check out Spent Glory’s other review articles here
Thanks again to Games Workshop for providing me with this product so that I can produce this review content.





Leave a Reply