
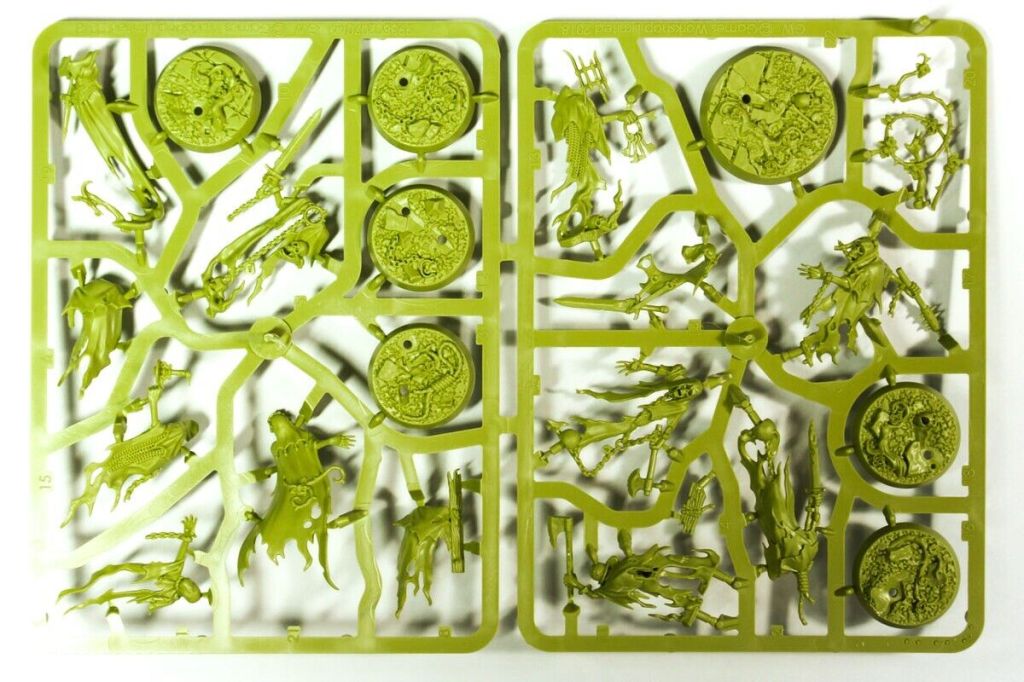
Today’s article kicks off a new series on Spent Glory: “The Hobby”. I wrote recently about why Warhammer Underworlds is more than just a great game, but also a great Hobby. I also recently had a reader propose an article idea to me, writing “maybe it would be a good idea to provide some pointers towards new mini painters. WHU was the first wargame I got into and I’m sure I’m not the only one.” The fact that there is such a wealth of Hobby potential around the game itself and the fact that this is a beginner-focused webpage means it’s high time to start a series on how exactly to get into “The Hobby”.
Articles in this series:
The Benefits of The Hobby
Building Underworlds Models
Painting Supplies
Primer, and Why to Use It
Contrast/Speed Paint
Acrylic Paint
Miniature Basing
Lore, Novels, Art, and Fan Fiction
Making It Manageable
As discussed in the Hobby intro article, there are generally four big ways to engage in Warhammer Underworlds apart from playing the game itself: Building miniatures, making custom conversions/proxies, painting the warbands, and engaging in the lore/background story. There certainly are others (writing beginner advice columns online, for one) but for the purposes of The Hobby series, we’ll cover those ones above. For now, we’ll start with the building of the models themselves, with a sprinkling of conversion dust here and there. Future articles will cover multiple beginner painting tips and discussion on painting materials/techniques, and then we’ll dive into lore (and maybe even fan fiction). But, since you can’t realistically paint anything that you haven’t built, we will begin with model construction.
Side note – you actually can paint miniatures while they’re still on the sprue, then stick the painted pieces together after the fact. I do not recommend this for beginners. You can also do something called ‘sub assembly’ where you build a few parts of the model, paint them, and then stick them together at the end. I don’t recommend that for beginners either, but I wanted to be clear and say that yes, you could skip the building step and go right to painting if you just can’t help yourself. You’ll need to get to it eventually though!
Let’s go over a list of the materials you’ll find useful as you get started. None of these are absolutely must-haves, and you can pick and choose from the list to suit your needs. I also want to point out that this is a beginner’s guide! You do not need to buy the top shelf premium stuff – just get some basics and if/when you’re ready, splurge on a high quality item. Fancy gear doesn’t make you a better hobbyist, and you probably won’t notice the difference between good and great gear until you have enough skill and experience to appreciate it. I don’t know how to ride a pogo stick, for instance, and I doubt shelling out a thousand dollars for a fancy one is going to help me learn faster. I’ll tell you what I use if you’re stuck on where to start, but I’m not going to rate and evaluate the ‘best’ stuff out there. I ain’t no paid shill!
Building Materials
- Hobby knife: A sharp hobby knife is probably the single most useful tool for a model kit builder, and if you’re only getting one thing on the list this is probably it. You can use it to cut your models off the sprue (be careful) if you don’t get any clippers, and it’s great for trimming what the clippers miss, as well as removing mold lines and excess material from your miniatures before painting. I use an X-Acto brand knife, but anything that uses a thin ‘precision blade’ will do the job.
- Safety Glasses: There’s always the risk of something going flying when working with model kits. A piece of spastic can snap off and go spinning into the distance, or into your face. The tip of your knife could snap off if you’re pressing too hard or at a bad angle. Glue can splash or squirt. These are all what we in the biz like to call ‘no bueno’, but it’s way worse if it happens to your eye. I work in an emergency department, and I prefer seeing you at the gaming table than in an exam room with fluorescein strips. Bonus points if the glasses or goggles you’re using are magnifying and/or have a light source, though that’s generally something you’ll find more useful during painting than building.
- Light source: Again, this is more useful for painting than building, but never a bad idea. A steady, desk mounted light is what I use, with a tilting and rotating head and arm – think like the Pixar mascot. You could also use a headlamp or a horizontal LED strip, really whatever suits your needs and workspace, but you will like something more than just the lightbulb in your ceiling. The best difference in how well you can see what you’re doing is going to come if you use a full spectrum ‘daylight’ bulb. I use a 6000K bulb, but anywhere between 4000-8000K is probably fine. Too low (warm) or too high (cool) and you’ll not see as well, and it might mess with how your colors look when you get around to painting. This is also a hotly debated topic and I am by no means an expert painter, but there’s my two cents on Kelvin scale.
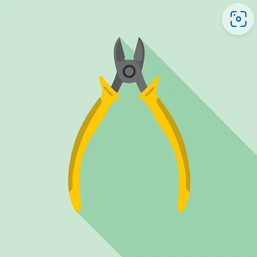
- Clippers: I’m not going to pretend to know what makes a good clipper. I’m sure there exist differences, but really you just want some kind of cutting pliers or wire cutters to remove your models from the sprue. Games Workshop and Amry Painter both make some, and you can get others from Tamiya, but honestly whatever they sell at your local hardware store will do just fine, as long as they’re small enough to get in there and clip what you need without mangling the model. I use the Xuron Micro-Shear Flush 410 because that’s what Trapped Under Plastic told me to get.
- Something for Rough Surfaces: Occasionally you will have a mangled bit where a sprue piece stuck, or you goofed with your hobby knife, or a mould line stands out more than you’d like. There are multiple ways to deal with this – a popular one among fancy lads is to pick up a set of Needle Files, which can be either rounded or flat, and are on long metal sticks so you can manipulate them with ease. You could also use sandpaper, but that can be a little more difficult to reach where you need to and apply the appropriate pressure. I actually use what’s called a sandpaper stick. They came in a pack with multiple grit coarseness, but I’m a gremlin and just use the same one on every model. Why use many tool when one tool do trick?
- Mould line remover: This is a tool included in many beginner hobbyist toolkits. It’s a little rectangular scraping tool that you can use to peel away the mould lines without damaging the rest of the model. You can vary the ‘bite’ by changing the angle you scrape, and I’m sure it has a ton of cool uses. I don’t own one and never will since the back of a knife or my sandpaper stick works fine for me. But if it works for you, have at it!
- Rubber Cutting Mat: These are what you’ll want to be doing your chopping on. Aim for one of those ‘self-healing’ ones since they won’t leave scars when you gouge it with a knife and so you’ll have a smoother and more stable cutting surface for future projects. Think of the old rough and grooved cutting board in your kitchen – fine for chopping zucchini, but not for precise surgery on a lil’ plastic hero. These are made in a thousand sizes and are very popular for a lot of hobby spaces like quilting, scrapbooking and more, and I have no recommendations other than green is a classic and you won’t probably need the fancy lines and measure marks that some of them come with. Bonus – this keeps spilled paint (you WILL spill a pot of ink, contrast, or wash at some point) off of your desk itself.
- Glue: Seeing as Underworlds models are ‘Push-Fit’, they technically do not require glue to assemble them. Just fit the pegs into the holes and things line up pretty well, though there is a risk of some things not lining up perfectly, and some kids fit a little more cleanly than others. Super glue (or plastic glue) allows them to fit more tightly and survive getting dropped more readily, but you’ll have to be cautious since the glue takes up space in the peg and hole system, so unless you trim down the pegs and/or bore out the holes, glue will actually make things a WORSE fit, not a better one.
- There are three types of glues you might want to have on hand – Super Glue, Plastic Glue, and PVA/White Glue (like Elmer’s). I’ll cover them all below, but I use Super glue for nearly everything.
- Superglue (Cyanoacrylate): This type of glue holds together effectively any type of surface, bonds quickly, and is pretty strong. You do have to be careful about it getting on your fingers and sticking yourself to the model! Super glue is my go-to since it allows me to also glue other things if I want to do conversions (say a resin head or a metal arm from some other product line), and allows me to get on with each step more quickly. My preferred brand is Zap-a-Gap (the green one). You can use pretty much anything that’s around but you should stick to the thin stuff. Thick gel glues can be very messy and hard to clean up and will make the space-filling problem worse, though I’ve gotten away with Gorilla Glue in the past. Another option is to use glue where there are flat surfaces that meet, but not to use it in the pegs and holes.
- Plastic glue – Plastic glue is also a solvent and creates strong bonds by essentially melting or welding pieces of plastic together into one continuous piece. It’s great for the plastics used for Underworlds models. It does NOT glue metal, resin, or other materials, so it’s not as useful in some conversion scenarios, but will do you just fine if you’re putting the model together per the box instructions. Plastic glue tends to create great strong and long-lasting bonds but takes longer to set than super glue. This means you can fiddle around with the fit more while setting, but it’s also more likely to fall apart if you don’t hold things in place long enough. Be careful with this stuff as well – once the plastic things are glued with plastic glue, they aren’t coming undone. Definitely ‘dry fit’ your pieces to make sure they look how you expect/how the instructions say before plastic gluing them.
- PVA/White Glue – Think Elmer’s brand – anything like this. I want to specify out front that this is NOT for assembling your models with, as it dries way too soft and will not hold your models together, as well as being far too space-filling and will create noticeable gaps. Where PVA glue shines is in basing, which I’ll cover in a future article. Underworlds models come with scenic, sculpted bases and don’t really need anything more, but if you felt like adding grass tufts, flocking, sand, extra stones or rubble, PVA glue is what you’ll likely use. You can dilute it with water to thin it out a little and apply it with a toothpick or a nasty old brush. IT dries clear so won’t mess with whatever you’ve painted underneath. But it’s only for adding doodads. Don’t use Elmer’s to assemble your models, I am begging you.
- Paper Clips: These are great for cleaning out stuck/dried tips of your glue bottles or paint dropper bottles if that’s what you use. Occasionally you’ll find you just need a little ramrod to punch through the crust and get the glue or paint flowing again so you don’t need to buy another bottle. It also saves you mucking up your hobby knife trying to stab into the clot.
- Gap Filler: Sometime, pieces just don’t line up right and you have a big gap that you want to fill in so that it’s invisible after painting is done. Citadel Liquid Greenstuff, Vallejo Plastic Putty, or Milliput Superfine White are all popular options. I actually don’t own any of these and just raw dog it with super glue or thick paint, but honestly in most cases with Underworlds models they fit together really well (especially if you’ve done some shaving on your pegs and holes) so this is rarely necessary.
Actually Building
OK, so we have a tool or five we plan to use. Let’s get this warband assembled! Where do I start?
Step One: Read the Instructions. Ugh, lame, I know. But I say this with the experience earned through grief and pain – read them. You want to be able to get an idea in your head about what goes where and how the project is going to go together before you start hacking away at the sprue with your clippers (or twisting pieces off with your fingers, you savage). This is more relevant if you’re doing a big model with a ton of pieces like a monster of vehicle from other game systems, but still valuable for Underworlds. Read the instructions for your glue as well, since it might say something like how it will work best on a rough surface and you should scratch it up a bit before gluing, or that you should only use it in a well-ventilated area. Little kid me should have probably taken note of that one. Then again, a sense of smell is overrated.
Step One and a Half: Stop and Think. If you’re planning to do some customization/conversion work on your models, gather the pieces you’re switching out and make a plan. Are you switching out the model’s head for a cool third-party helmet? Get that helmet ready, and make sure you know where on the model you’ll want to cut to take the head off at the right spot and at the right angle. You may need to trim away collars, shoulder guards, cloaks, or gorgets depending on how crowded the model’s head and neck area is – have a plan on how to approach this so that you don’t end up ruining the model and having a disappointing experience.
Step Two: Time to Clip (or cut, or rip and tear, go off king). Get your clippers or whatever tool you’re using to extract the pieces from the sprue. Remember those instructions you read before? Each individual mini is made up of numbered pieces. You can see the numbers on the sprues, so just clip the parts you want for the mini you’re working on – you won’t need every part all at once. The plastic parts on modern sprues are often fitted by some computer algorithm to maximize space on the sprue – it’s not easy fitting a full warband on two little rectangles like that! This means how pieces are assembled and where they’re located on the sprue isn’t always intuitive, so you may need to bounce back and forth to find what you’re looking for.
I know the temptation can be hard to resist but try to avoid removing everything from the sprue at once unless you want to lose pieces or overcomplicate the process. If you must cut it all at once, group the pieces for each model in separate little piles (or even in their own separate cup or tray) so they’re easy to find and you don’t mix up which arm goes on which torso.
The actual technique for clipping off a sprue is to mimic a guillotine motion, looking to only move the clipper blades together in a single plane. Squeeze the handles but don’t pull away from the sprue or rotate your blades. Just hold the piece with your fingers in one hand and clip the join/gate with the clippers in the other in one smooth straight chop. Ideally you only cut once. Get as close to the model as you can without cutting into the miniature itself, you’ll trim the last little bit on the cleaning step next. It’s MUCH better for your wellbeing to but less now and trim later than to gouge your model and have to figure out how to live with the trench you just created. If you’re using a hobby knife, the concept is the same – one cut, in one direction, not too close to the model that you risk slicing it and pin the sprue to your cutting mat so it is stable. A finger on the piece you’re cutting out will help keep it steady and also keep it from flying into the distance once it pops from the sprue.
Step Three: Clean your Pieces. Now that you have all the parts for your mini off the sprue, get them laid out and start to clean them up. They’ll have at least one connection point where you cut the gate off the sprue, use your hobby knife to trim this and try to get it flush with the surface of the mini. “Don’t cut towards yourself” is one of those pieces of advice you get told as a kid because it’s easier and more failsafe than teaching proper draw cutting technique, but it’s OK to bring the knife toward your thumb. I wouldn’t do this for a big piece of plastic but if you’re shaving a bit off here and there you can probably get away with it. This, uh, does not constitute legal responsibility for you cutting yourself, or something.
After the sprue gates are gone, you’ll probably want to sand or file them to make it as smooth as possible, so it doesn’t look obvious when paint goes on. The pieces might also have some mould lines that need to be scraped and/or filed/sanded. At this stage I also like to spend some time messing with the pegs and holes where the pieces connect. I wrote about this in the glue part of the supplies section above, but these connections can be very tight, and if you’re using glue at all, may not fit well. Shave some off the sides of the pegs, or clip them to be shorter. take your clippers or hobby knife and shave some off the inside of the holes, or cut small triangles off the rim to relieve some pressure/create a glue escape route. This part is tedious, but my Underworlds minis looked a lot better after I started doing this and now I spend more time here than I do on the actual surface trimming.
Step Four: Dry Fitting. Dry fitting is the process of putting the pieces together without glue to make sure they line up how you like and that you have them in the right orientation. It’s a good idea to dry-fit your miniatures before you glue them if you’re using glue – you want to make sure things will actually fit before it’s too late. There’s nothing worse than putting glue all over a part and realizing it won’t fit because you have the wrong part, missed clipping off a bit of sprue, have the part rotated wrong, or some other calamity. You ever hear of measure twice, cut once? This is like that but, for whatever the opposite of cutting is.
Step Five: Glue (or don’t) and Assemble. Once you have your pieces removed from the sprue, organized by model and step, trimmed and cleaned, then dry fitted to test their position, you can finally put the glue on and stick them together. When using glue, less is more. You can always add extra but it’s tough to use less once it’s already running all over the place. I keep a paper towel nearby to wipe away excess that might flow out of a gap in the model – you spent all that time trimming, filing, and cleaning up the model, you don’t want a bulge where super glue hardens out of a seam or a warped spot where plastic glue has melted it. A couple small dots of glue at contact points is usually all you need. Hold things firmly in place for 10-60 seconds to make sure it dries in a tight-fitting position, and then move on to the next component. Do this until the model is all put together!
Step Five and a Half: Gap Fill. Again, Underworlds models rarely have this problem, but you might have some unsightly gaps or cracks that show where the pieces should be flush together. If you couldn’t get them to line up during assembly (maybe too much glue, or a peg not trimmed enough, etc), you’ll probably want to fill the gap. You can use any of the gap filling materials listed in the tools section, or just drop some more glue in there and push like the dickens. This is one of the places where I believe the thicker gel-type super glue can shine, since it’s going to fill more of that space and stay in the gap better. If you’re painting the model later, you might be able to put thick paint in the gap but it’s not a reliable fix.
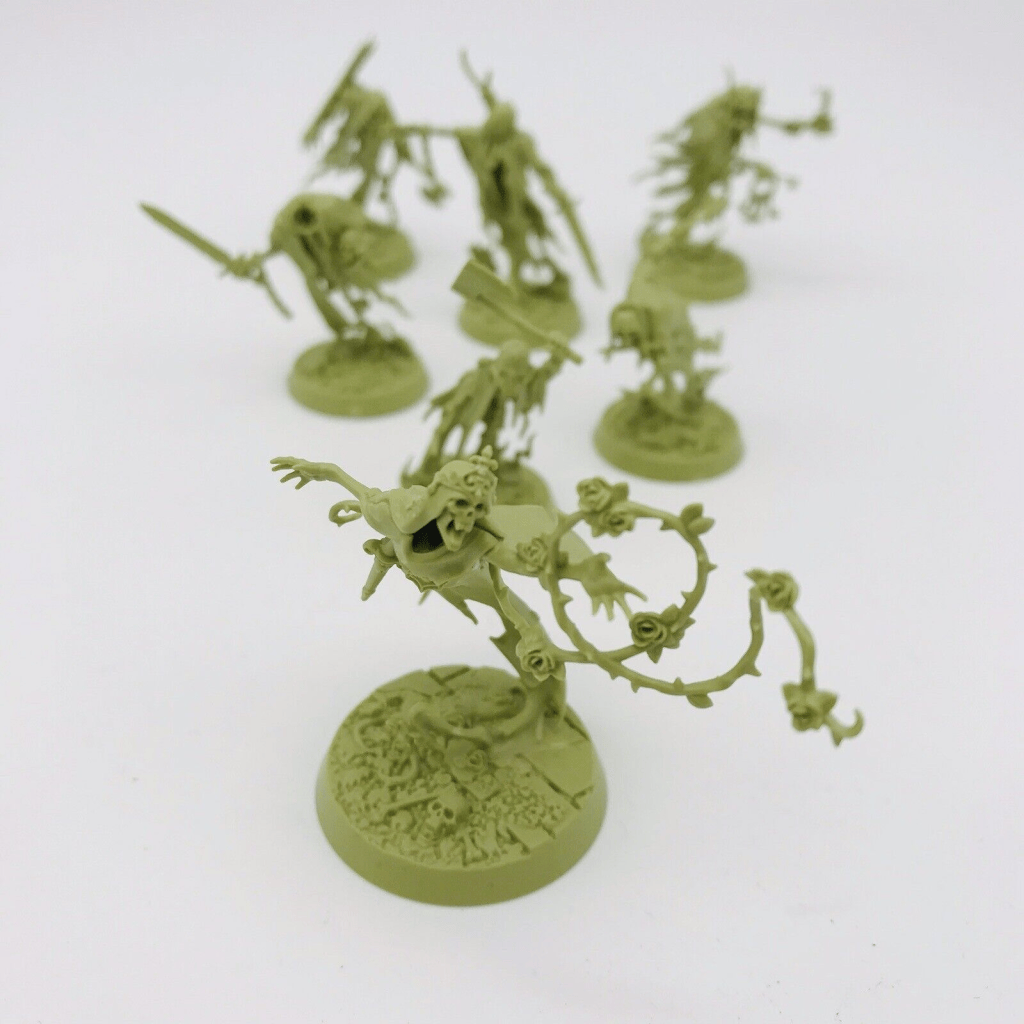
Step Six: Revel in your New Models. You did it! The figure is finished. Look at that sucker, how cool are they!? Now that you have the finished product in hand, congratulate yourself on a job well done, and start fantasizing about all the cool moves they’ll make in game, what paint scheme you want to try, or whatever else stirs your fancy. I sometimes like to photograph the models even before they’re painted – it’s still cool to get the family photoshoot all in order. You can share with your game club that you’ve made this progress, and it can help you see what they look like to start brainstorming how you might want to paint them as a whole warband.
Wrap
Hopefully this helps clear up some of the mystery about how exactly to put these little plastic fighters together, or helps you assess what tools and supplies you might want to begin your journey. If even one person decides to build a model kit because of this article, I’ll consider it a smashing success! If you find it’s helped you do a faster or cleaner job of things, I’d love to hear it. Be on the lookout for upcoming articles related to painting supplies, the concept of priming, how to use Contrast/speed paints, regular acrylic paints and some basic techniques, sprucing up your bases, and diving into the Lore of Warhammer Underworlds. Until then, happy building, and don’t forget to spend some glory!





Leave a Reply